Enrichment
Add external data to alerts and incidents
BASIC | 5 MIN
In Incident Management, you can use tags to create custom fields to store data that is important to your organization. Learn how to use them with this video.
Use case walkthrough: Use tags to create custom fields ►
This video explains how to create custom fields using tags in APEX AIOps Incident Management.
*Please note Moogsoft is now part of Dell's IT Operations solution called APEX AIOps, and changed its name to APEX AIOps Incident Management. The UI in this video may differ slightly but the content covered is still relevant.
While working on data ingestion, you may realize you need additional fields other than the ones provided by Incident Management to map your incoming payload. Tags are custom fields you can create to store such information.
For example, let’s say you are creating an integration using the Events API.
You’ve mapped basic information to the fields available by default.
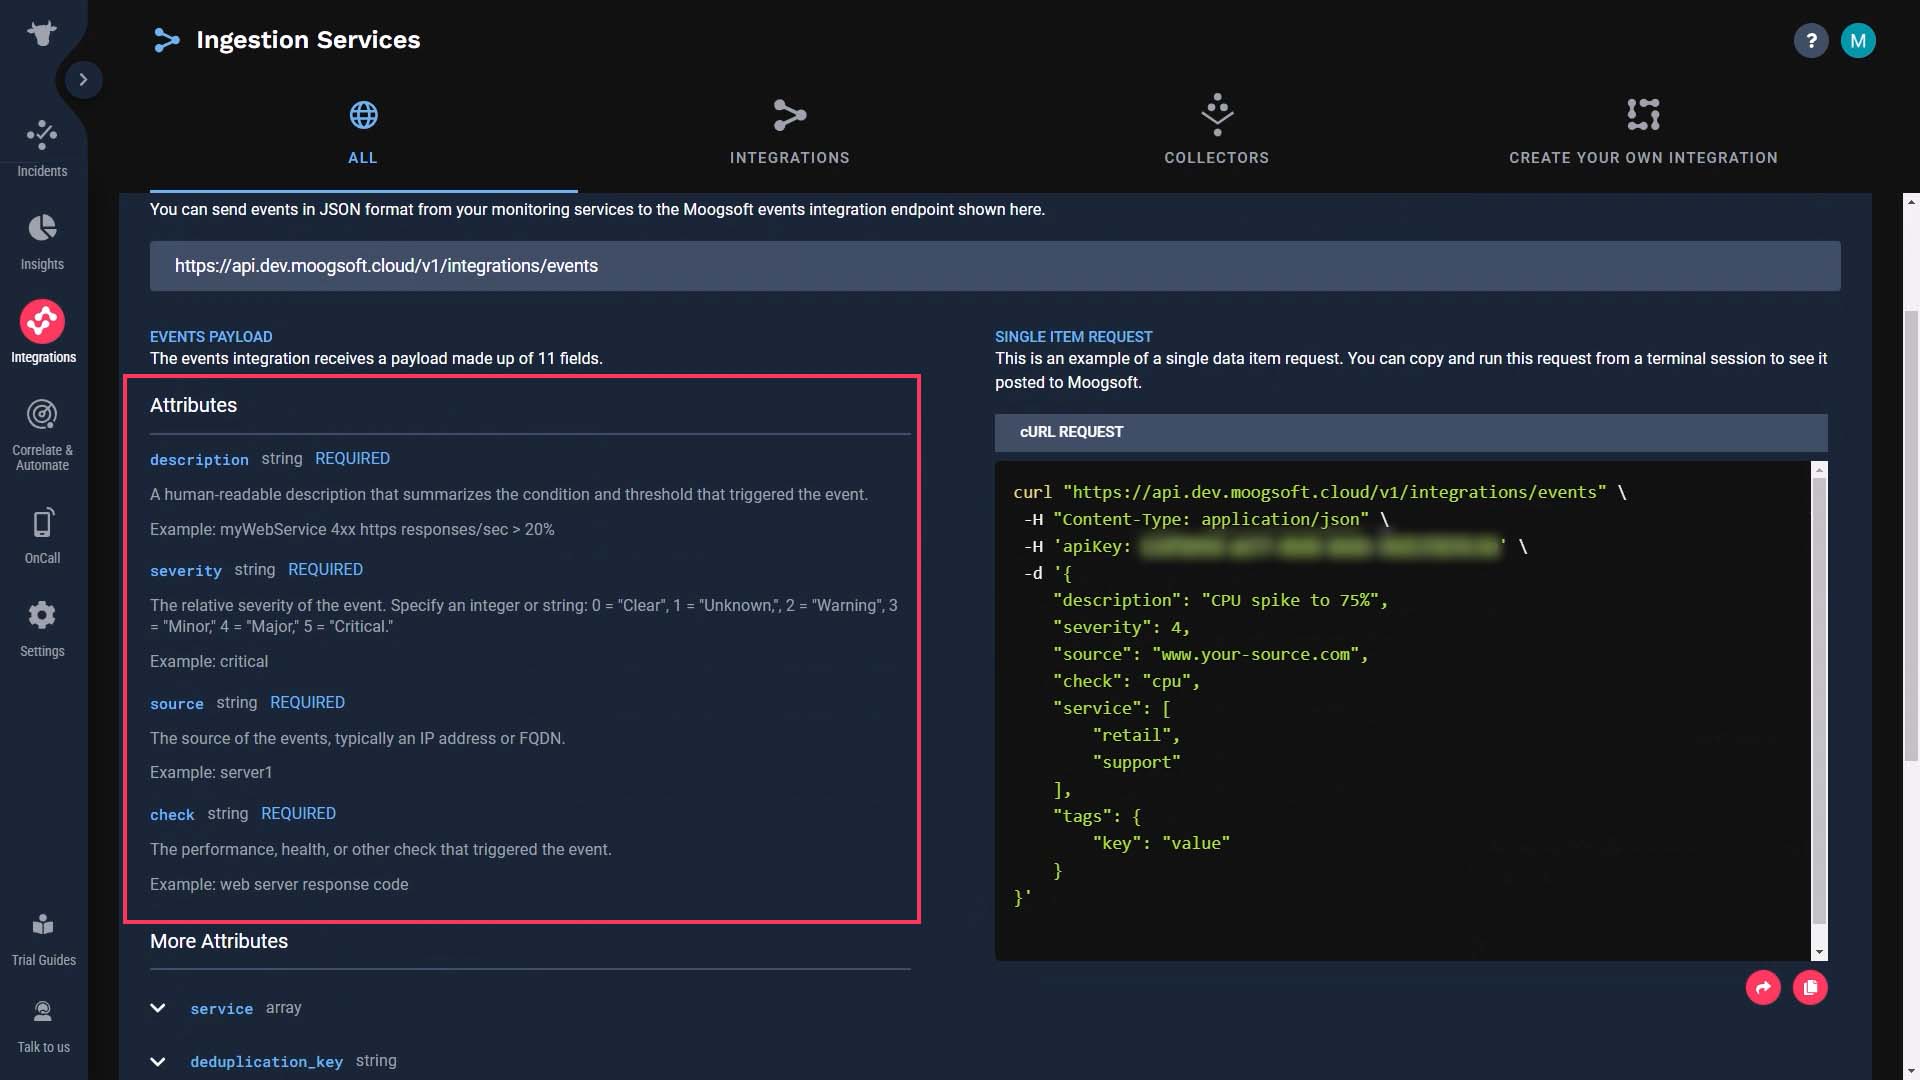
But you also need to map the environment value in your incoming payload. There’s no field available for that to be mapped. What to do?
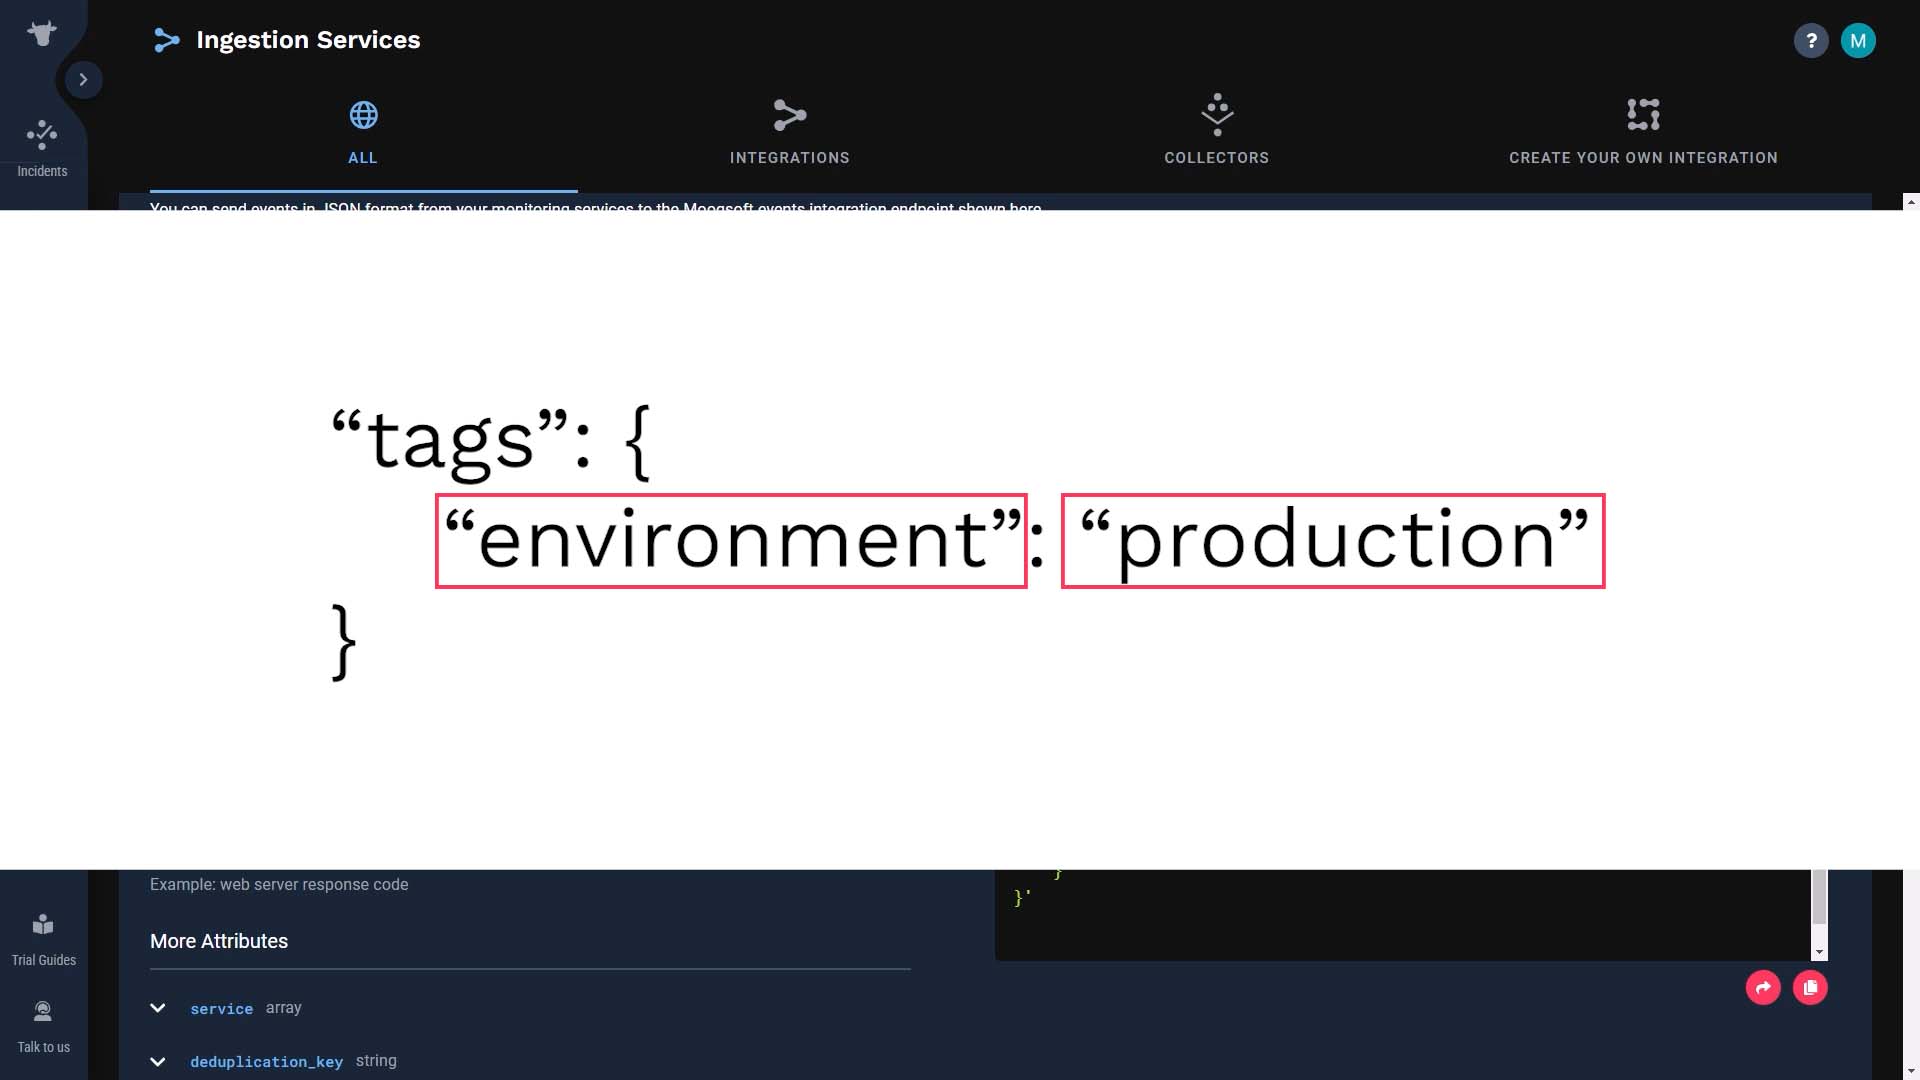
This is where you use tags.
This shows the JSON format for a custom tag. There is a key: environment, and a value: production. Incident Management will generate a tag to hold the environment type when the Events API receives this in an event payload.
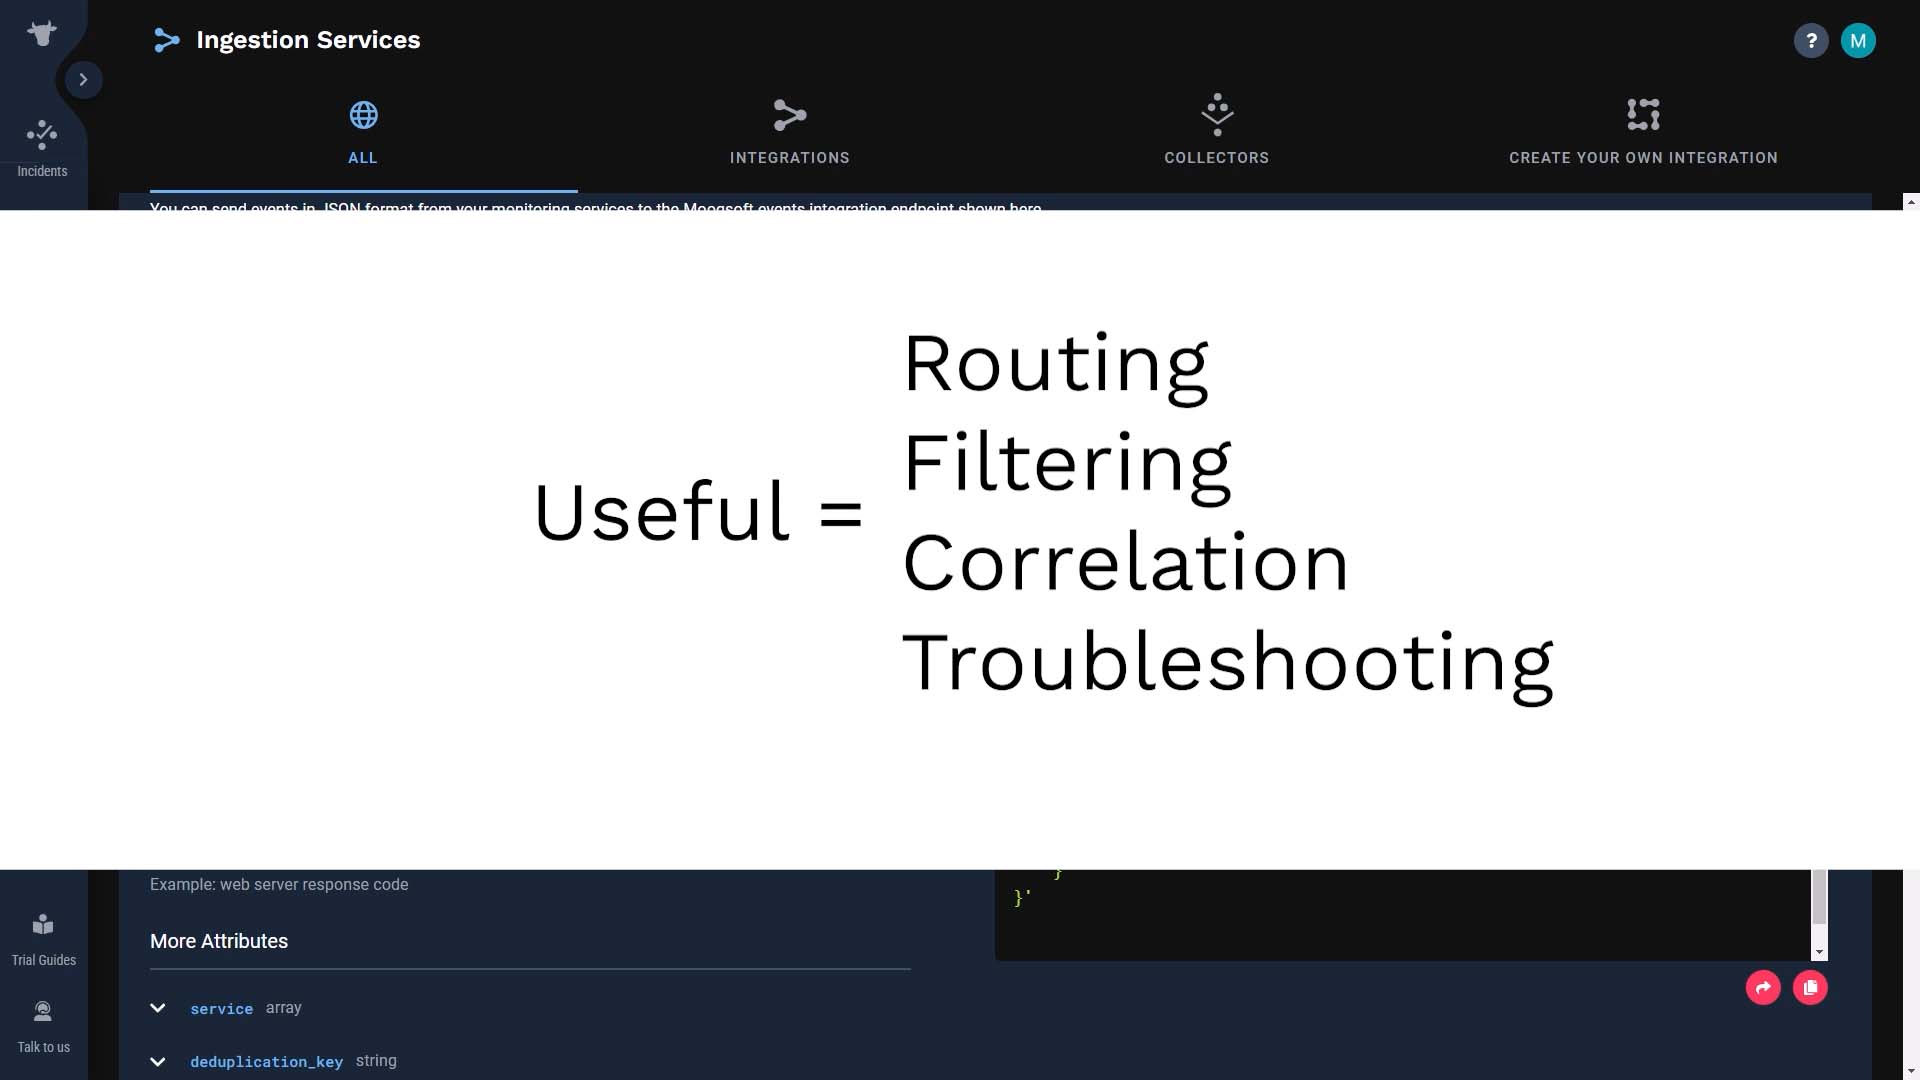
Keep in mind, you should create tags ONLY WHEN you need to use them later in the journey of the data. if that data is not useful for routing, filtering, correlation, or troubleshooting, there’s no need to map every single field to Incident Management.
Instead of the Events API, you may be using the Create Your Own Integration feature for the flexibility of its field mapping. In that case, there’s a convenient feature to auto-create tags. Here’s how it works.
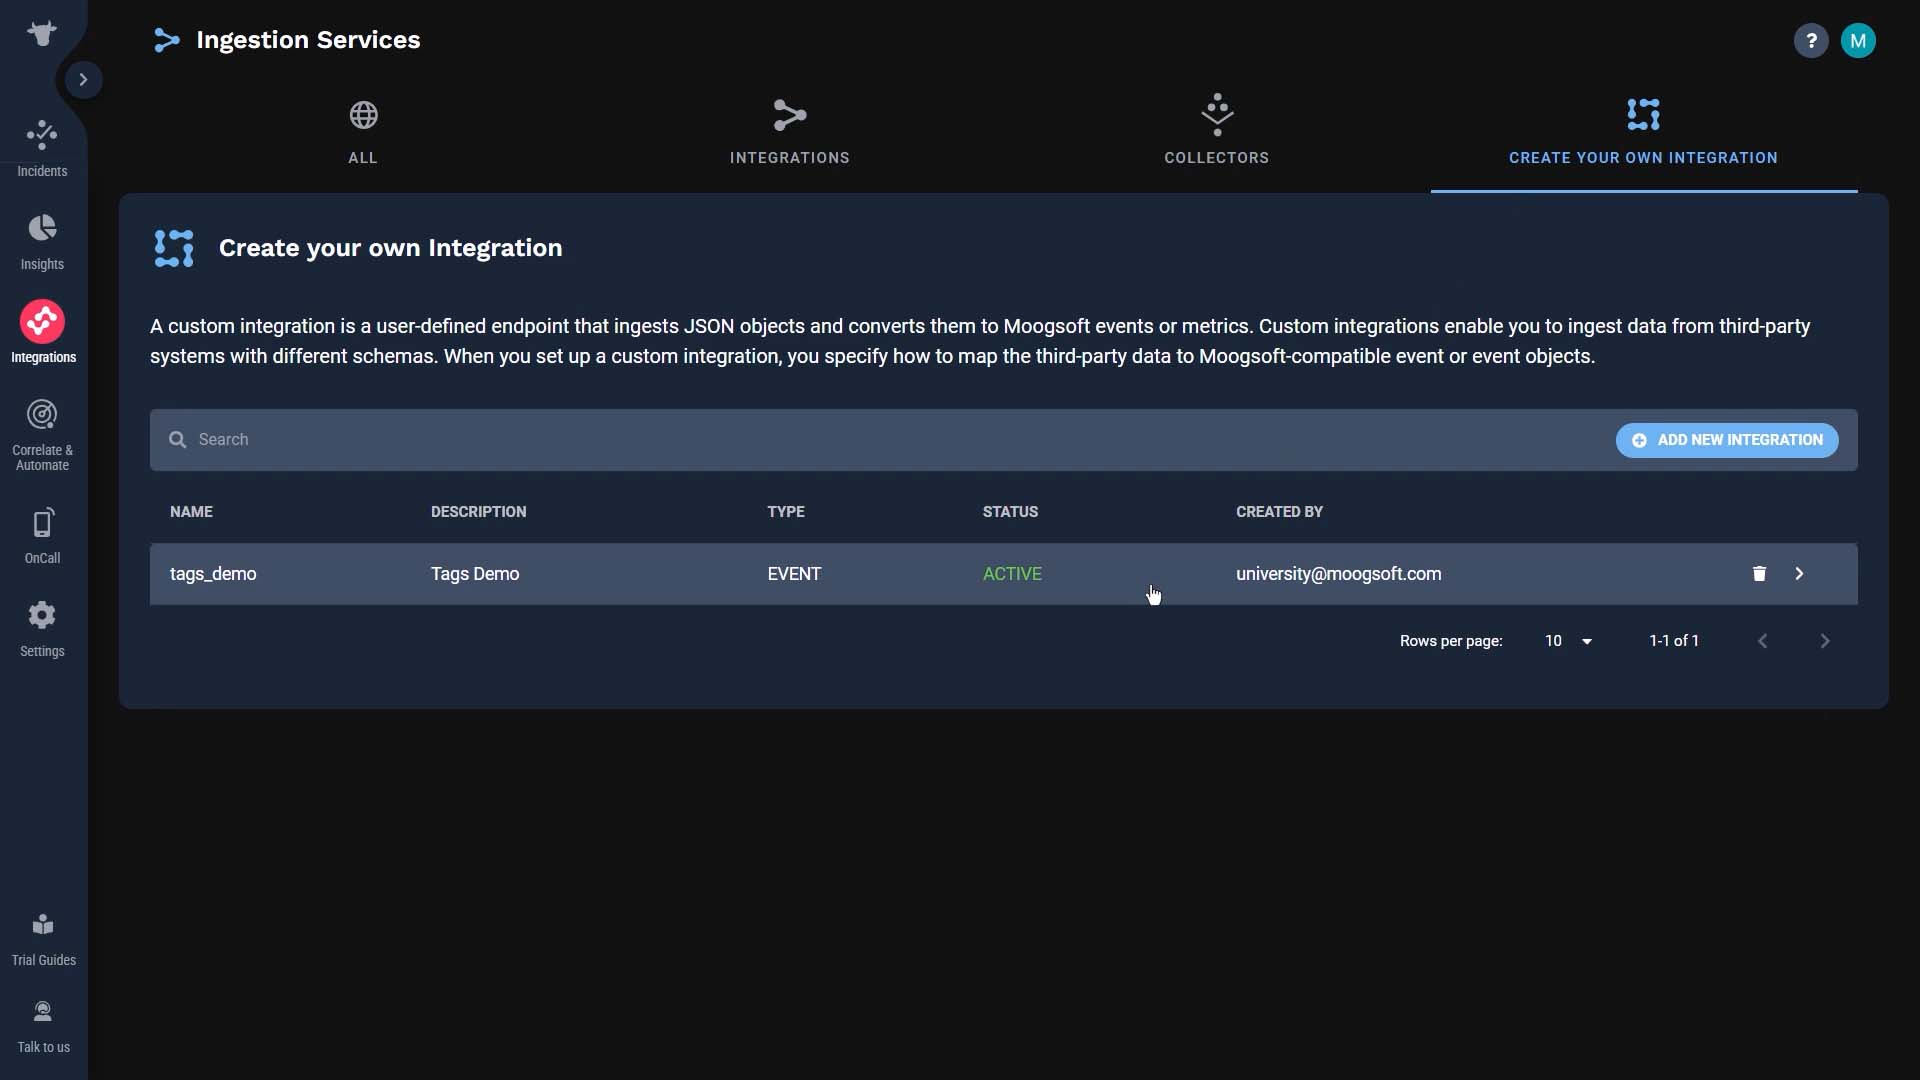
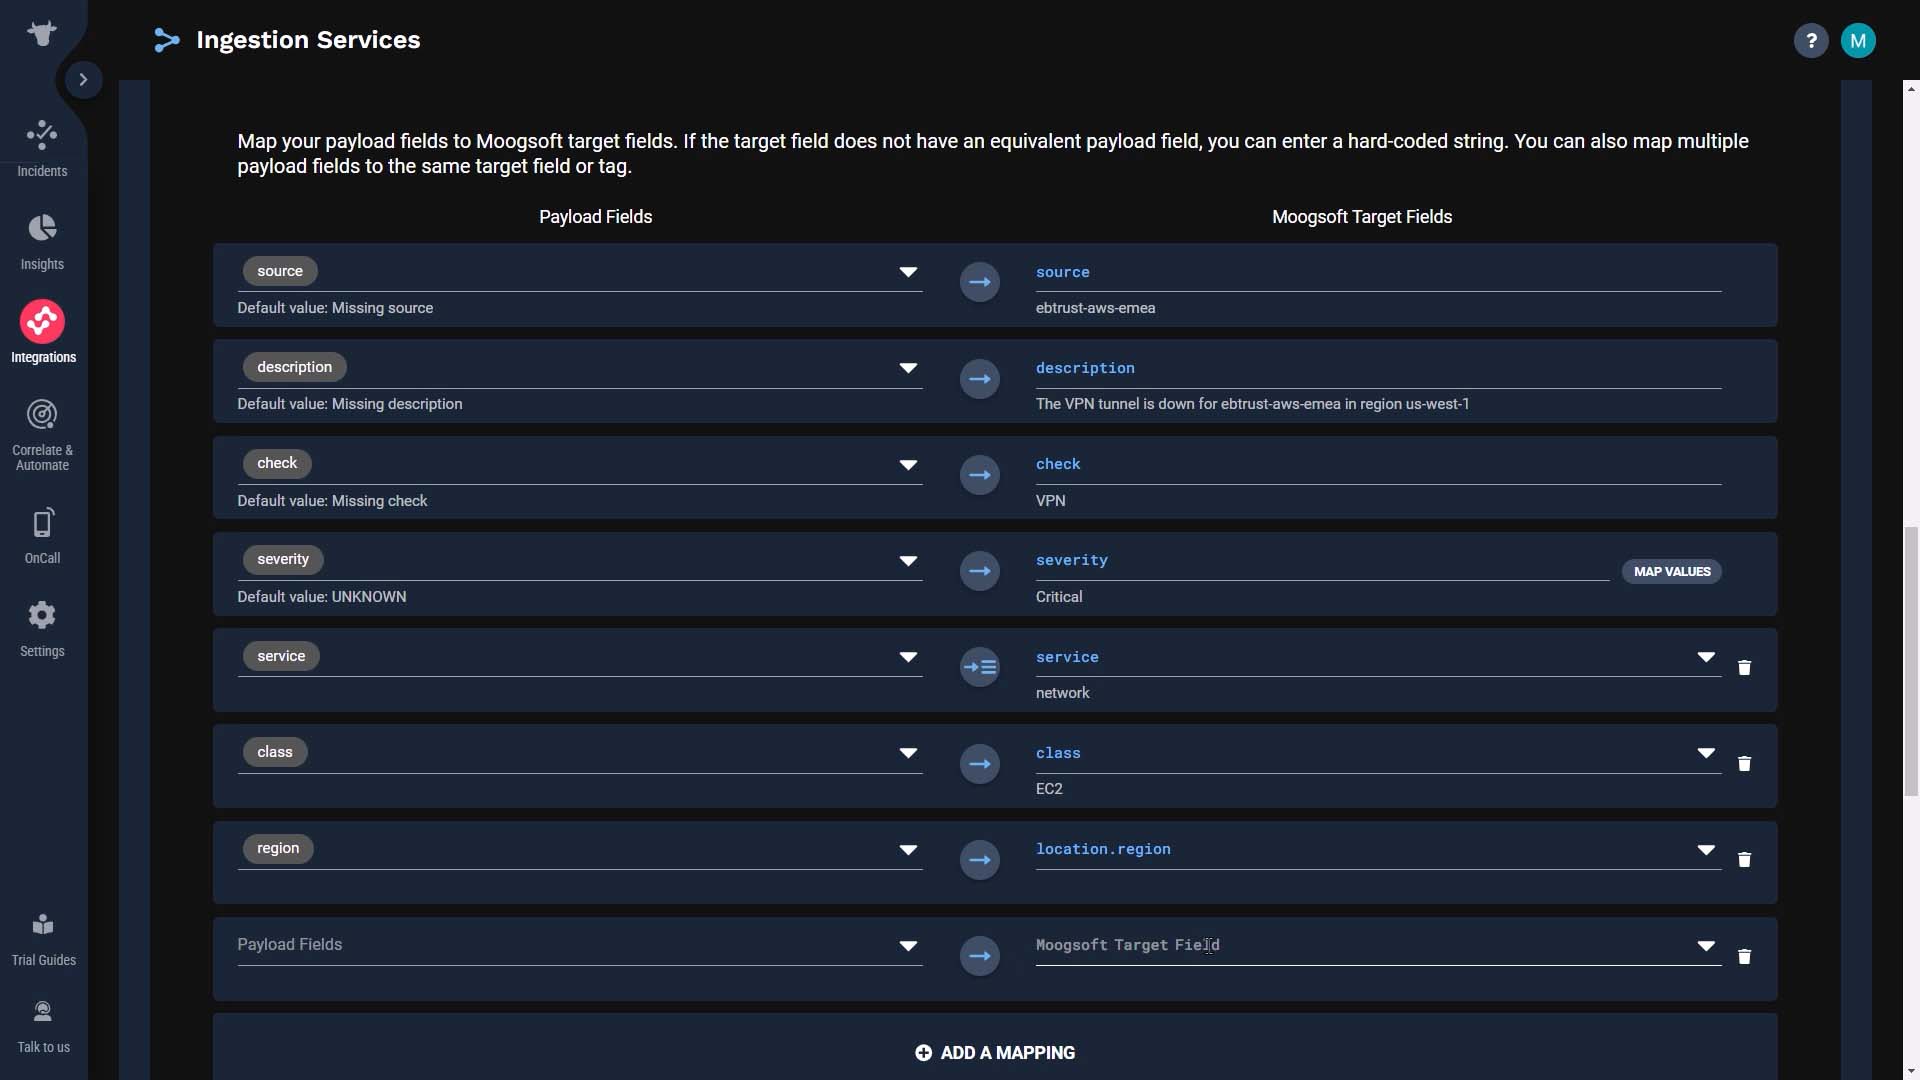
Add a new mapping row.
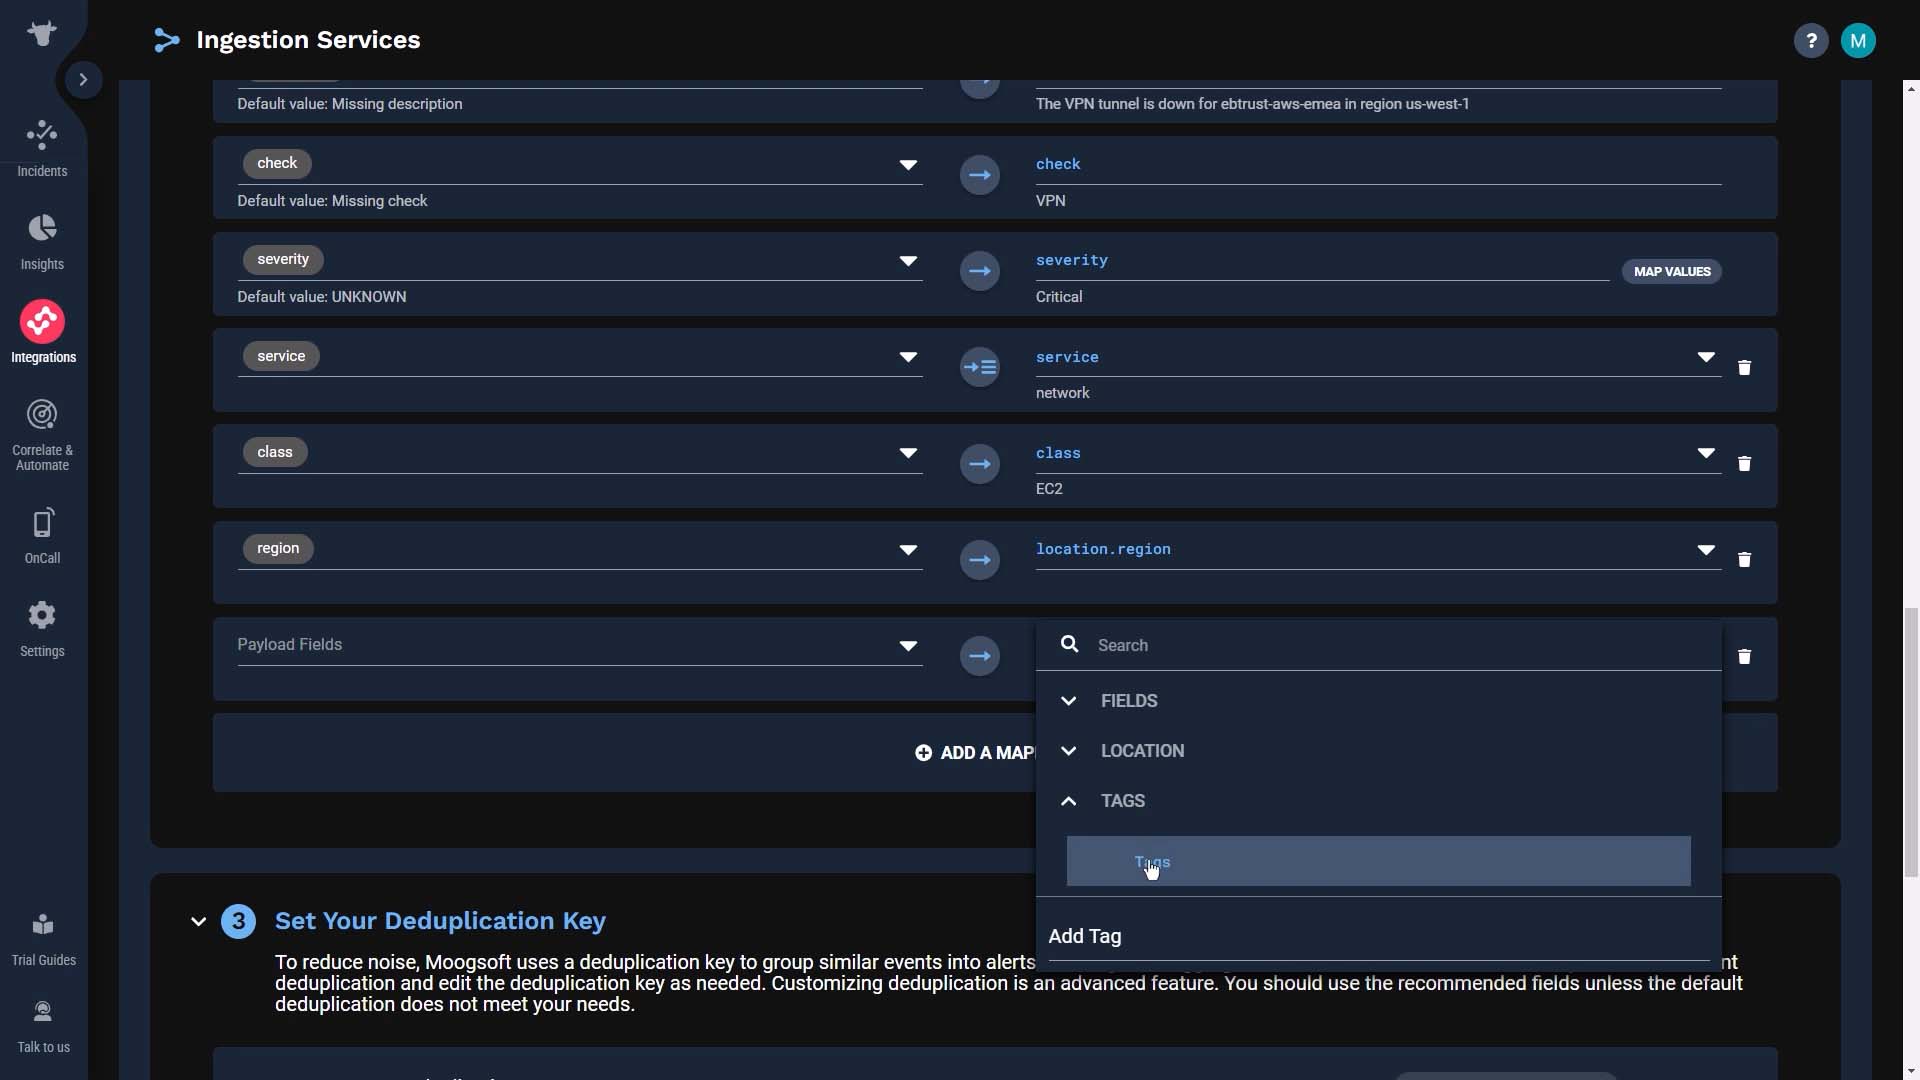
And in the target field, select tags.
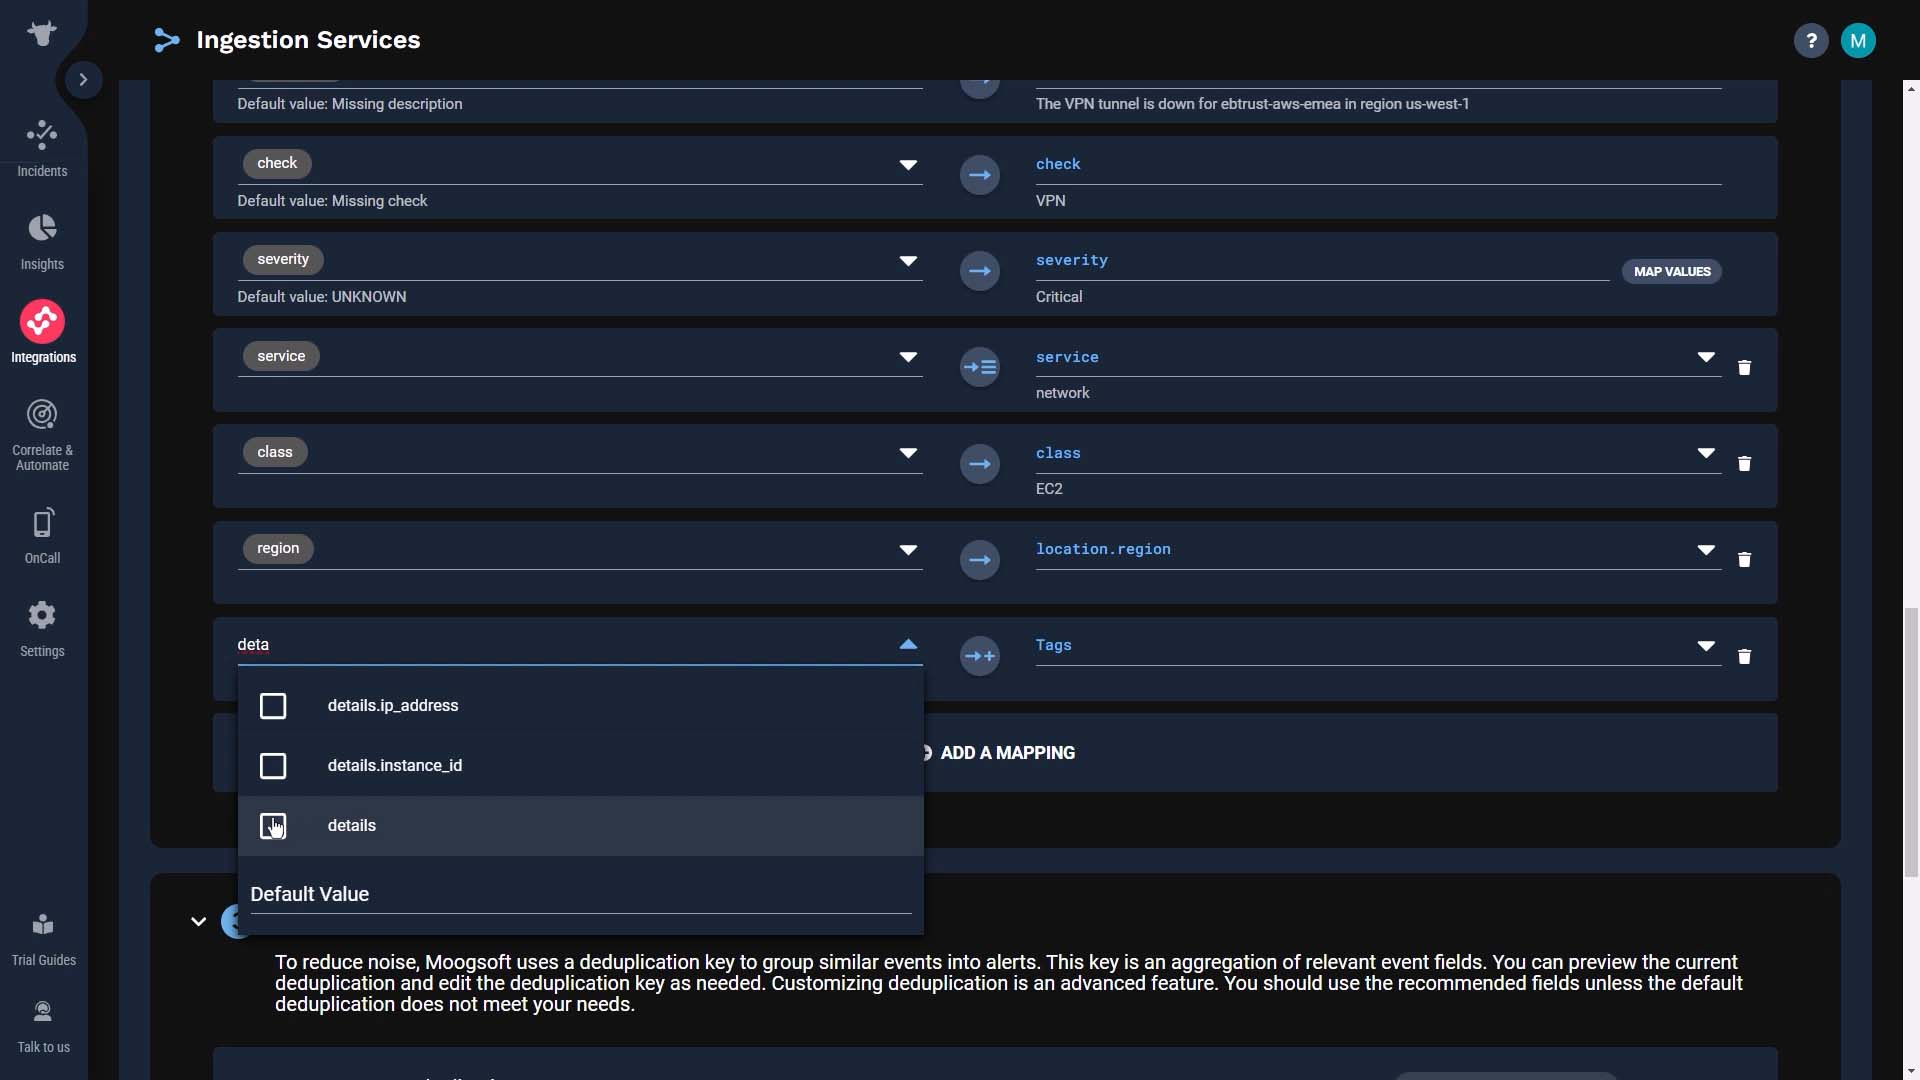
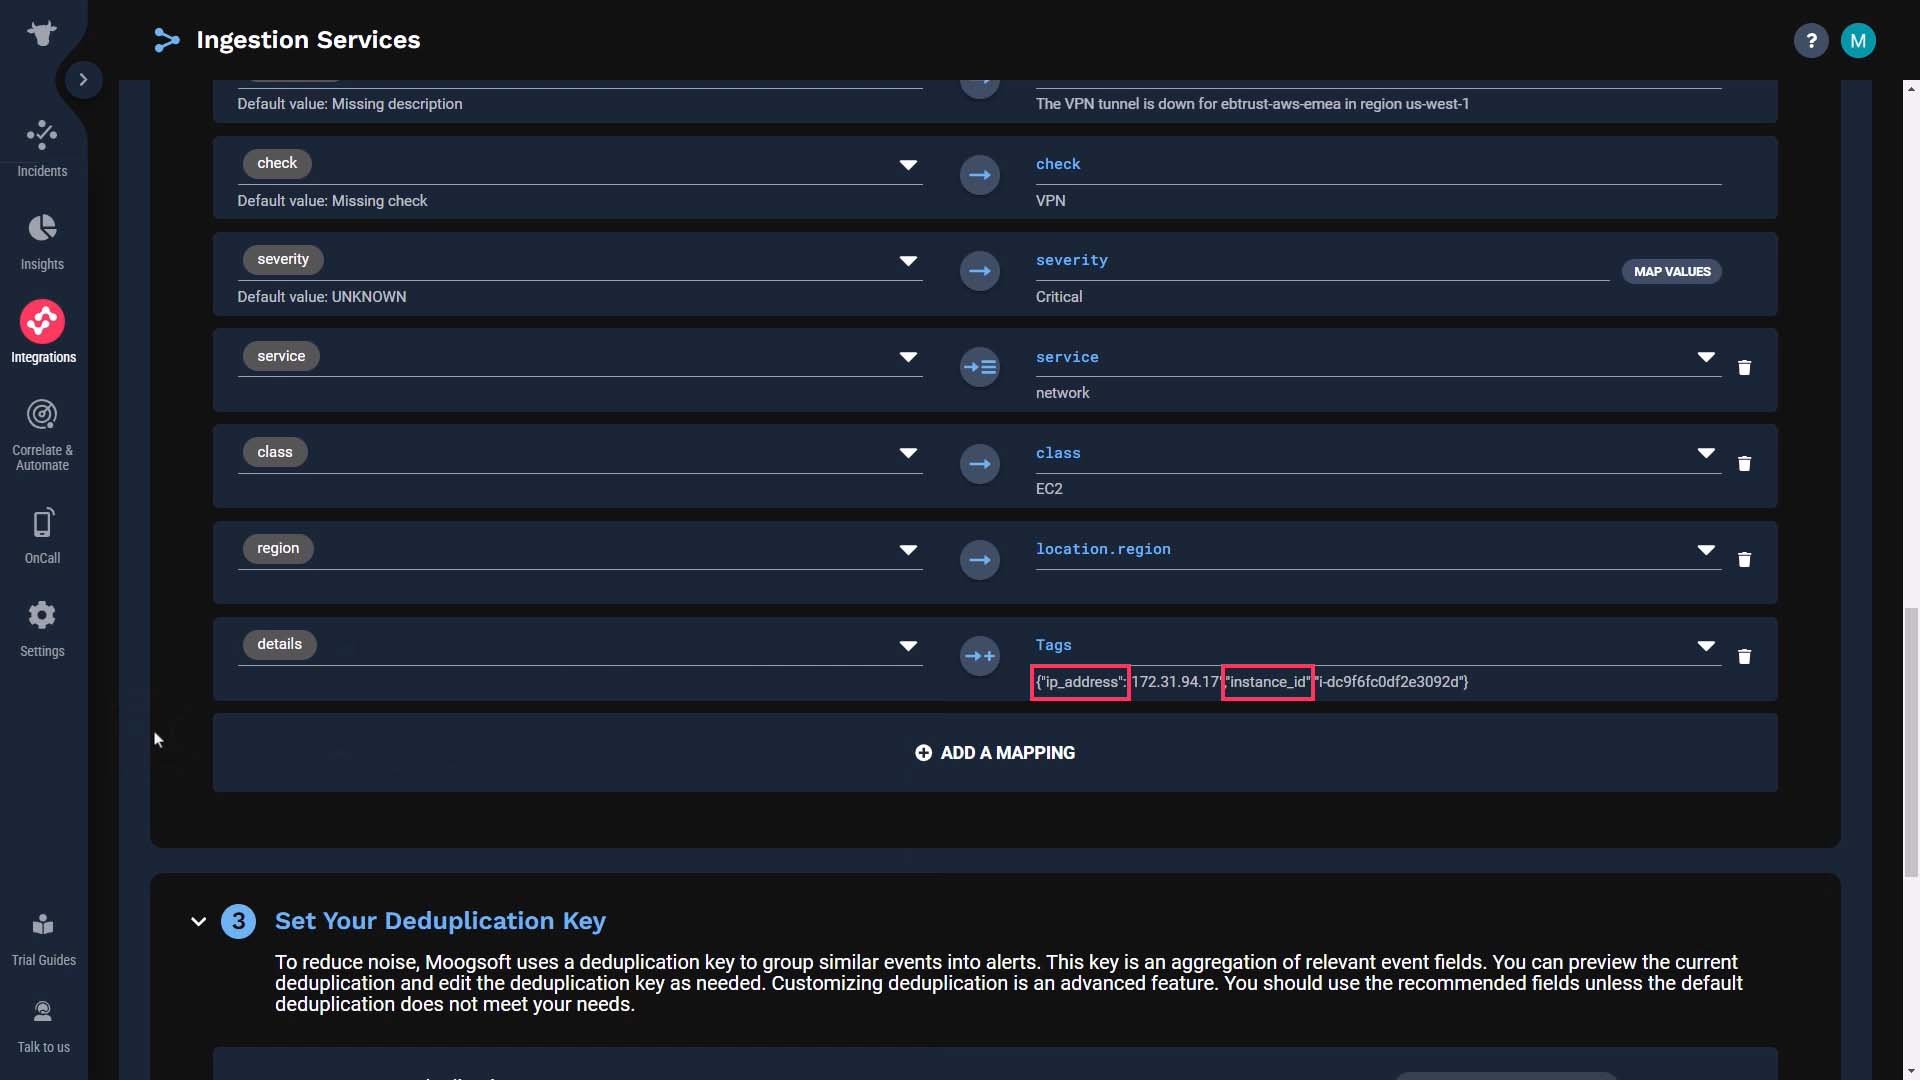
And for payload fields, search for and add the JSON key which includes the tags you want to use. We’ll add the instance details.
This adds IP Address and Instance ID at the same time.
Of course, you can also map tags one at a time. Here's how you do that. Now we have the environment value stored as a tag.
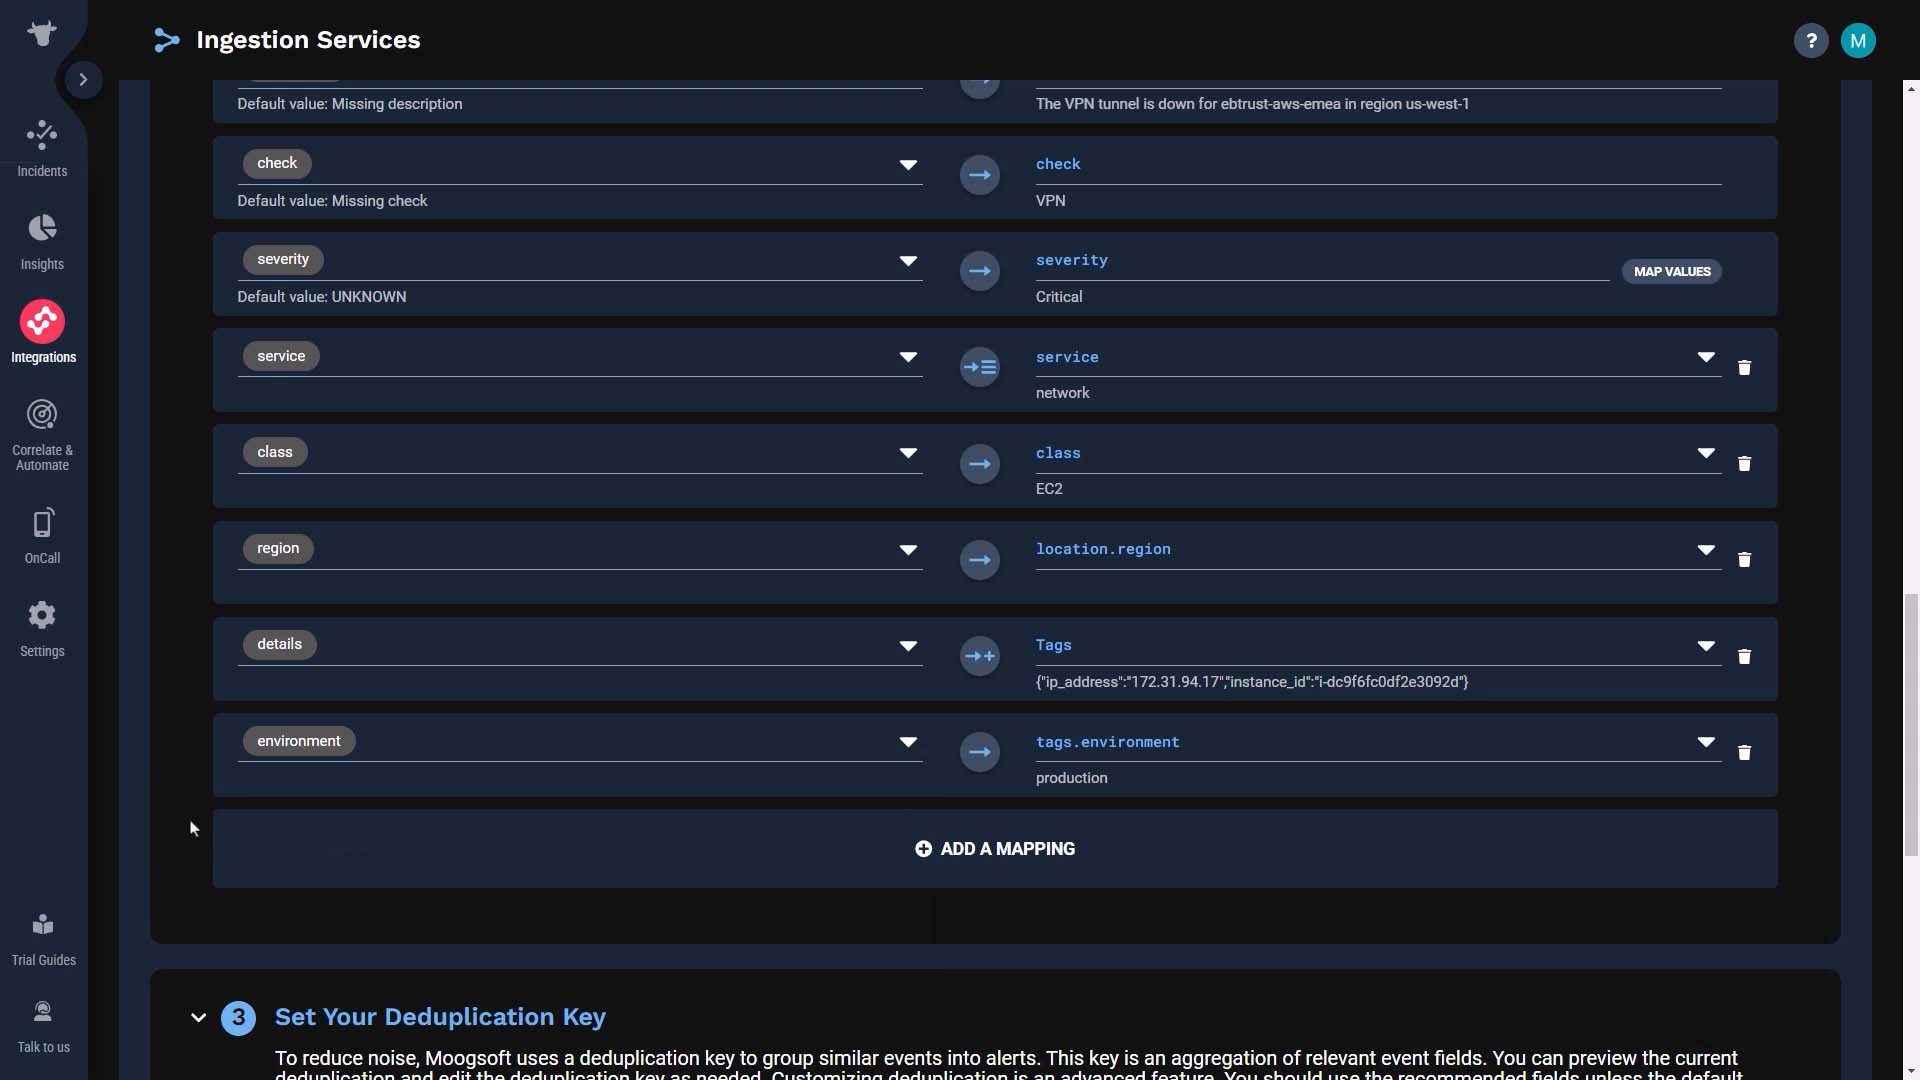
Another way to create tags is using the workflow engine.
Let’s say the impacted customer is not part of the incoming event payload, so you want to enrich events with customer information from an external source.
This workflow queries the data catalog using the instance_id. It looks up the customer value and stores it in a newly created tag.
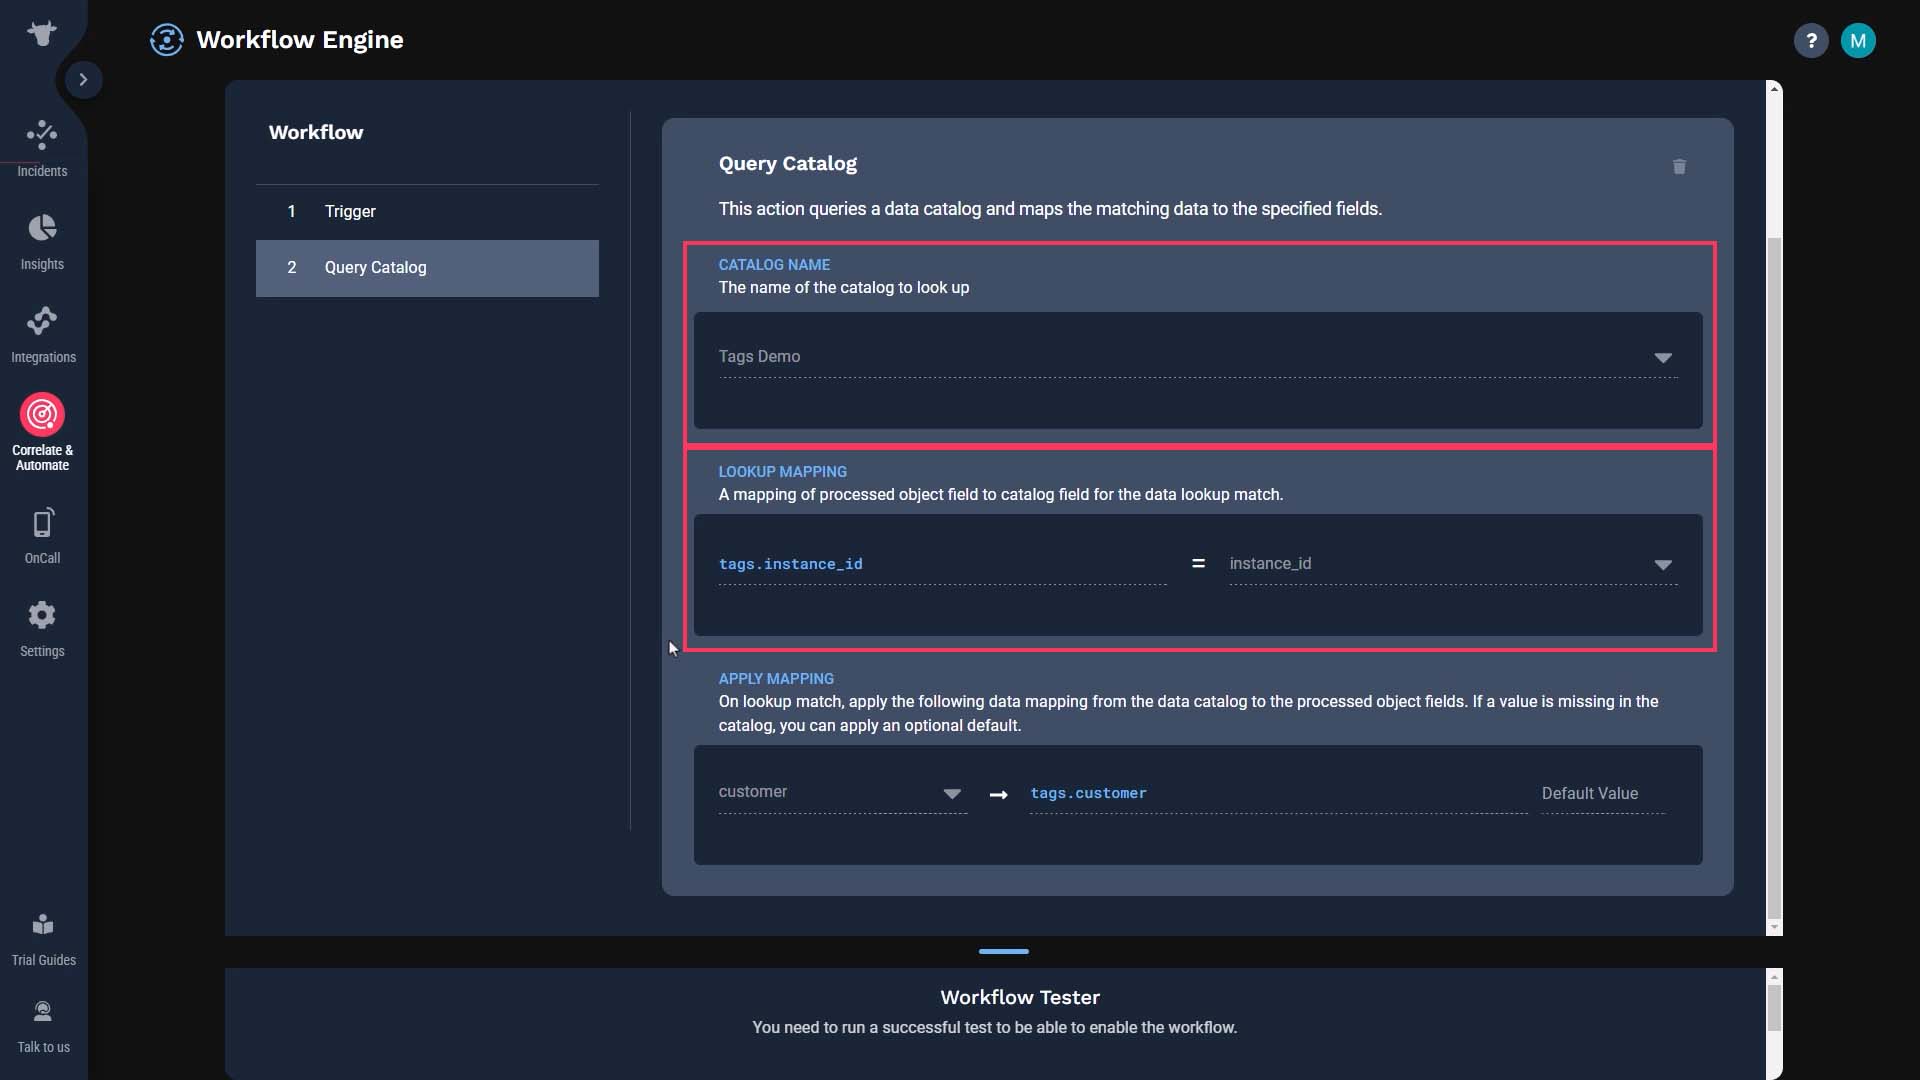
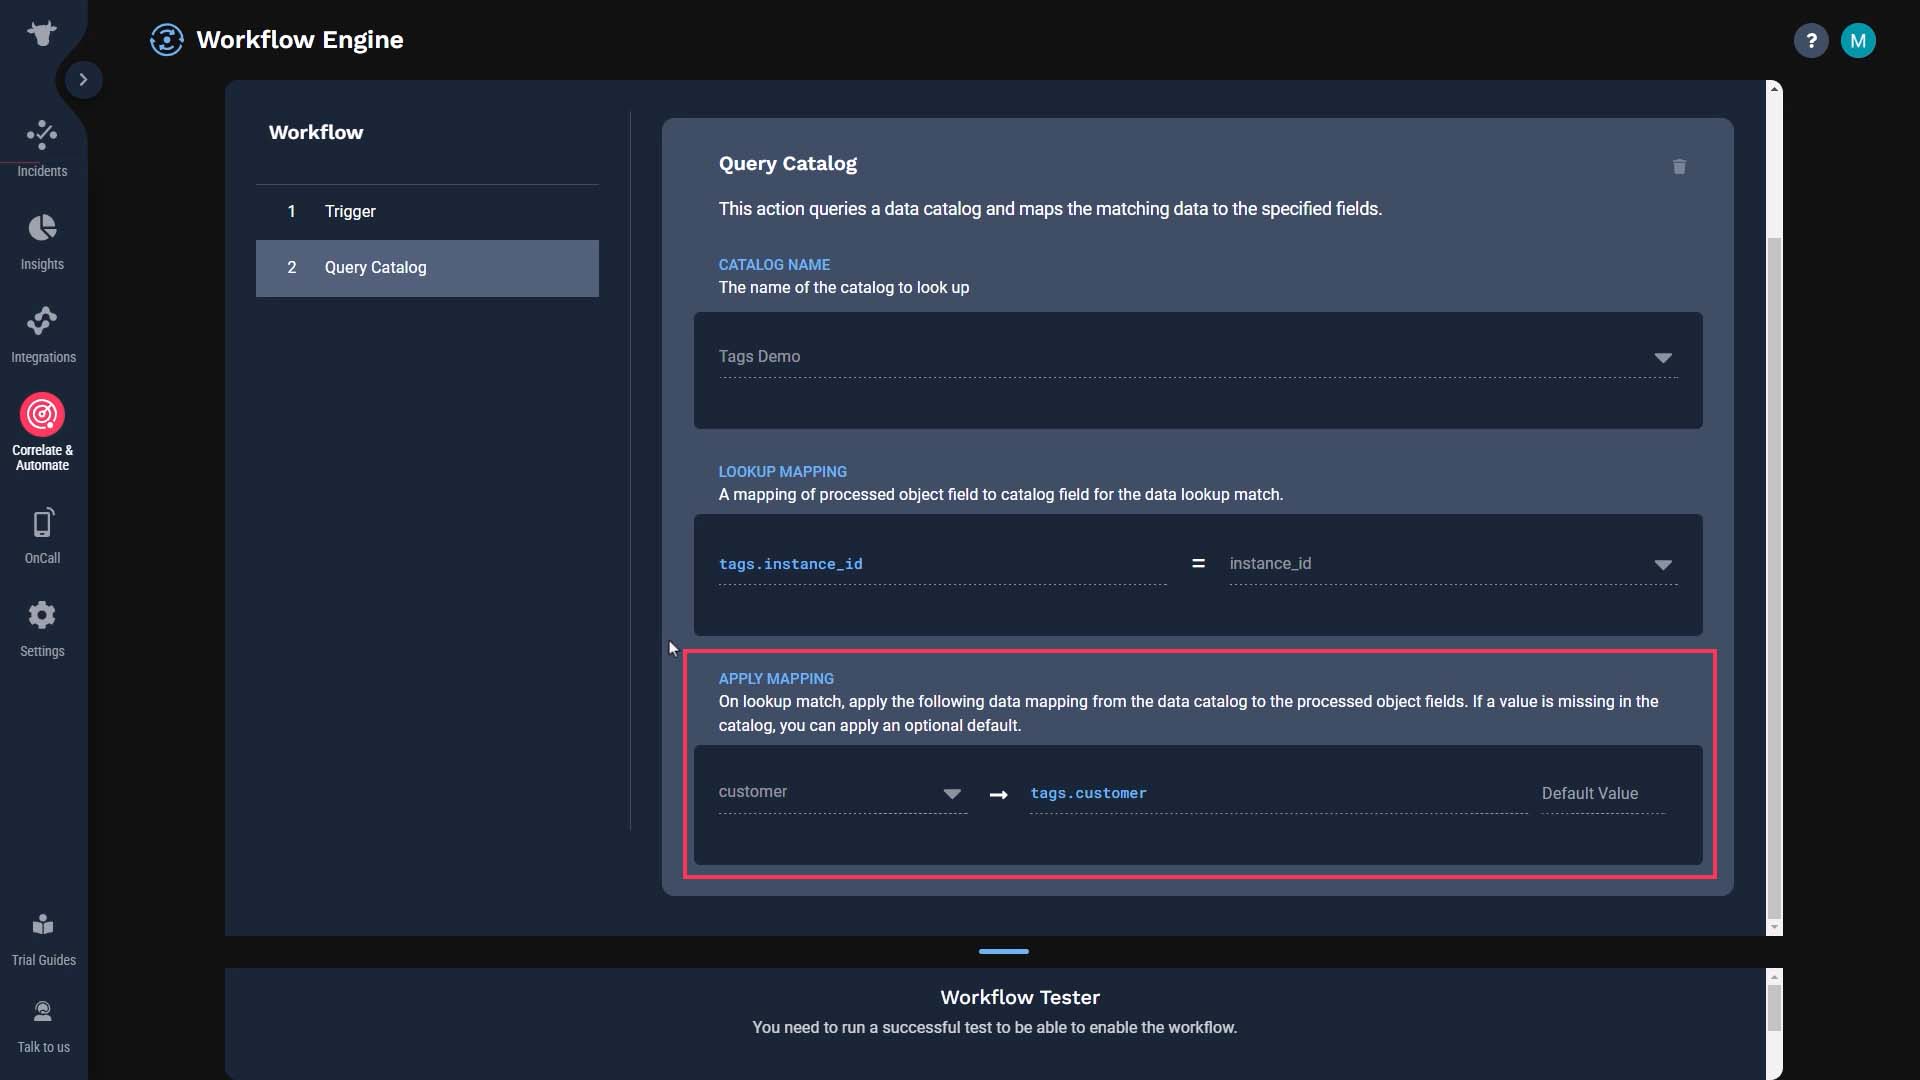
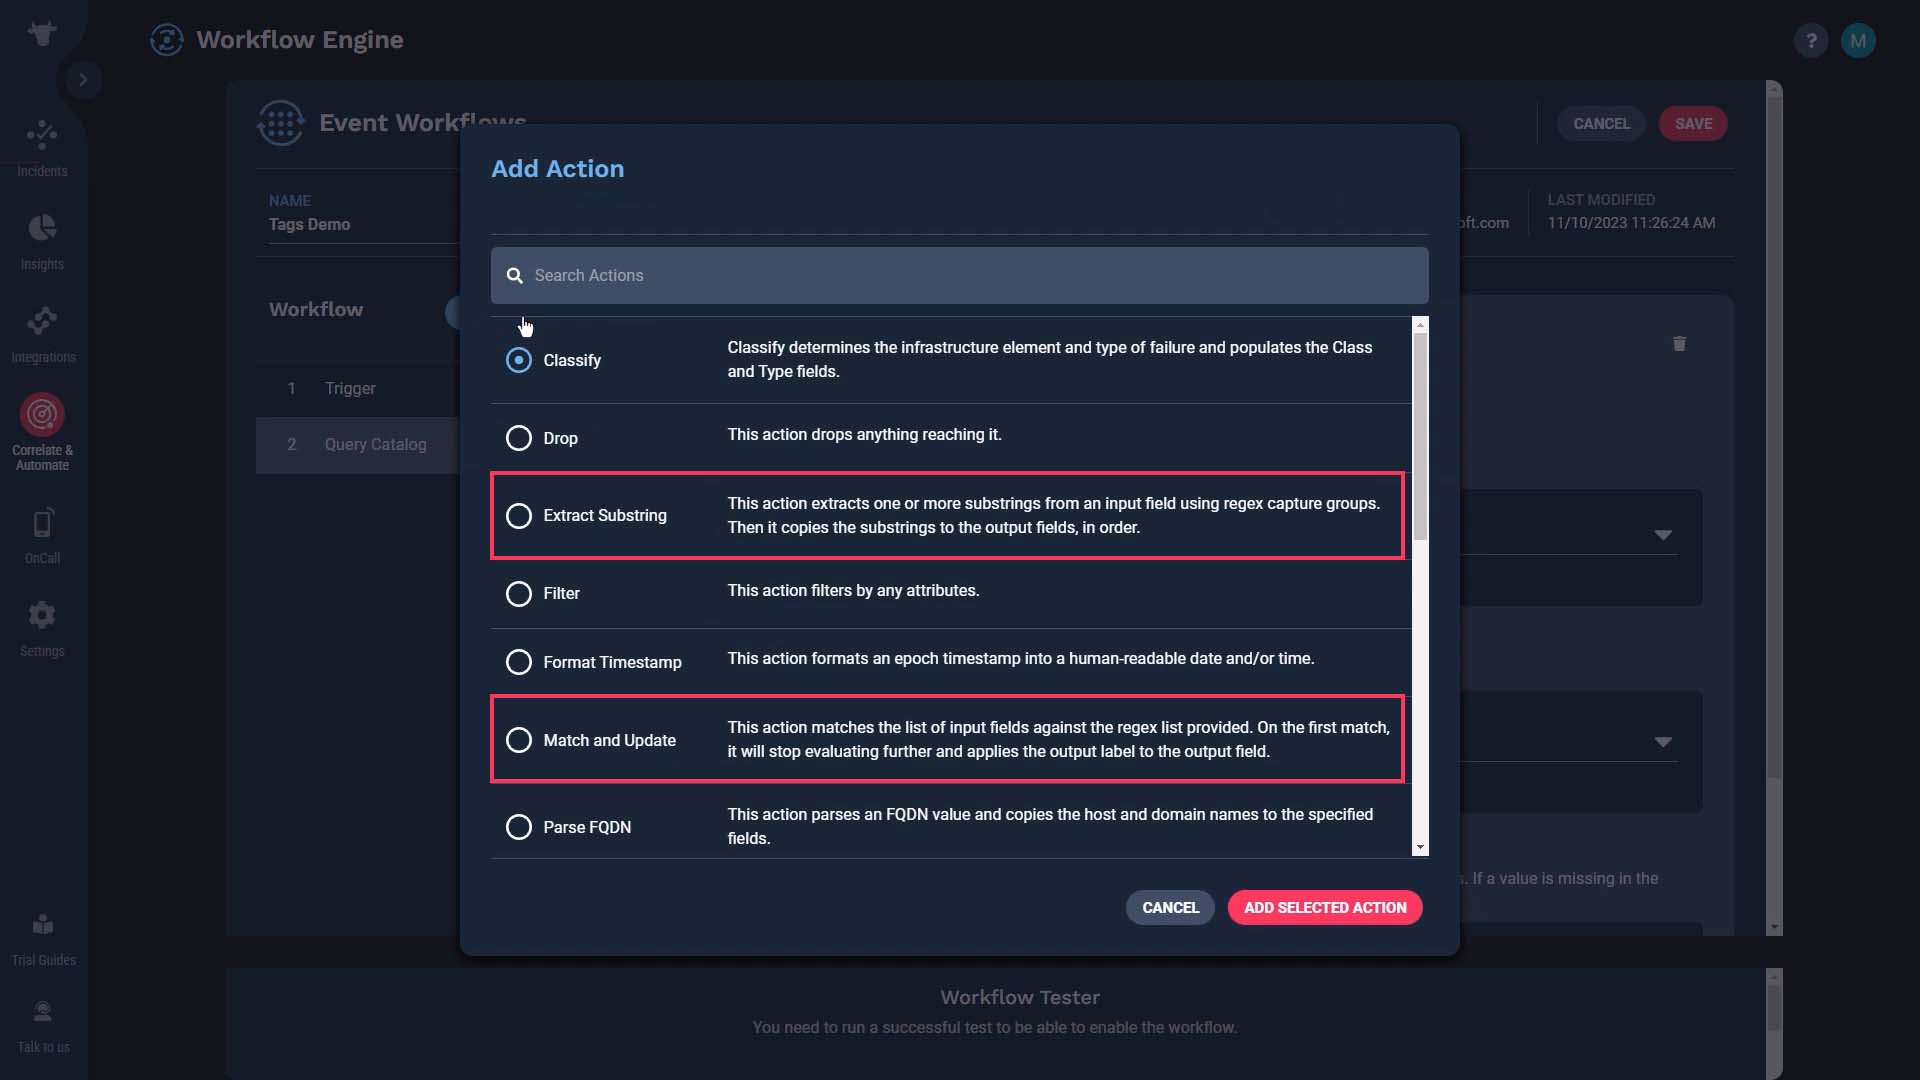
You can generate tags from any workflow action that allows you to specify an output field. For example, Extract Substring or Match and Update.
OK, now that you know how to create tags, next, let me show you how to use them.
You can use tags to filter a list. We’ll add a column for the customer tag…
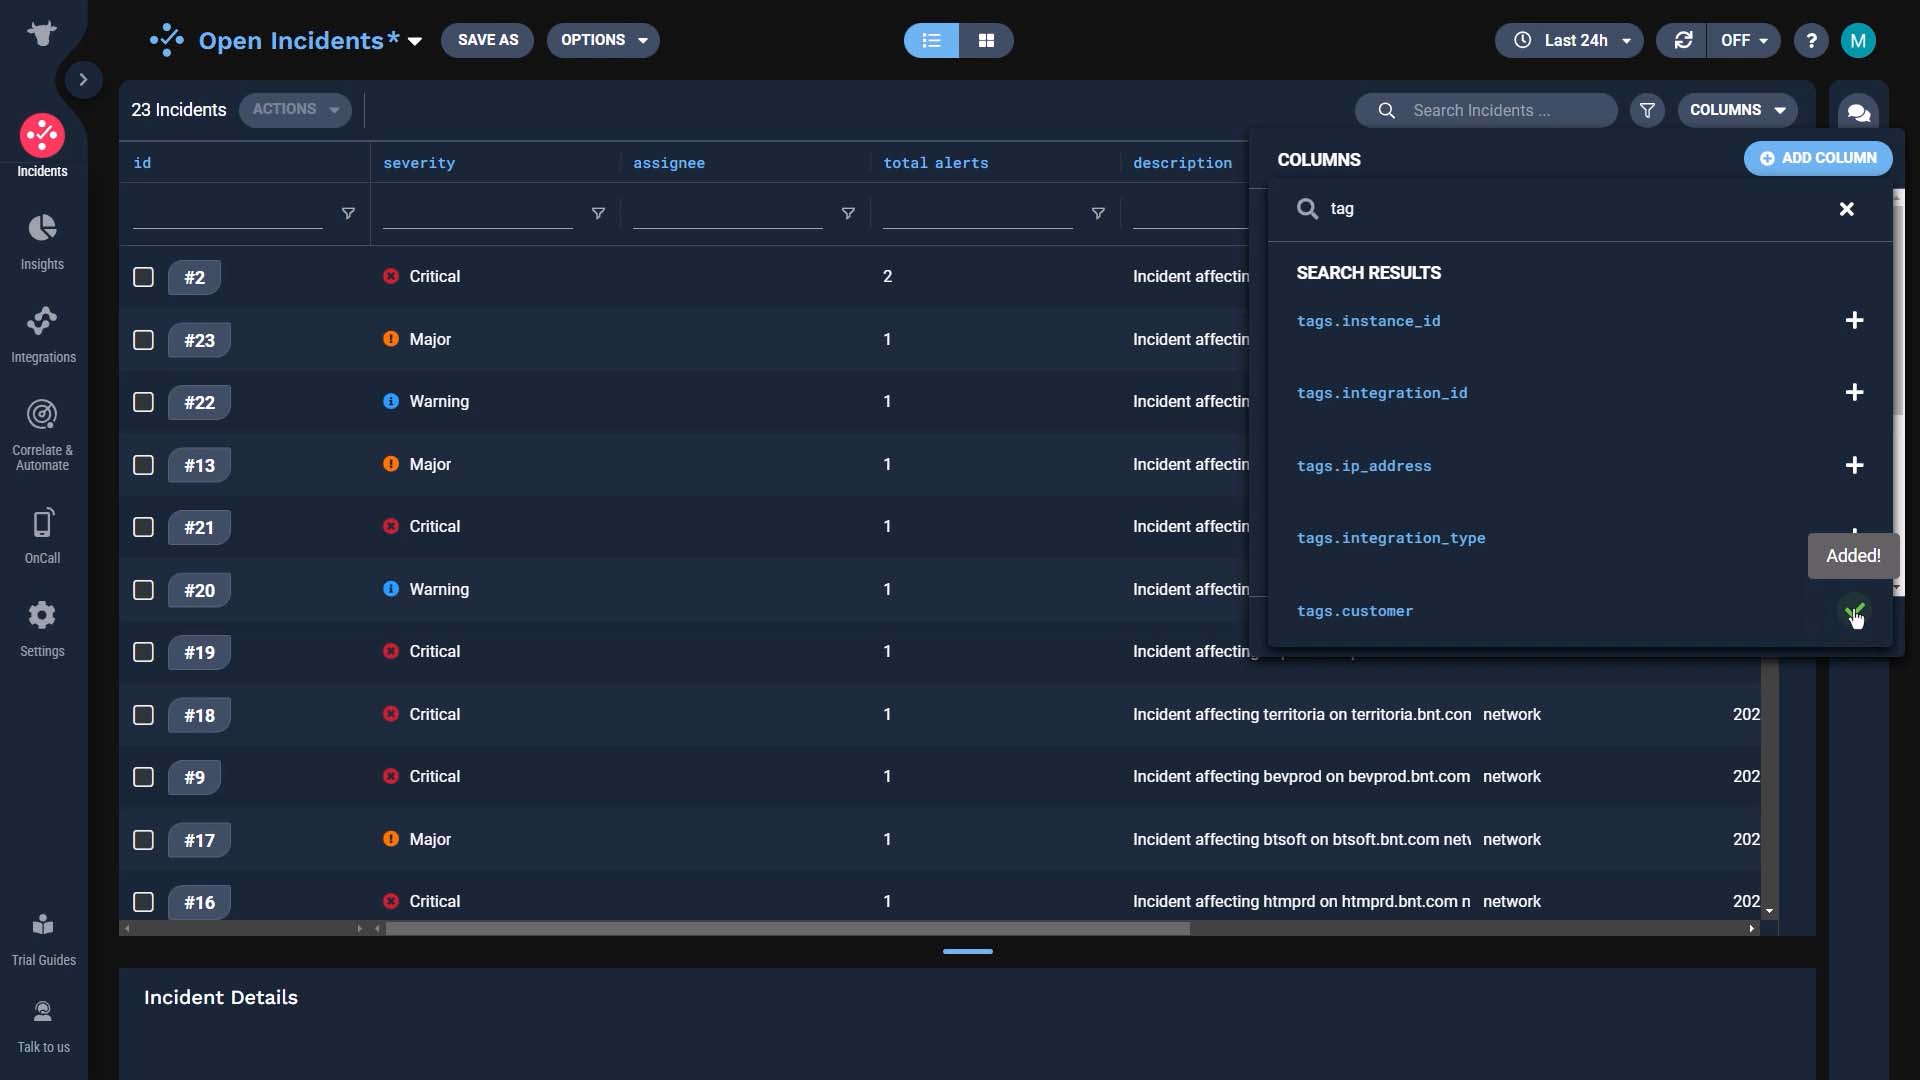
…and filter by the value we want.
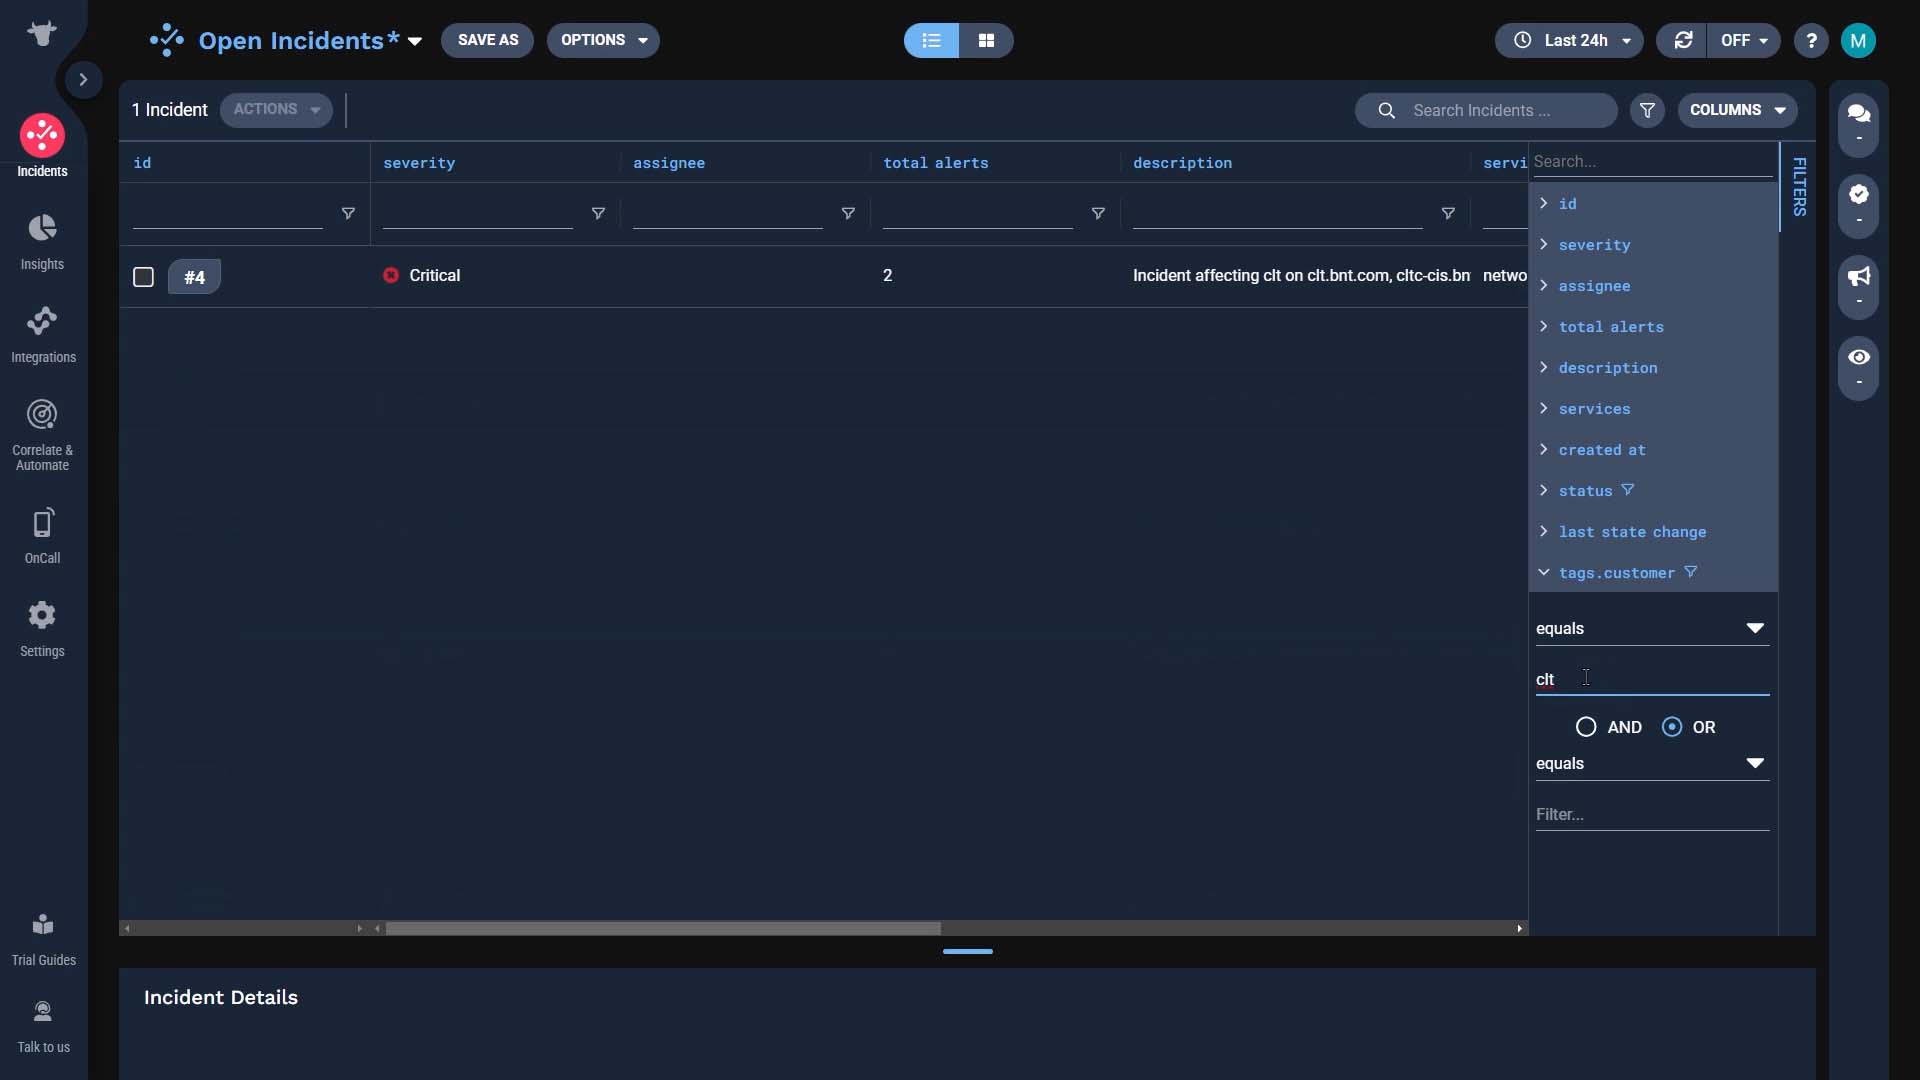
And, you can refer to tags to help with troubleshooting.
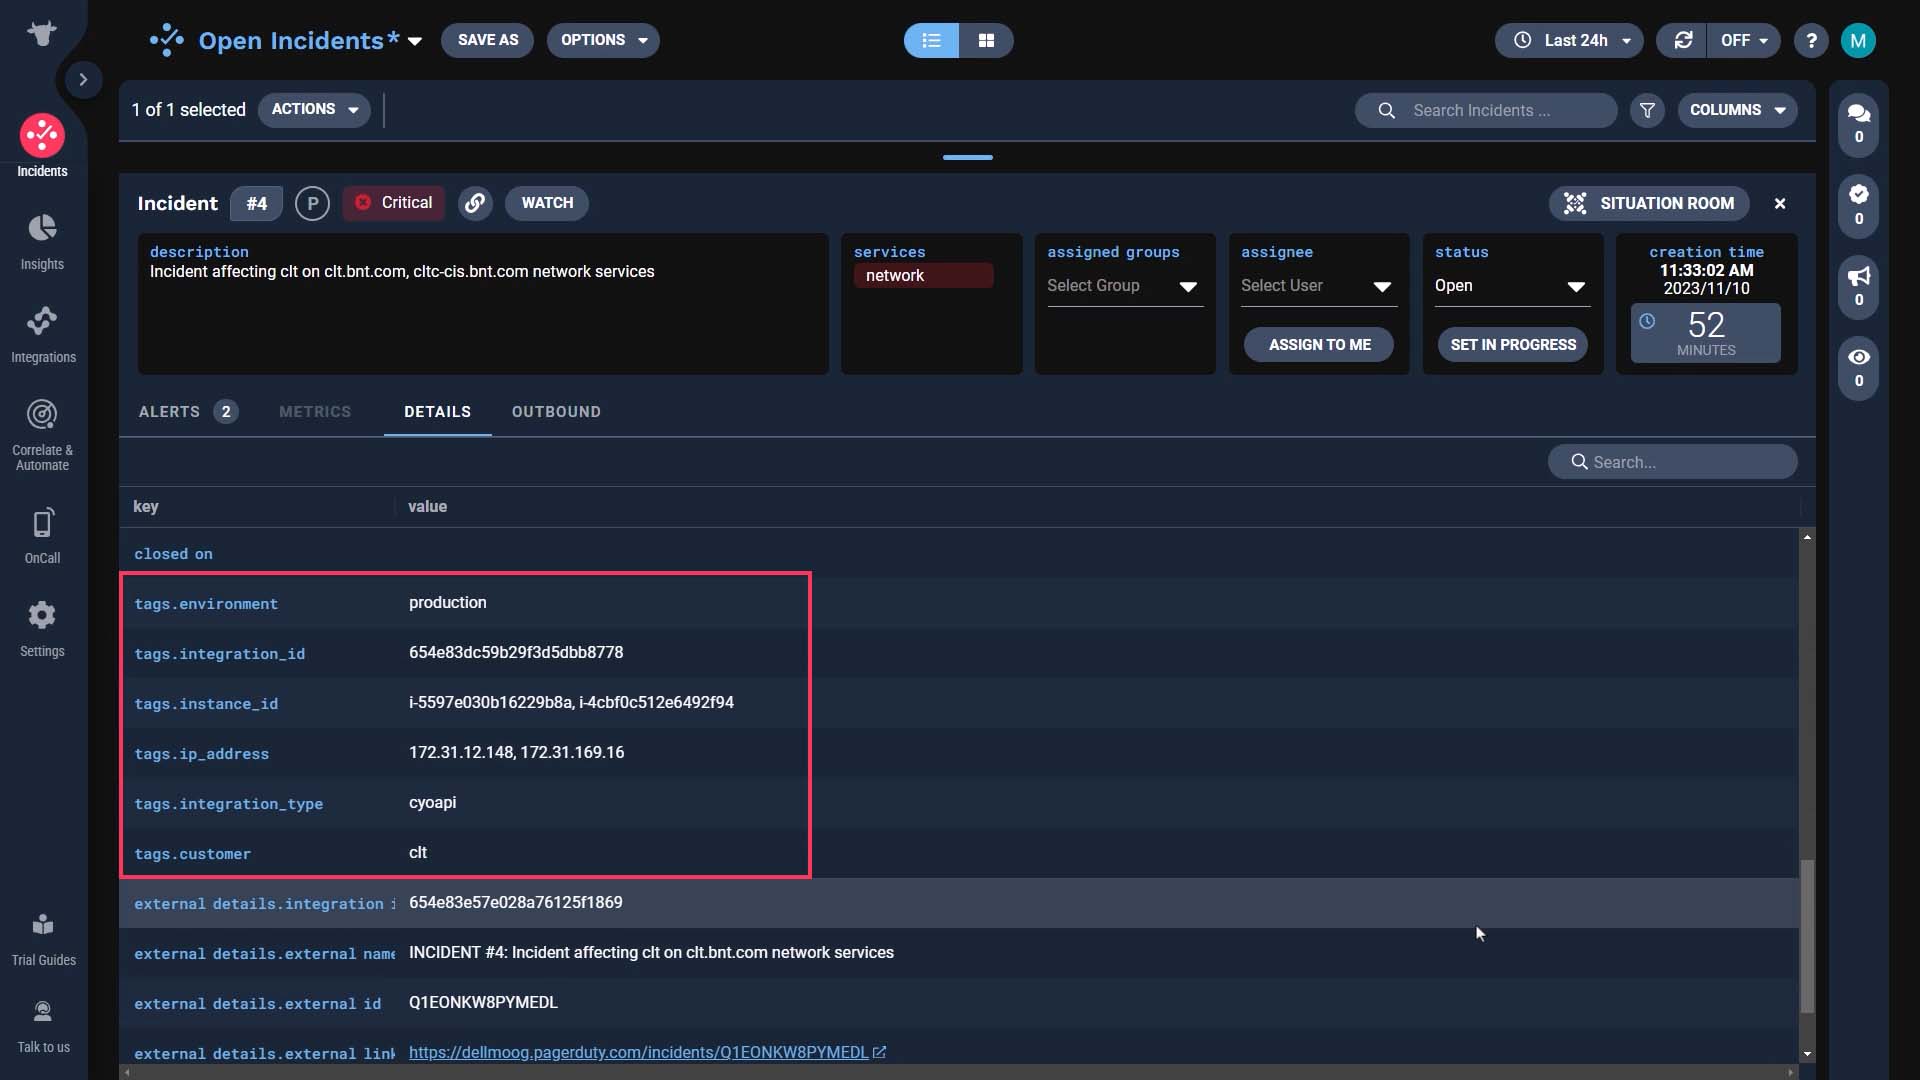
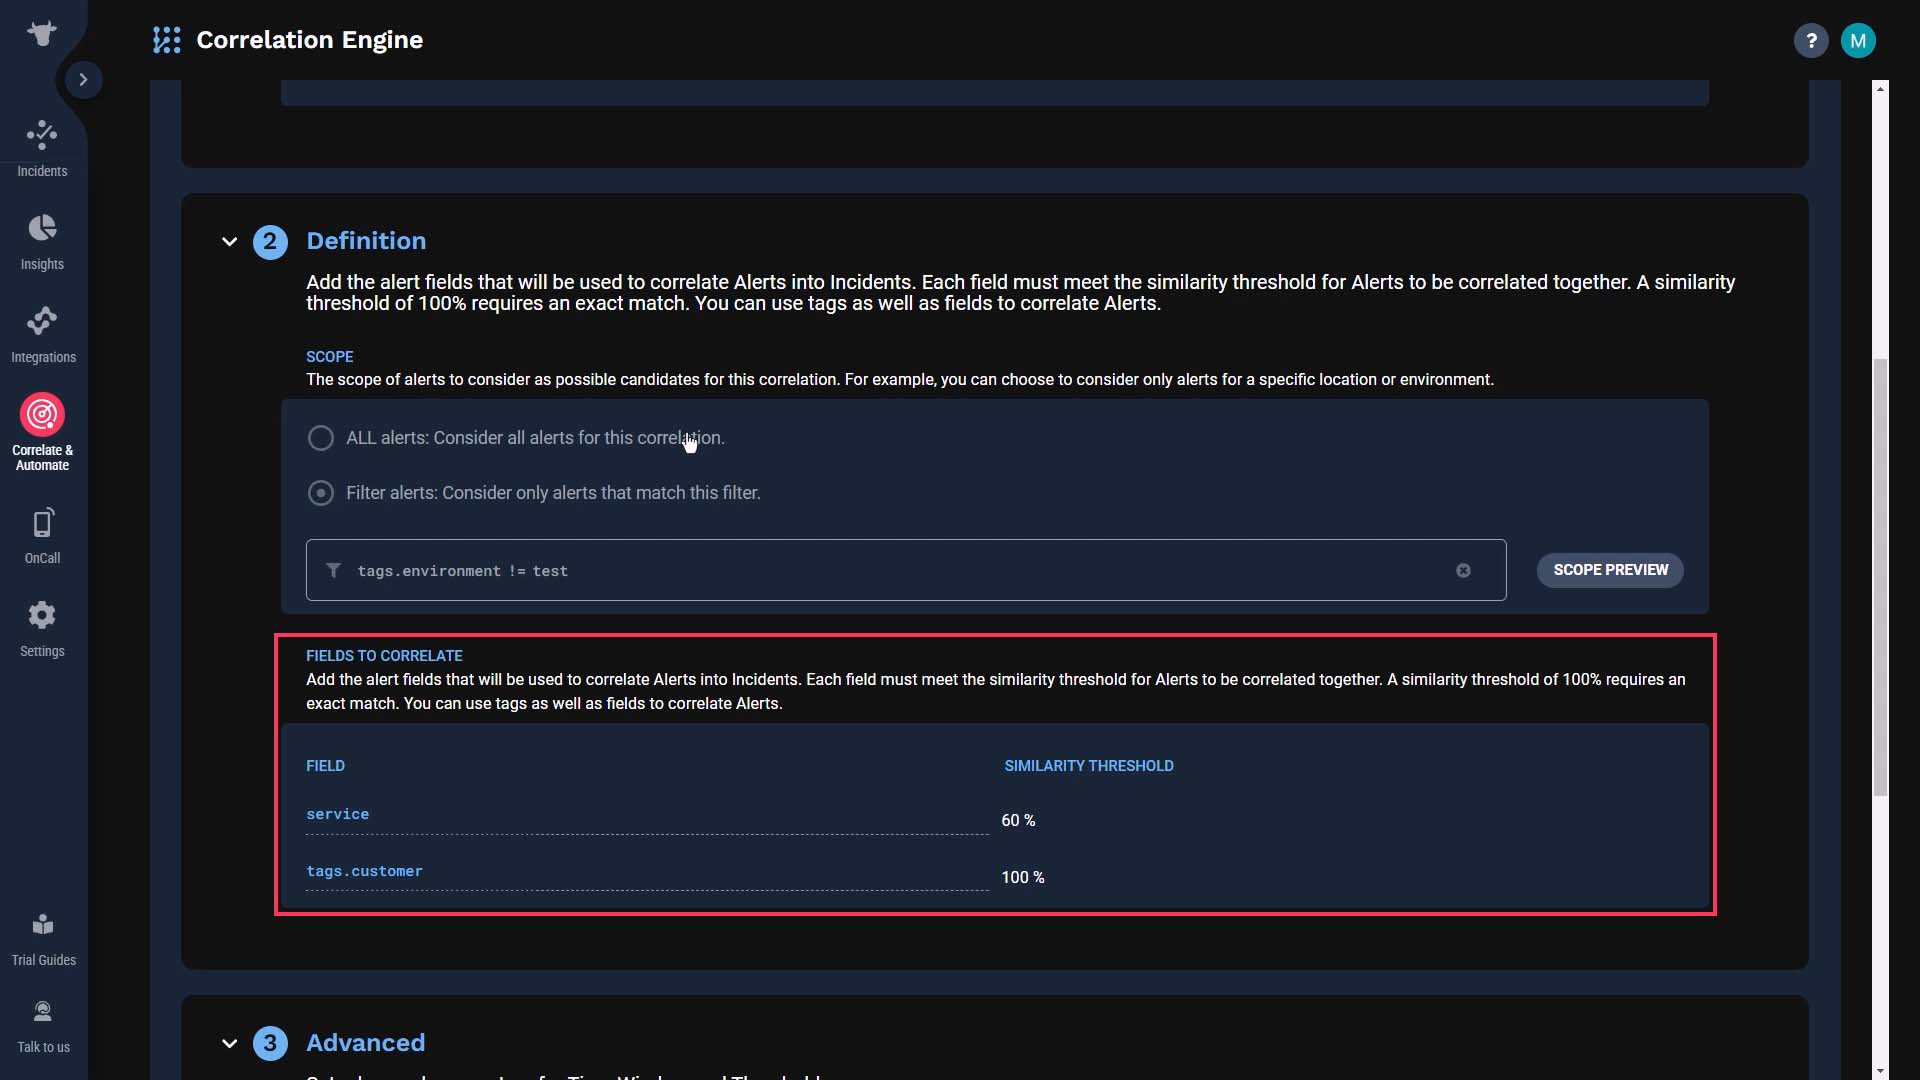
This correlation definition uses tags to filter, and to correlate.
Let’s say the alerts originating in the test environment should not be put through this correlation definition.
Since you have a tag for the environment value, you can use that to filter the alert flow like this.
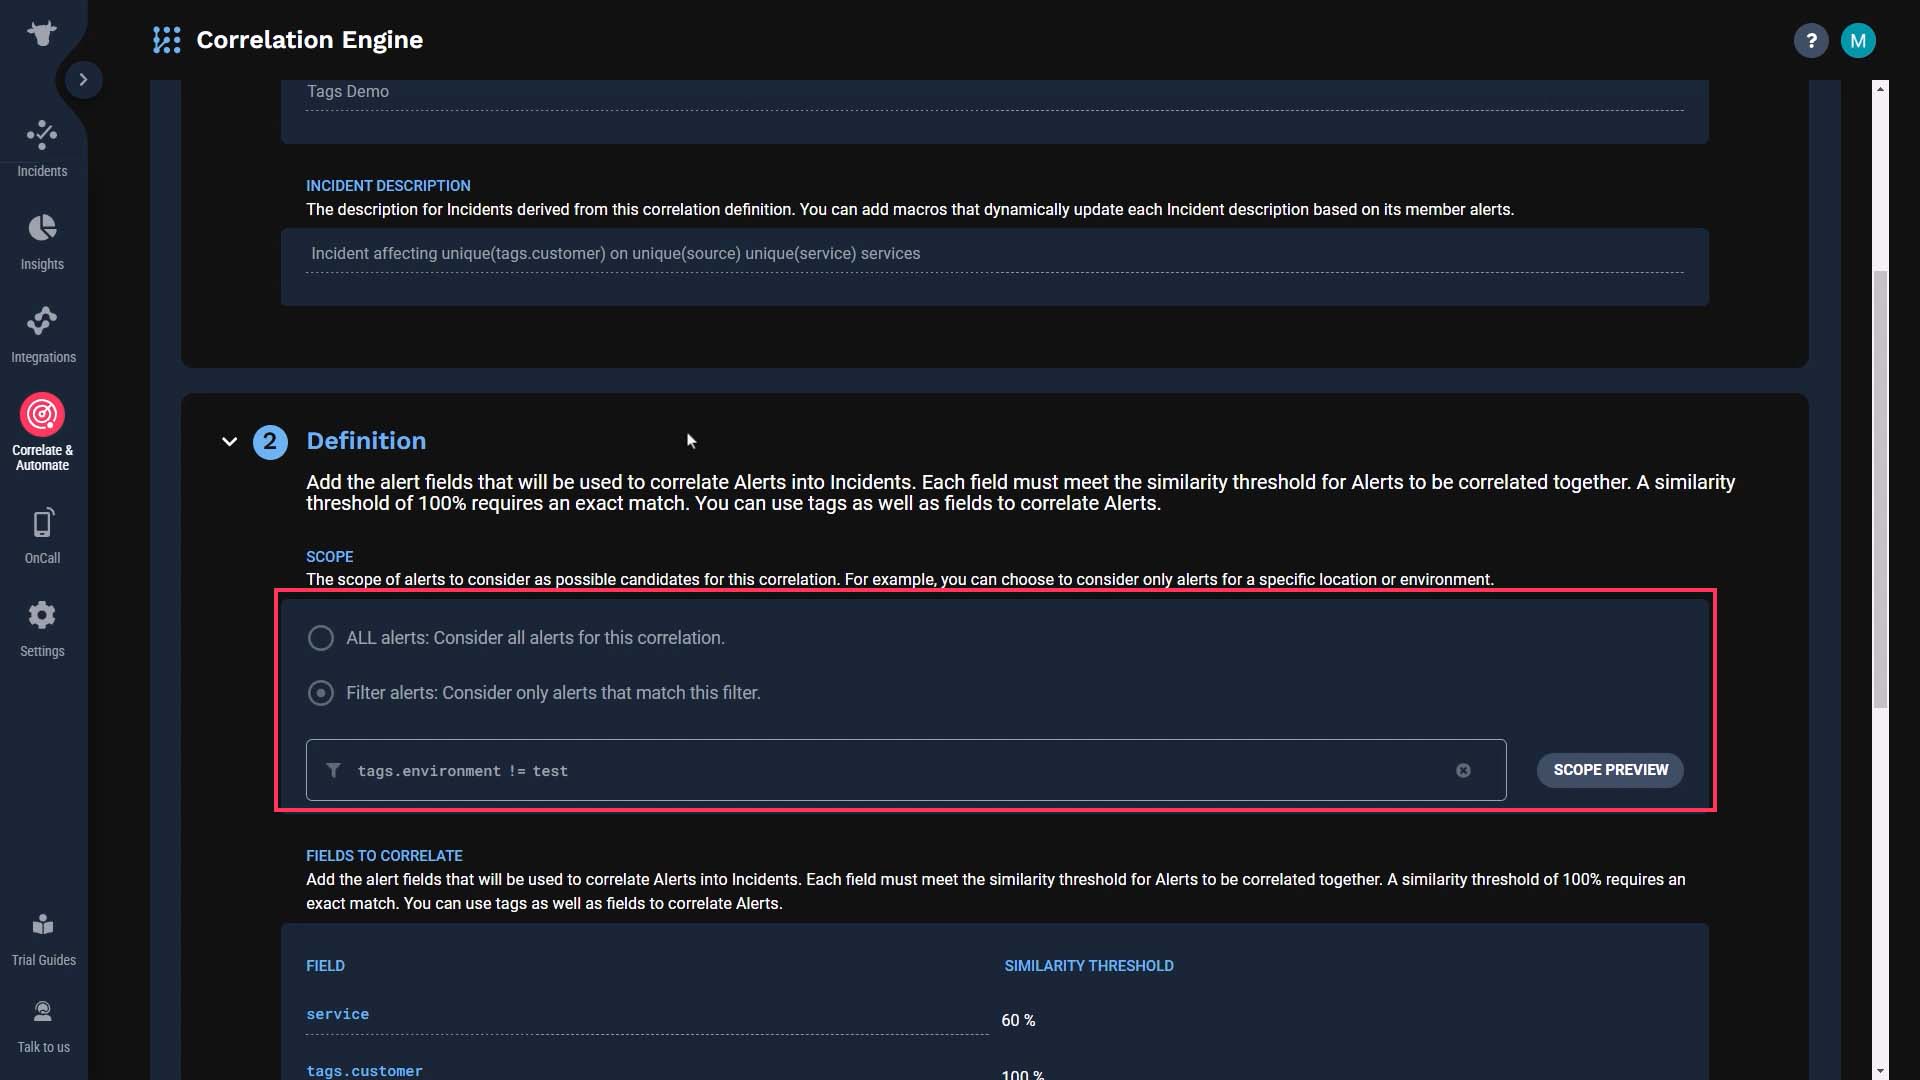
Also, suppose you want to use the customer name to correlate alerts. Here alerts that share the exact same value for the customer tag and similar values for service are grouped together into an incident.
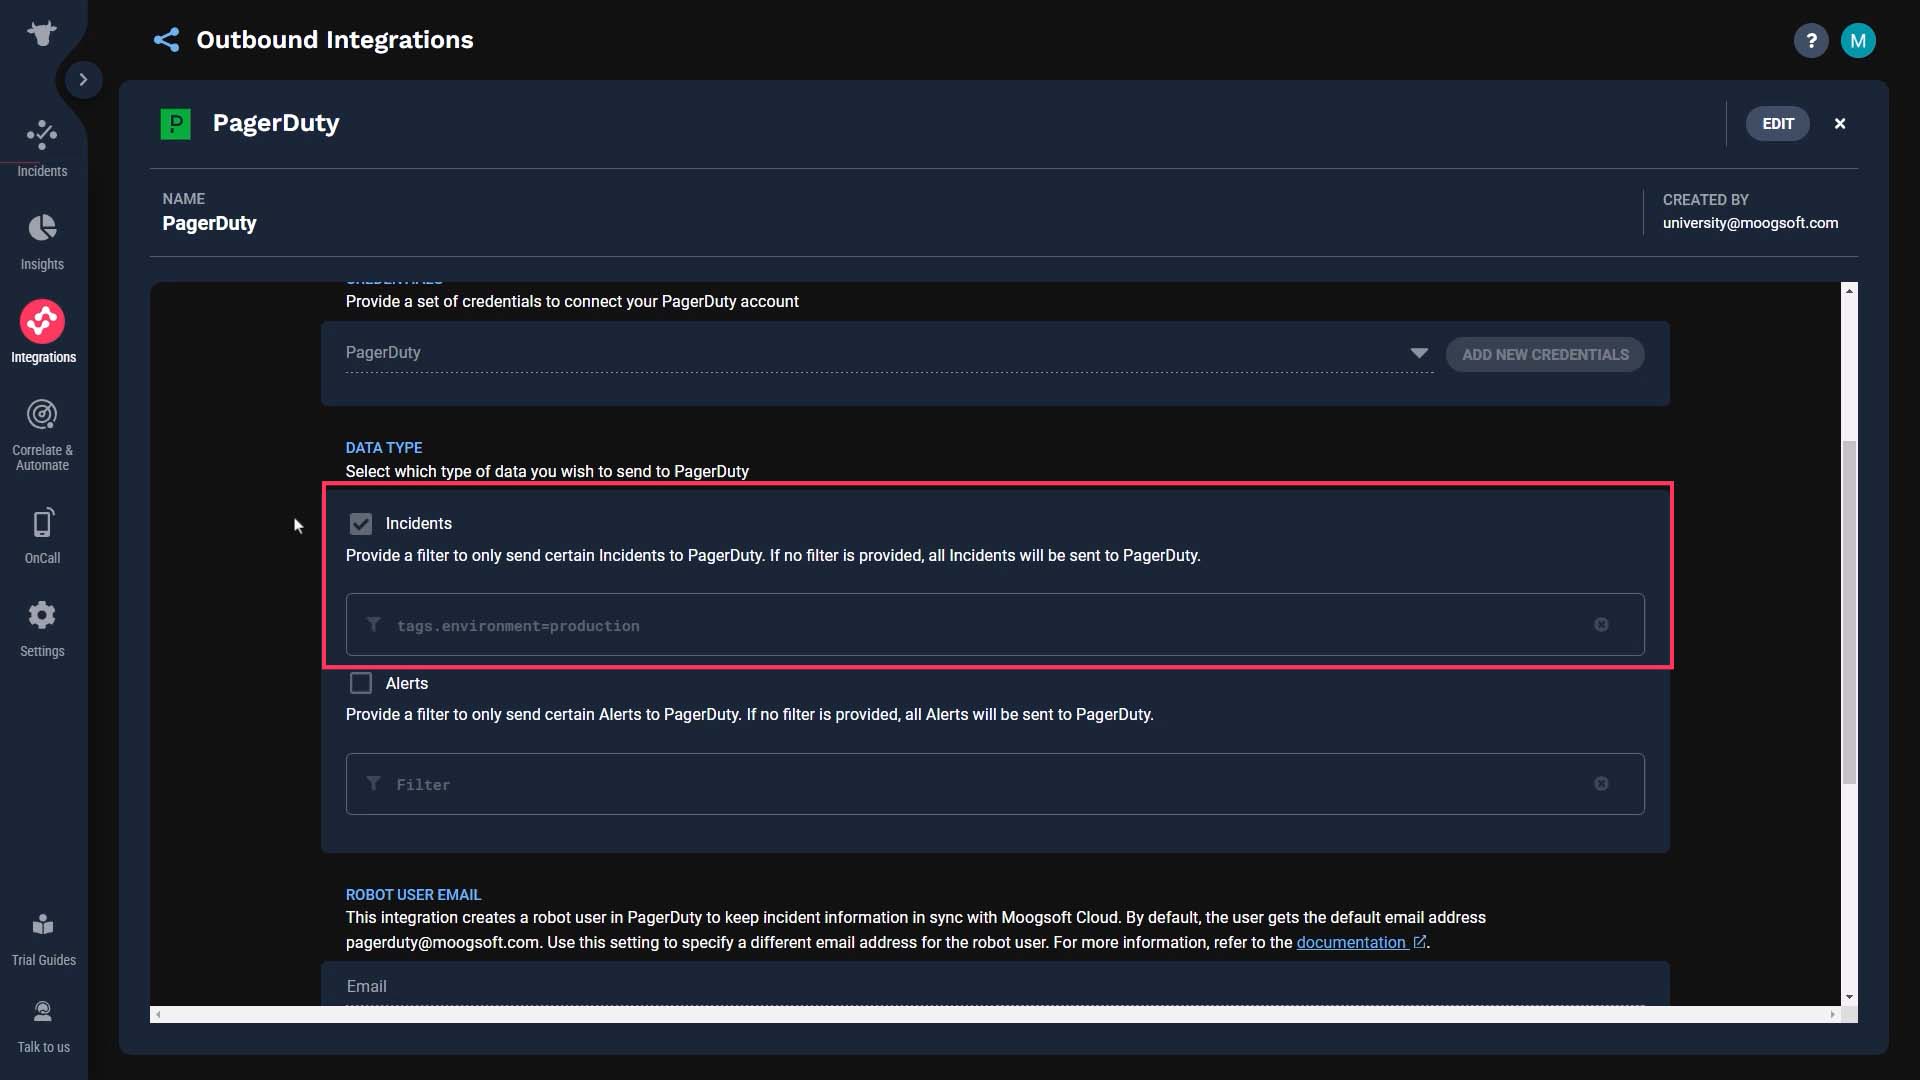
Another place you can use tags is routing. Let’s say your support team uses PagerDuty to respond to customer-impacting incidents. So you want to route production incidents to PagerDuty, but not incidents affecting the development or test servers.
Here, we’ve used the environment tag to create a filter so only production incidents will be routed to this integration.
Now you know how to use tags. Thanks for watching.
Now you know how to Thanks for watching!
BASIC | 6 MIN
In this video, learn how to add external data to events in Incident Management using the Workflow Engine, Data Catalog, and the Correlation Engine.
Use case walkthrough: Add external data to events ►
This video explains how to Add External Data to Events in APEX AIOps Incident Management by using a data catalog to facilitate enrichment.
*Please note Moogsoft is now part of Dell's IT Operations solution called APEX AIOps, and changed its name to APEX AIOps Incident Management. The UI in this video may differ slightly but the content covered is still relevant.
In this quick video, we’ll go over how to configure enrichment in APEX AIOps Incident Management.
Here’s our scenario. We want to cluster our alerts by the service impacted,
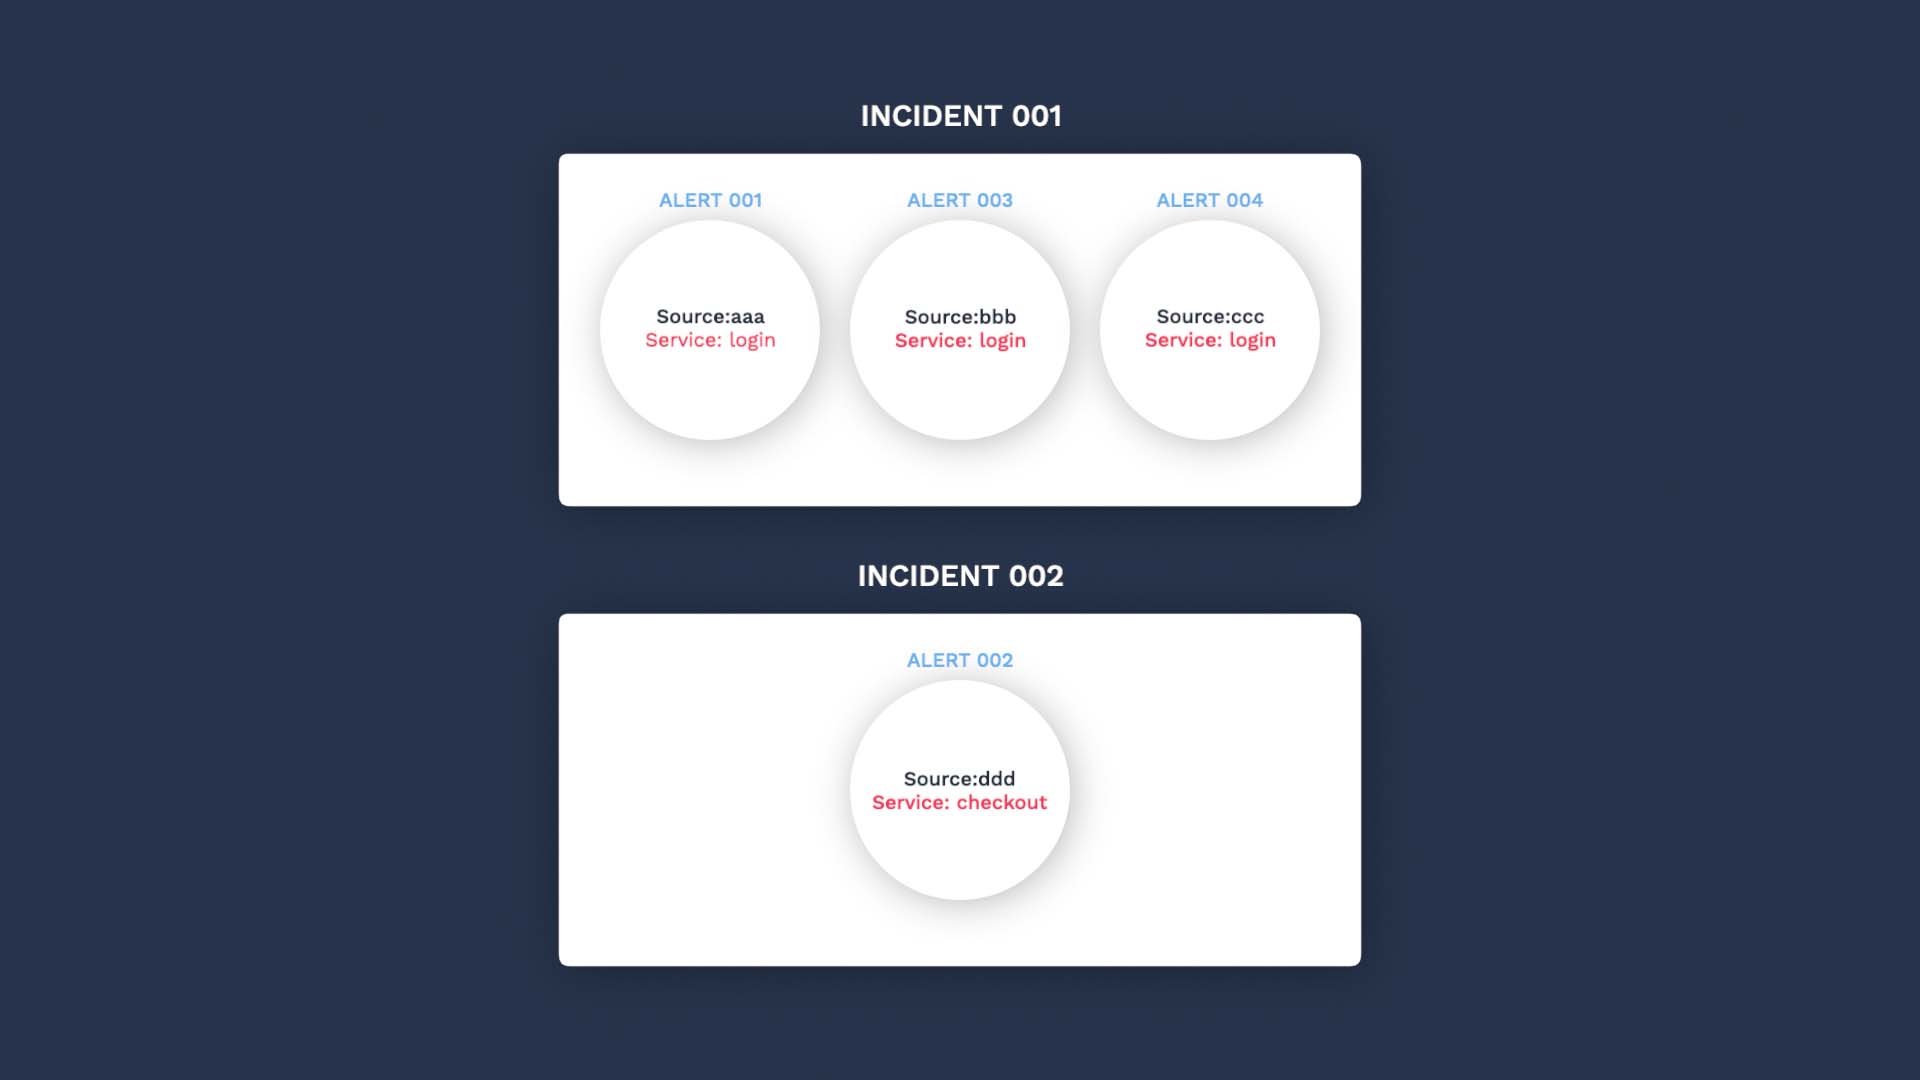
But the incoming events do not always have the service information.
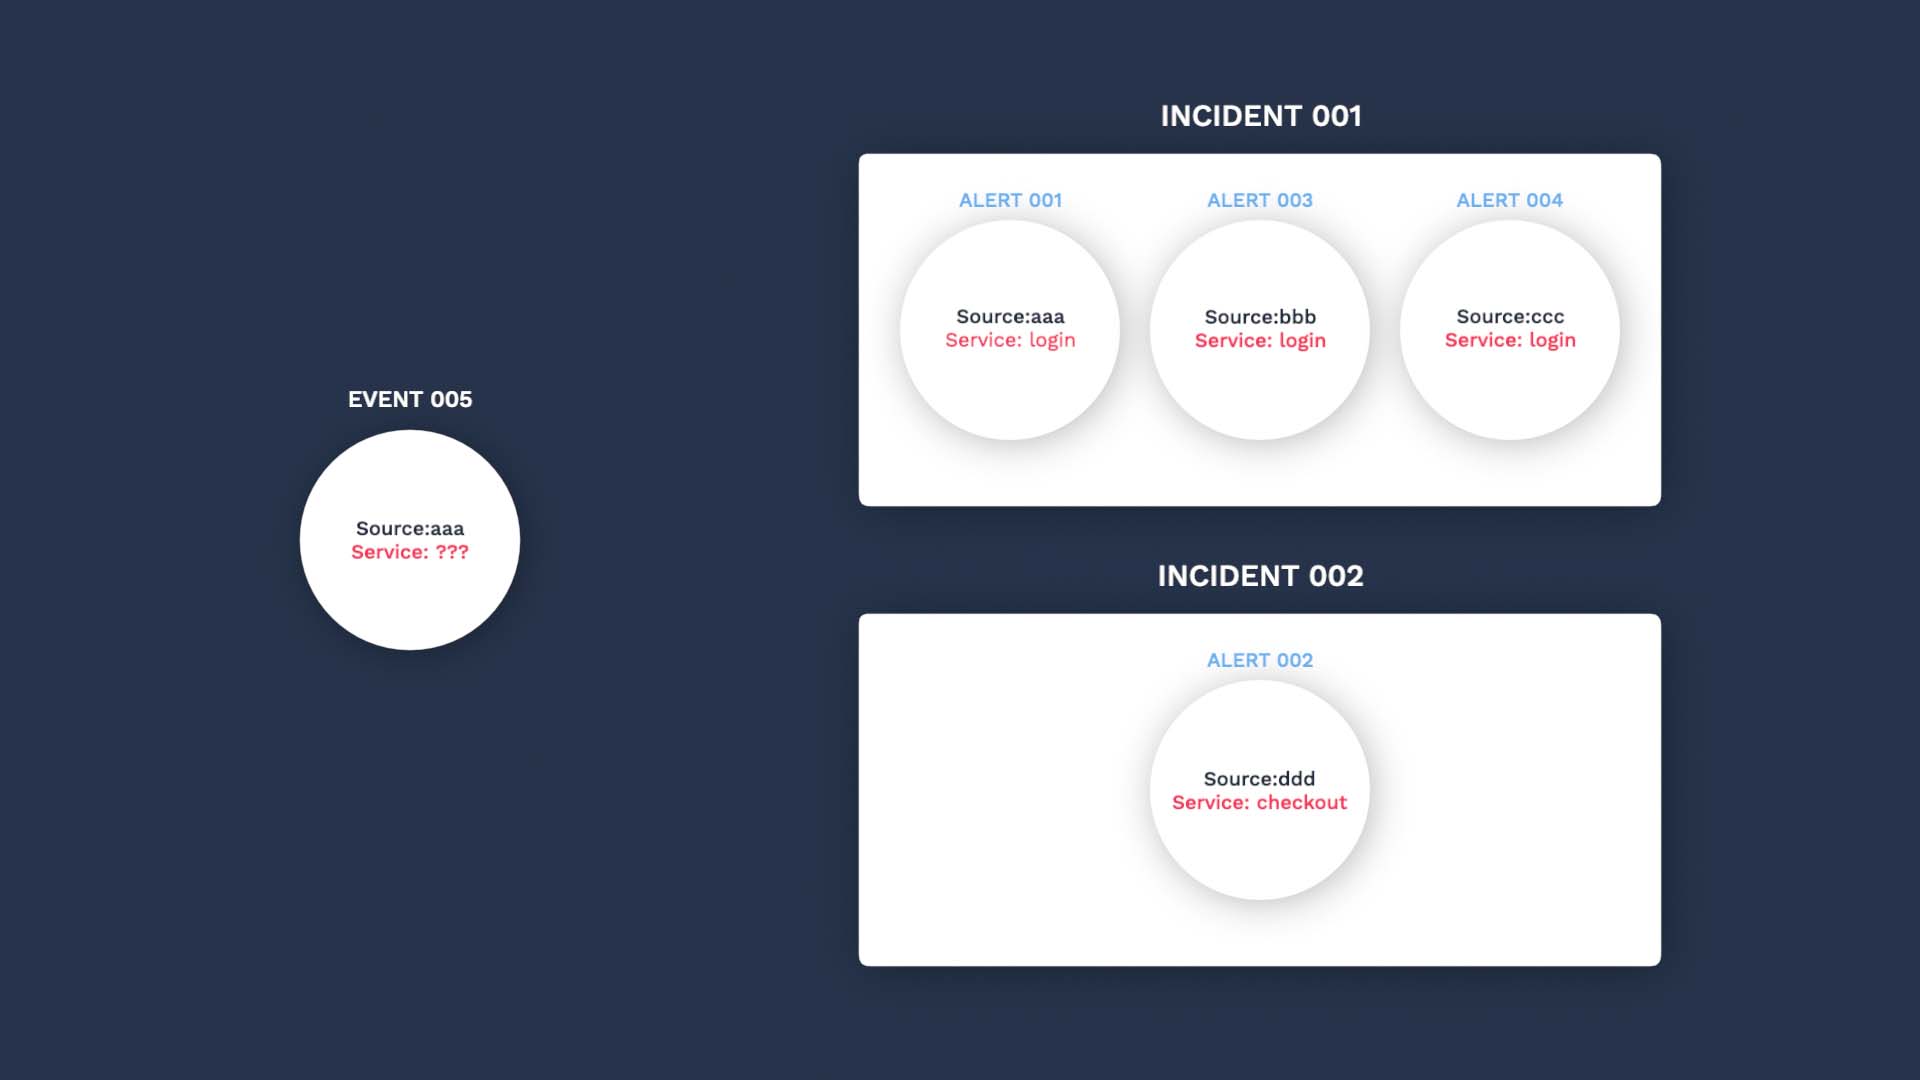
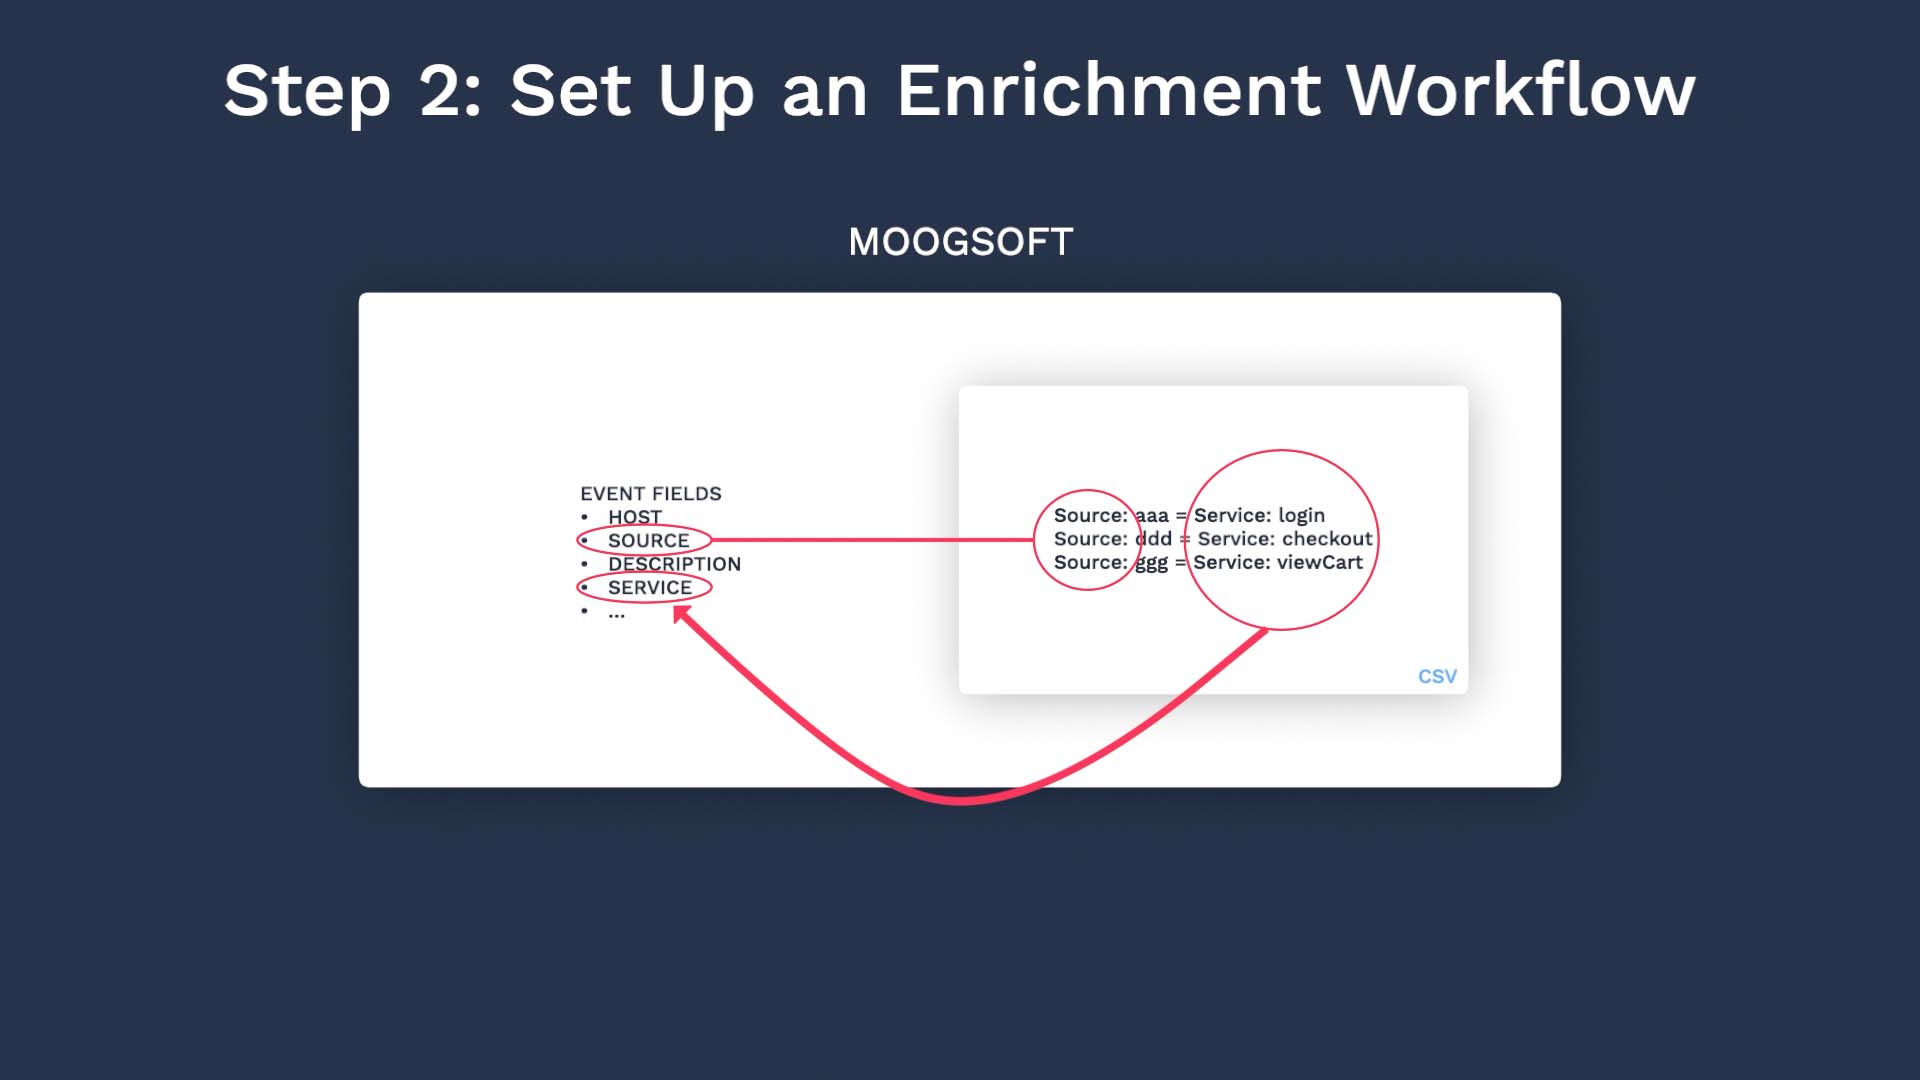
We do have a spreadsheet that stores the source to service connections,
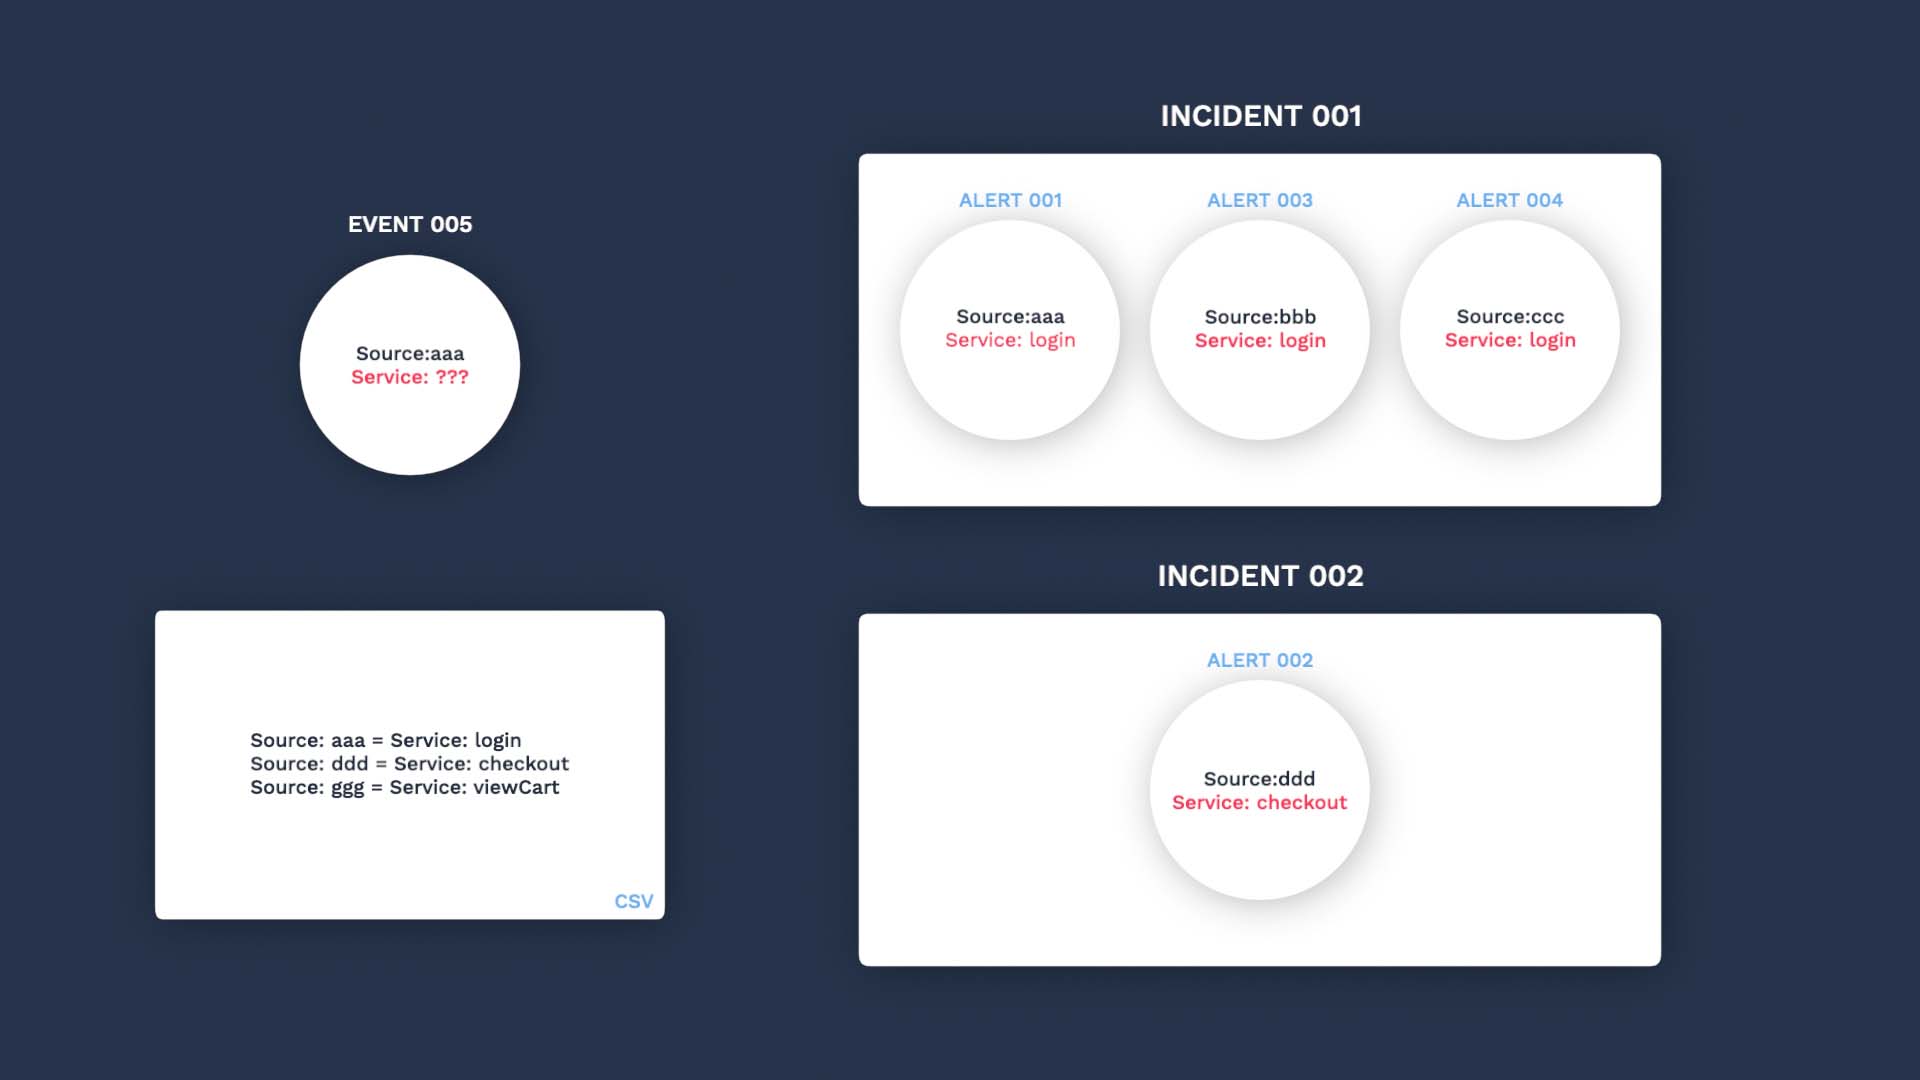
So we want to query by the source in the data catalog, retrieve the service information, and add it to the events.
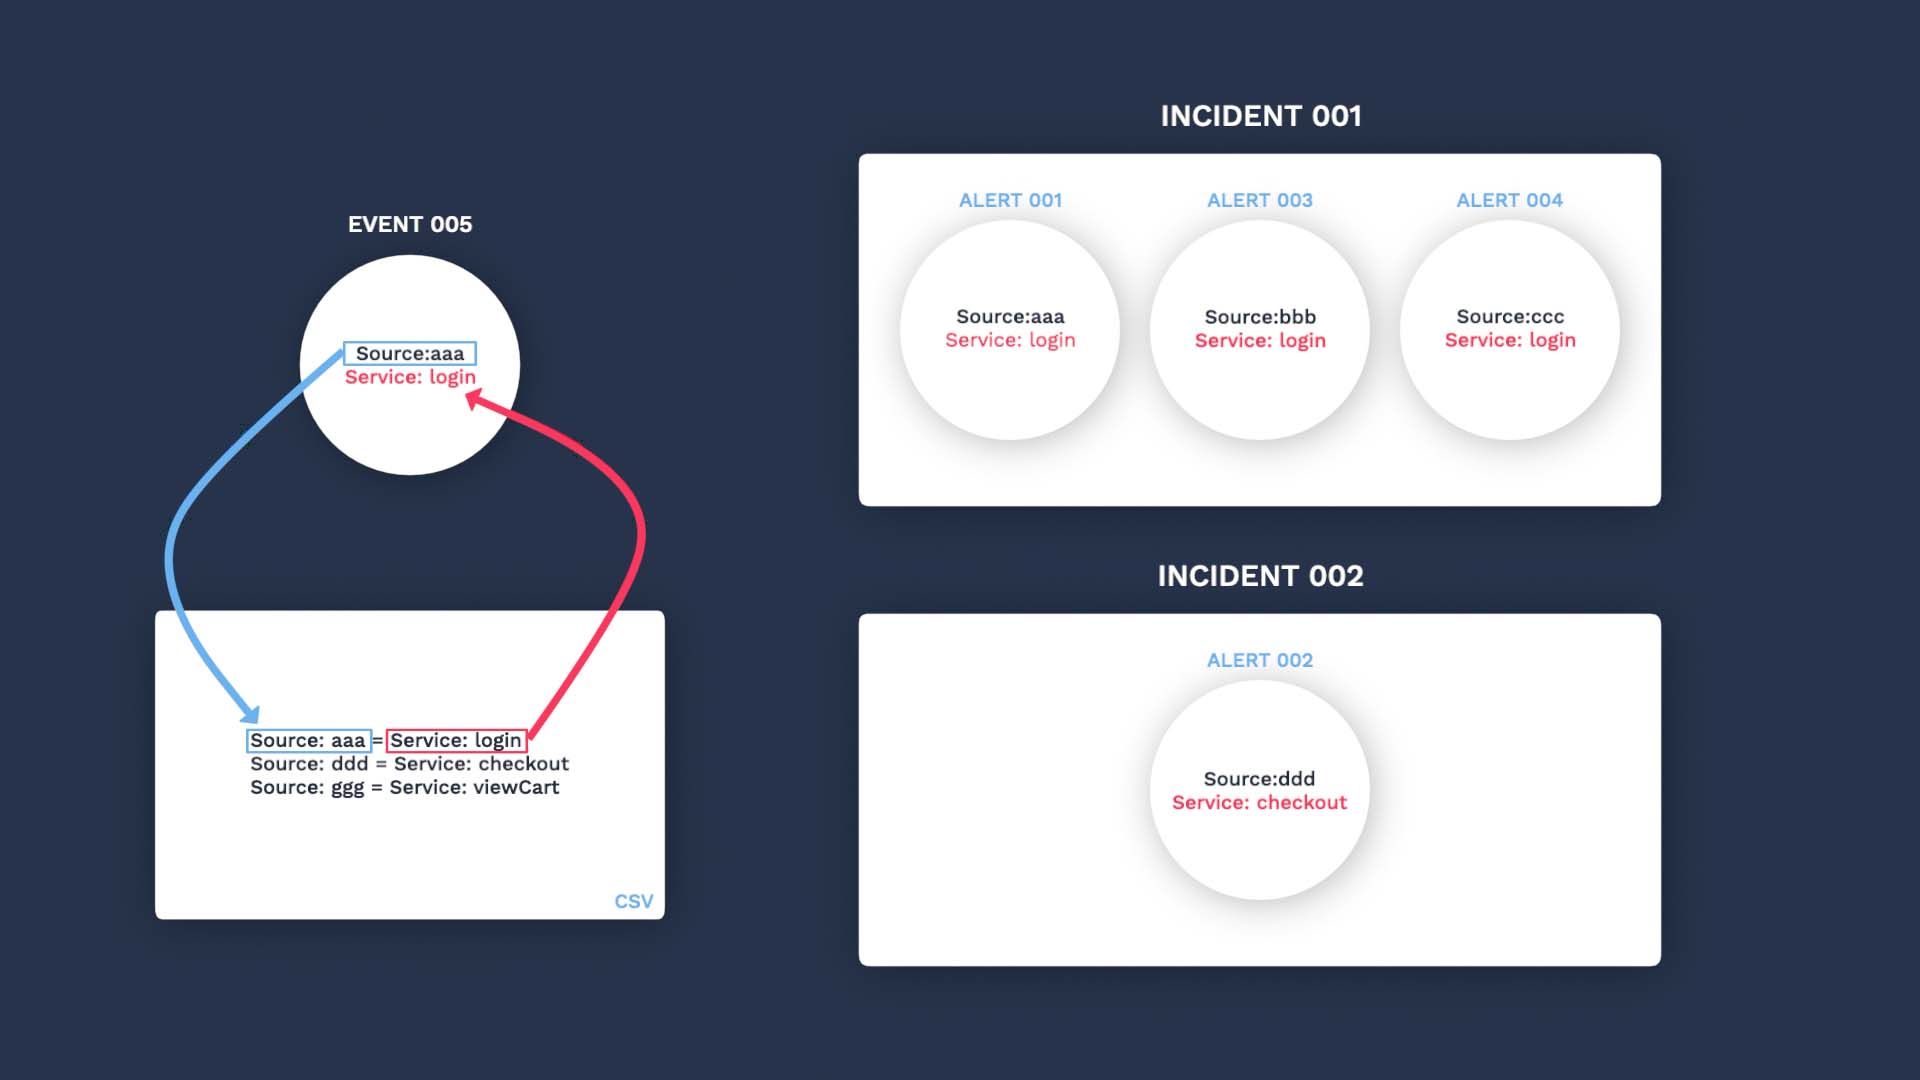
It takes 3 steps to make this happen.
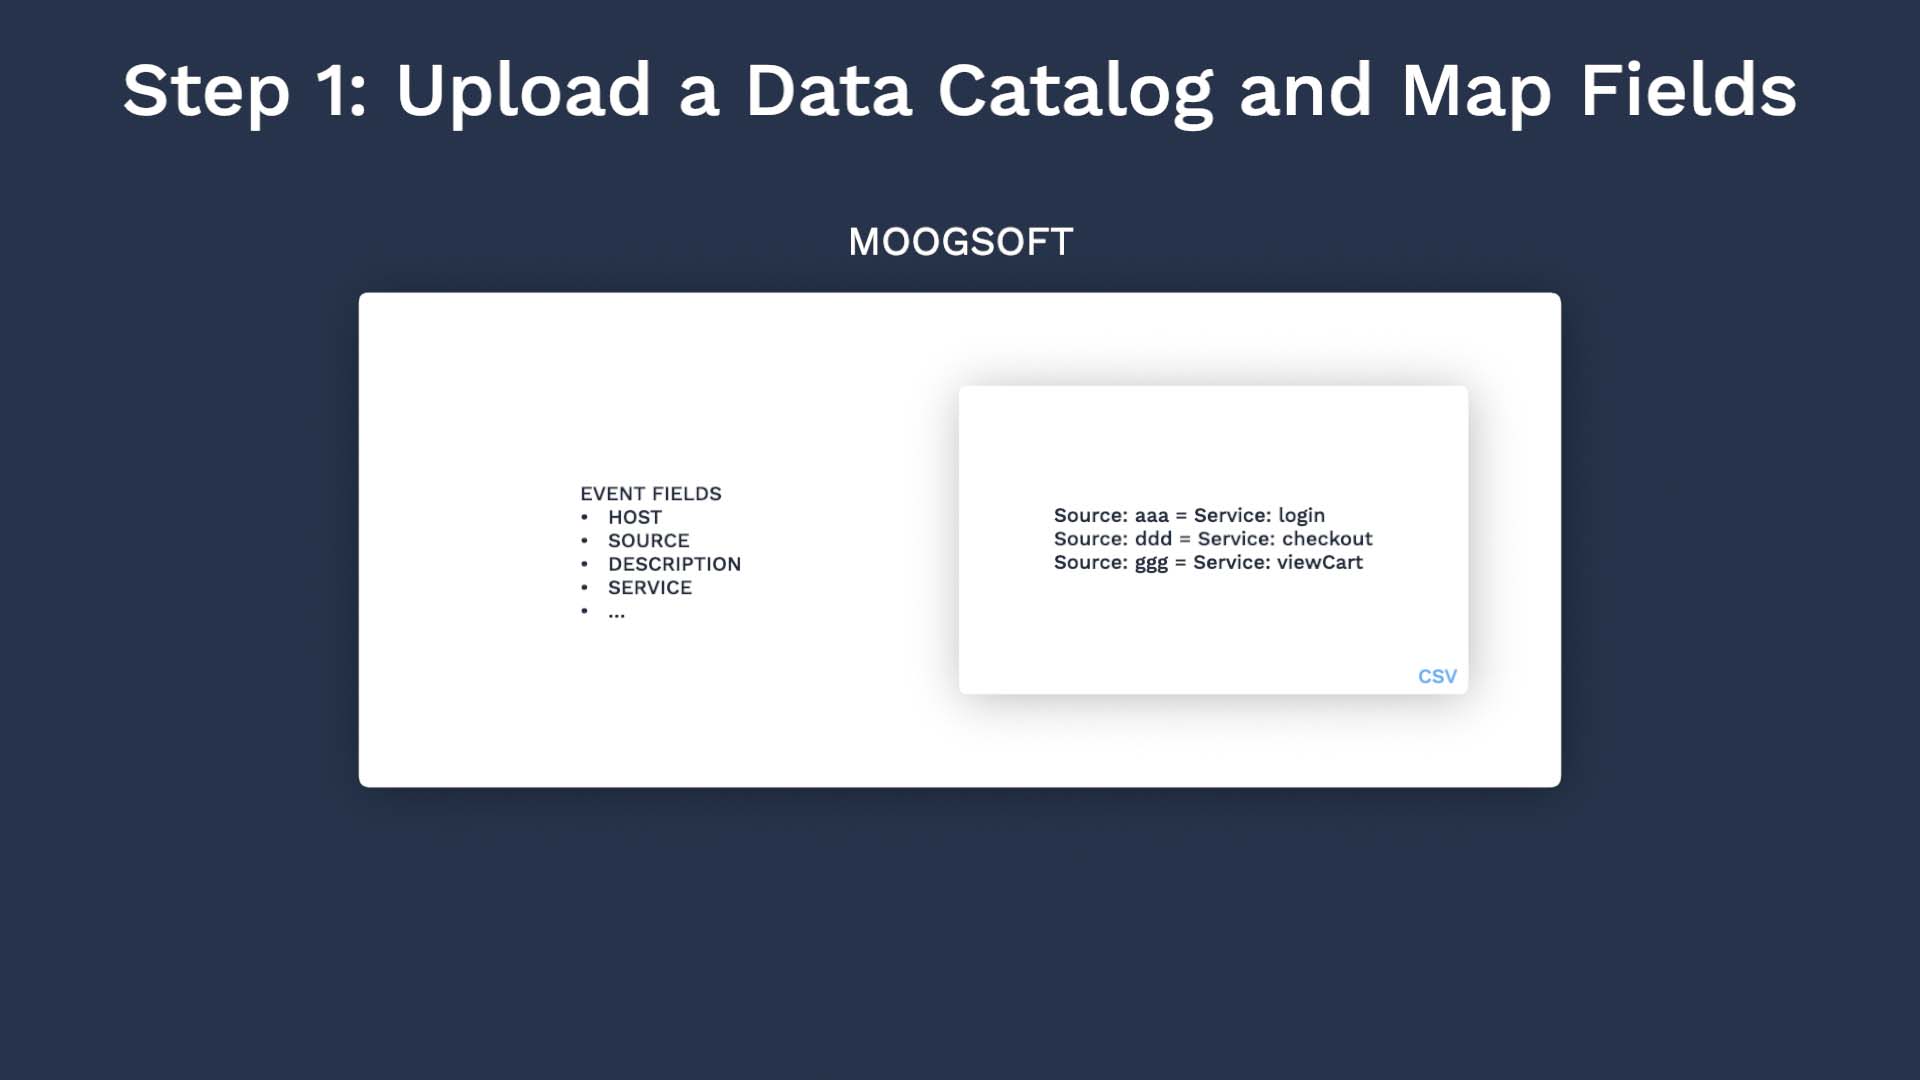
First we need to upload the service data to APEX AIOps Incident Management.
Next set up a process to look up the catalog for the matching source information, to grab the service.
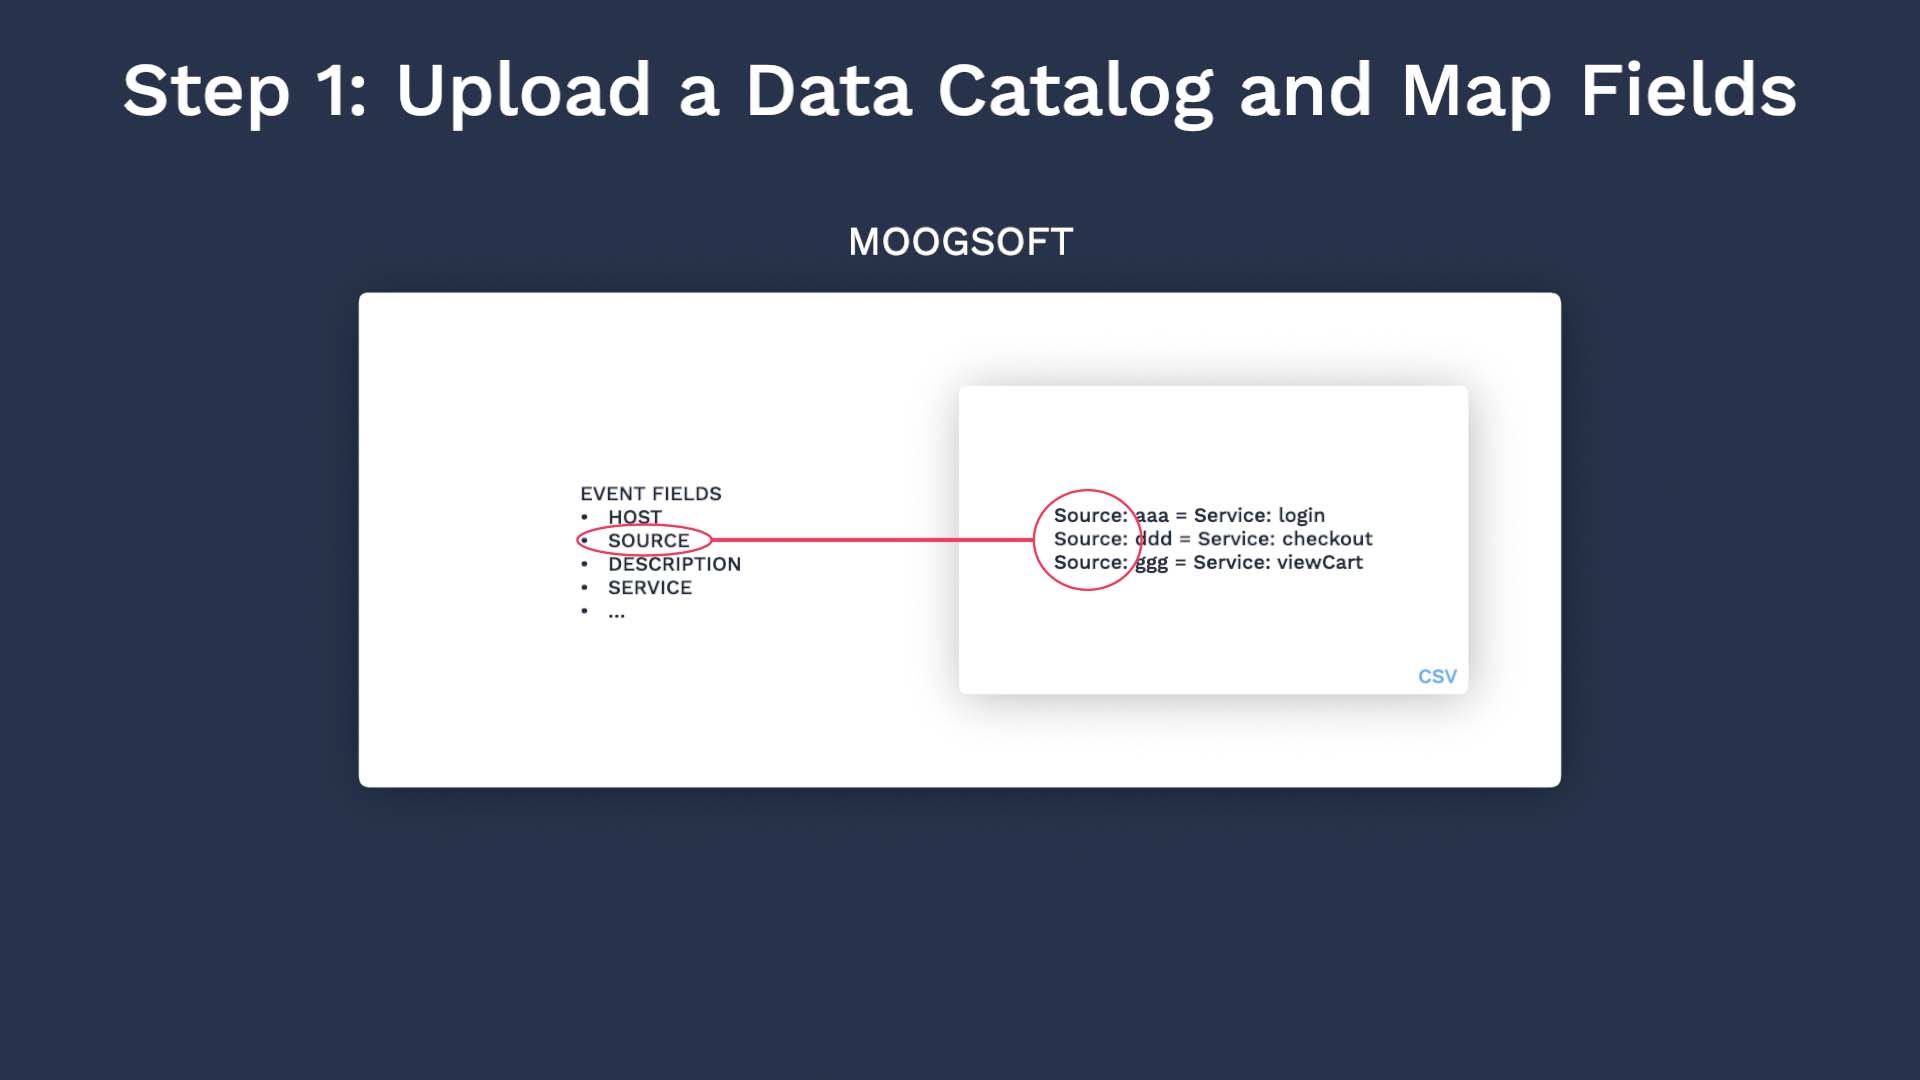
Next set up a process to look up the catalog for the matching source information, and add to events.
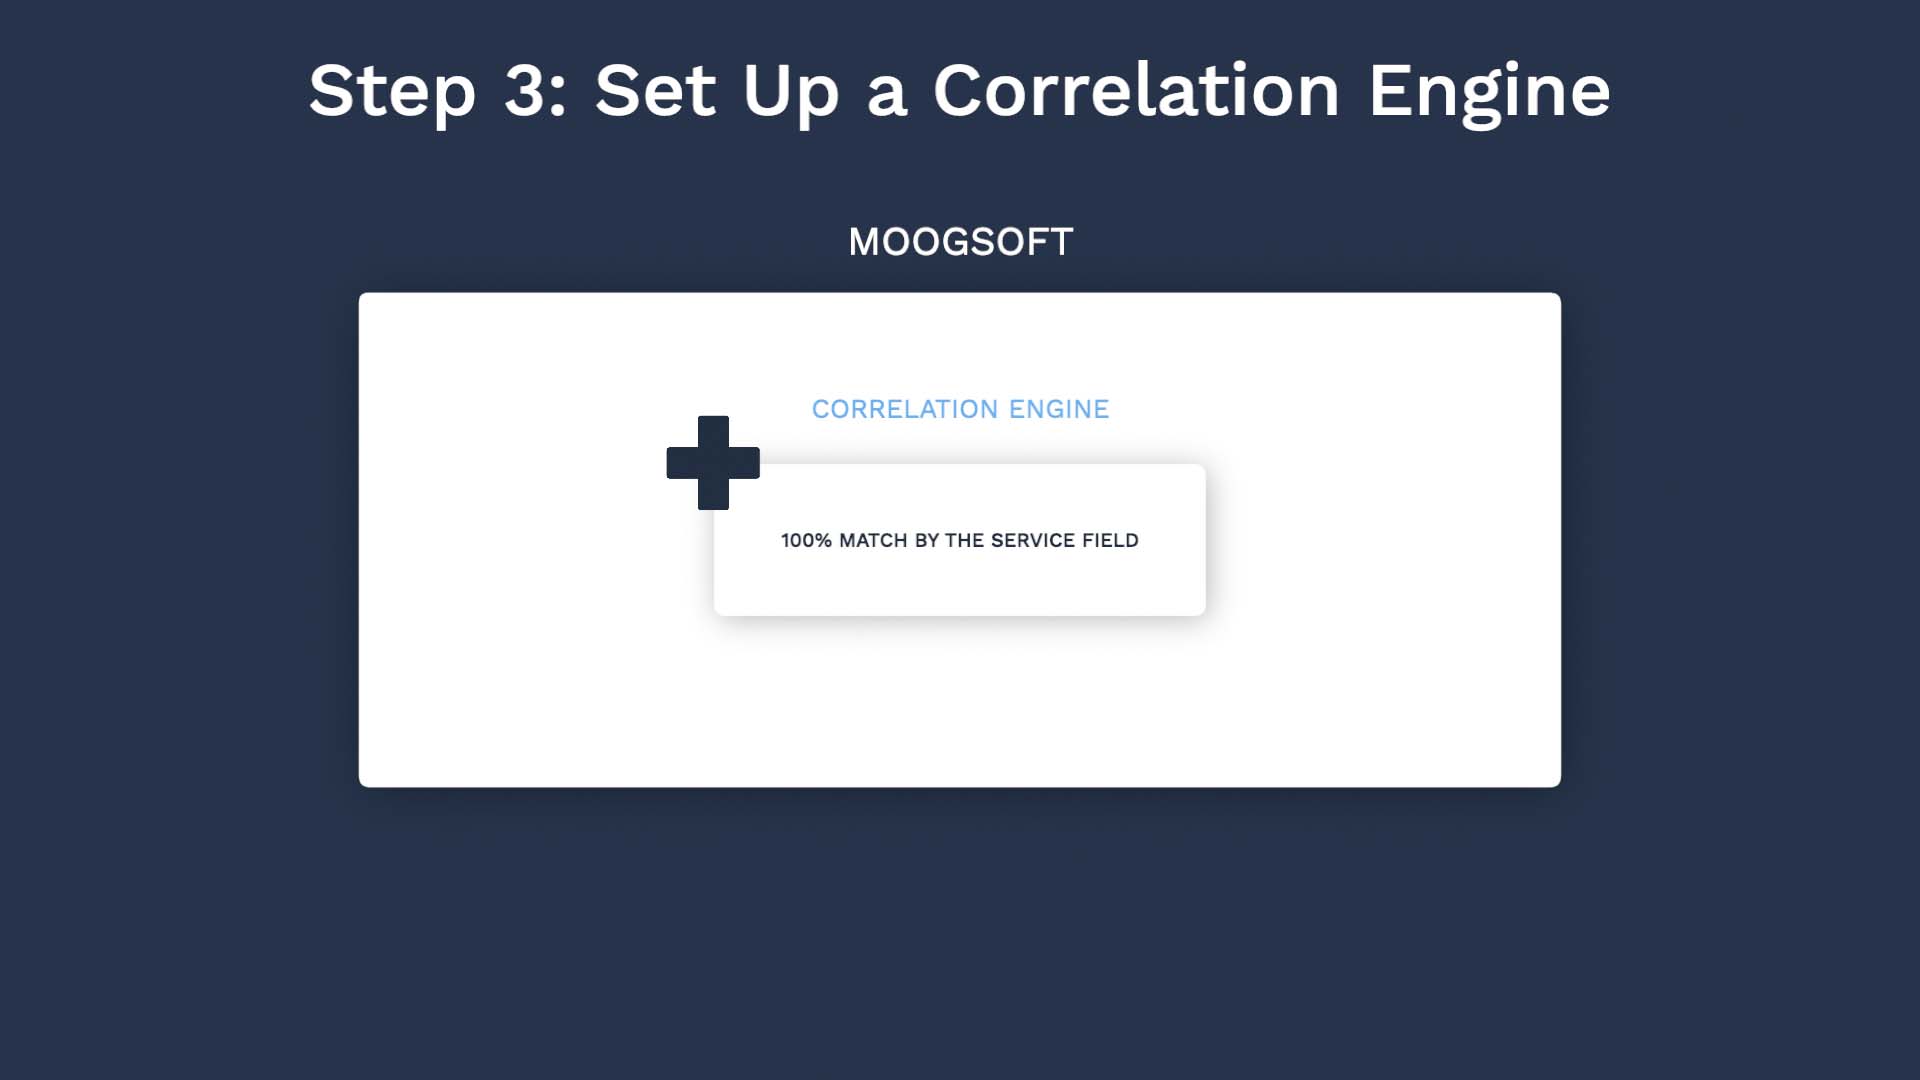
Lastly, cluster alerts by the service field value using the correlation engine.
Let’s step through the process from beginning to end.
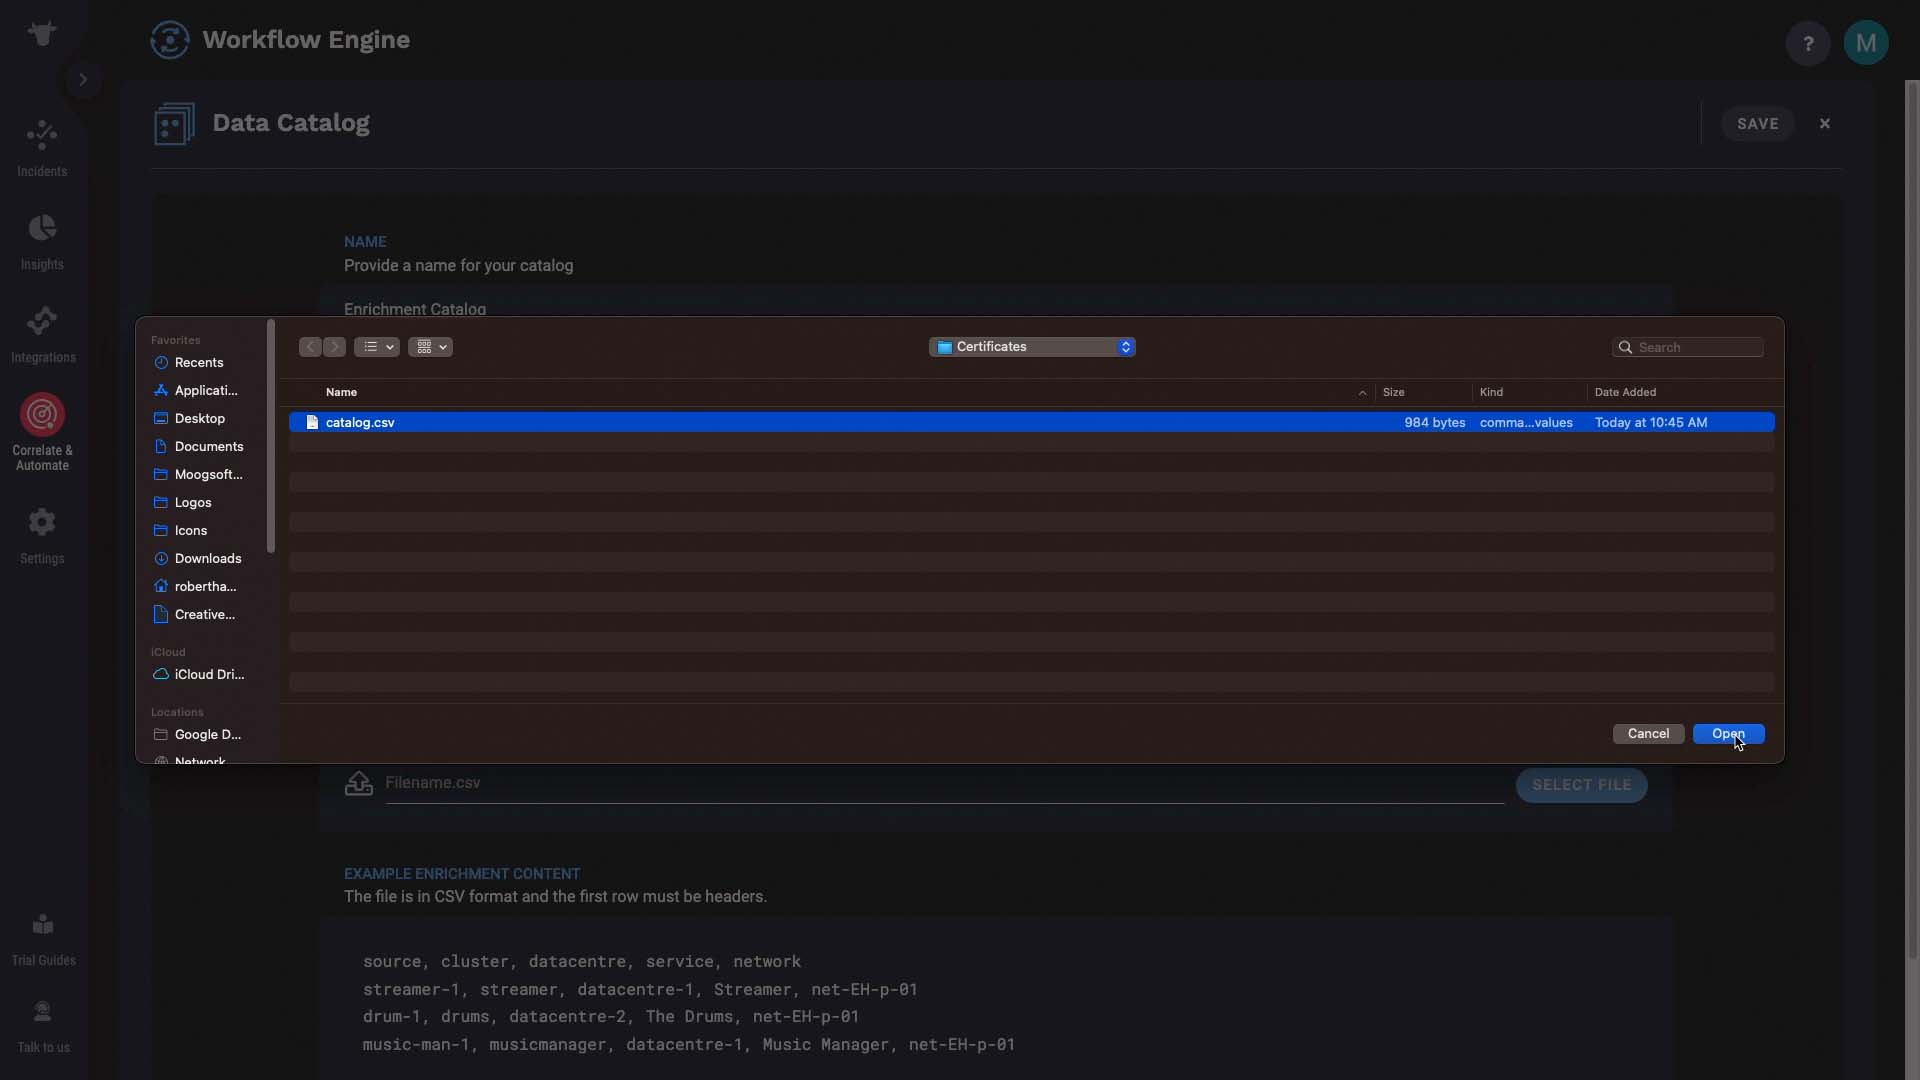
Here’s our data catalog. It’s a csv file that has the Source and Service information.
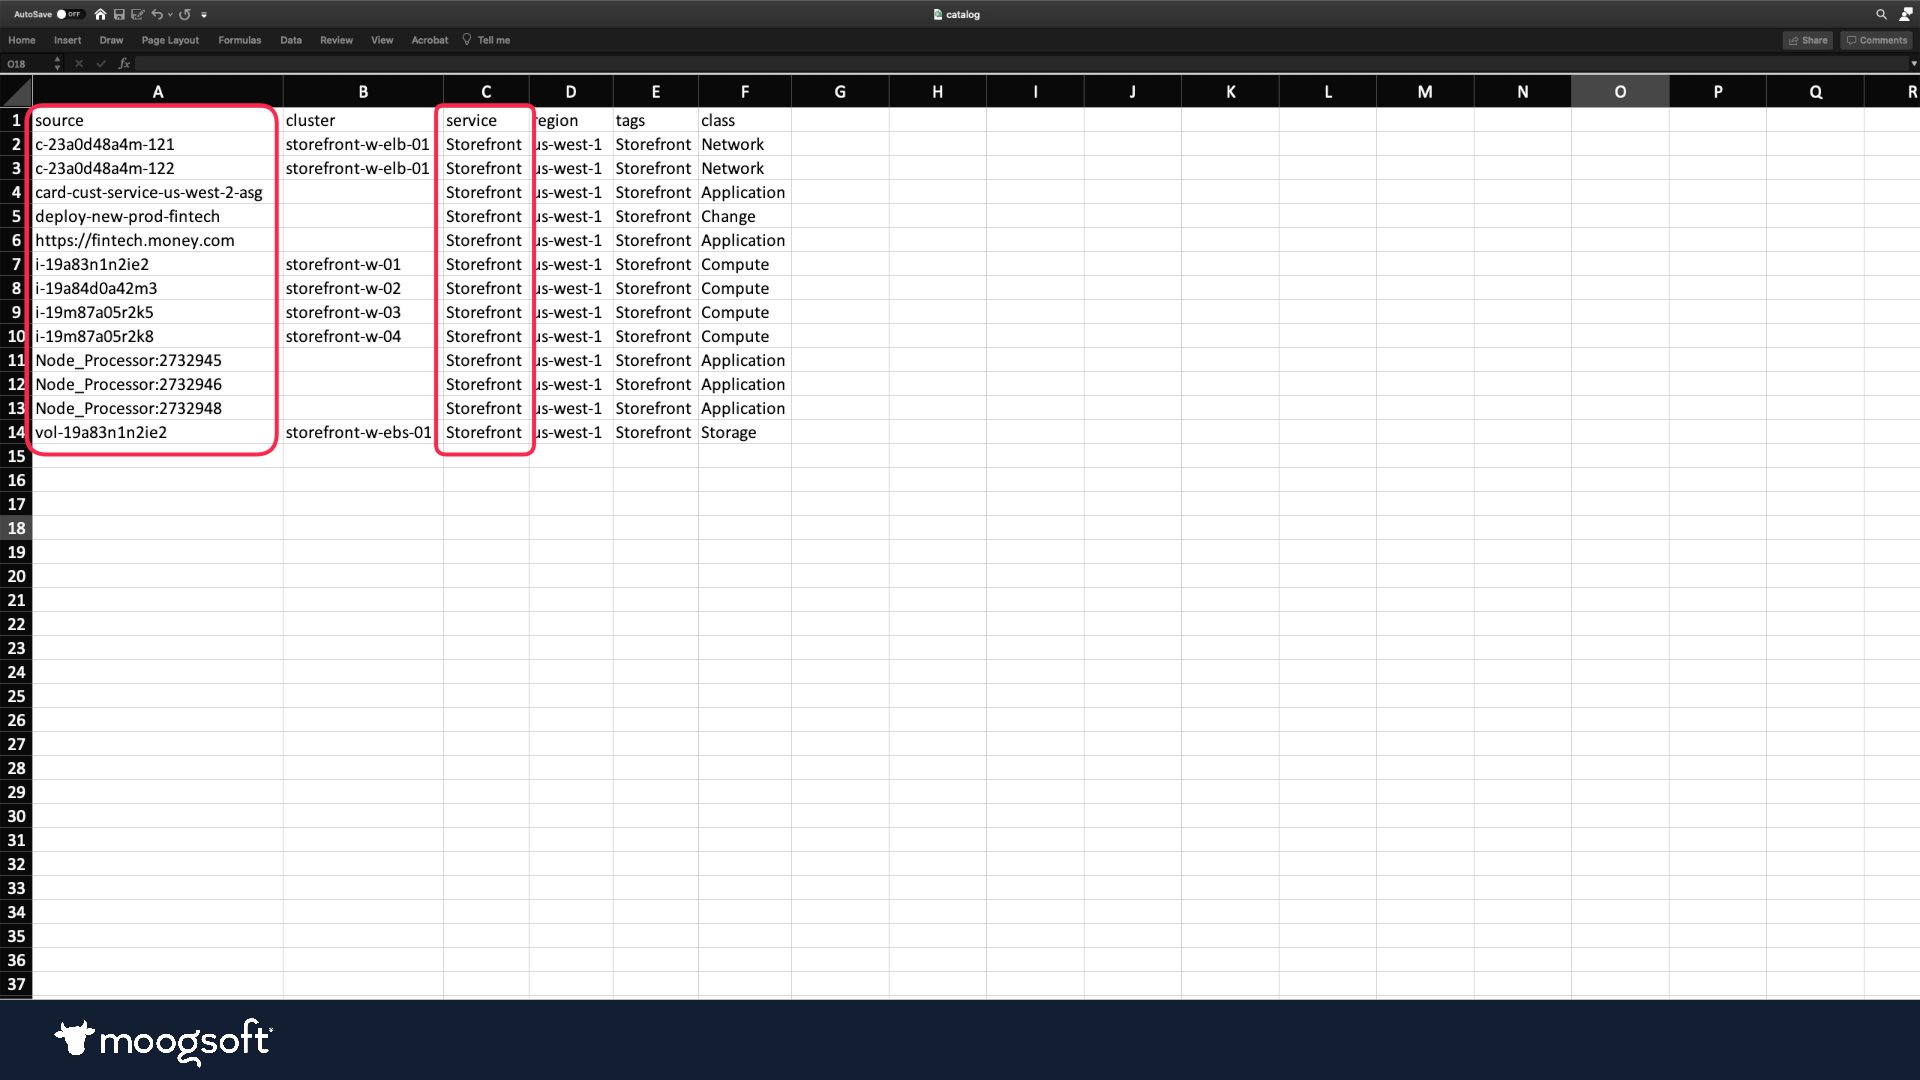
Let’s go to data catalog, and upload this.
Give a name and description other administrators would recognize.
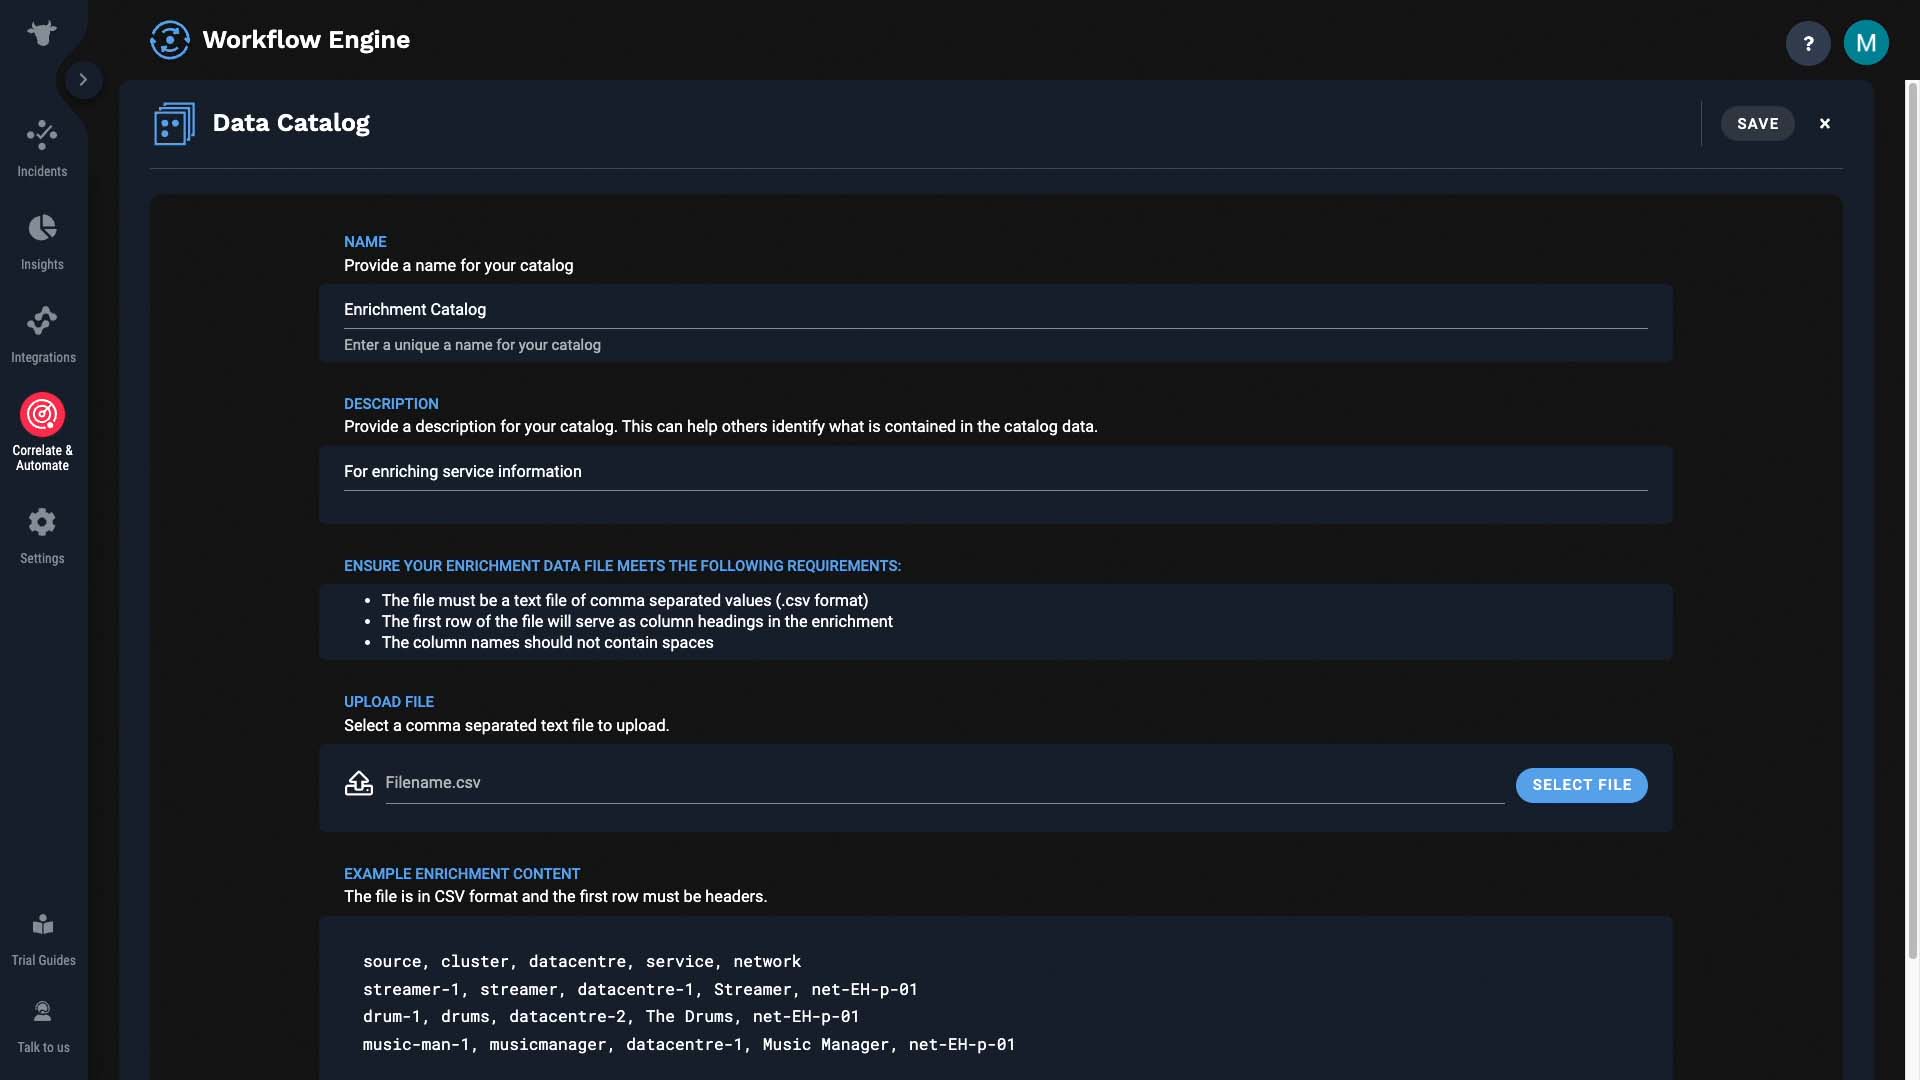
Here’s the file we just looked at.
Good. Looks like our data made it in.
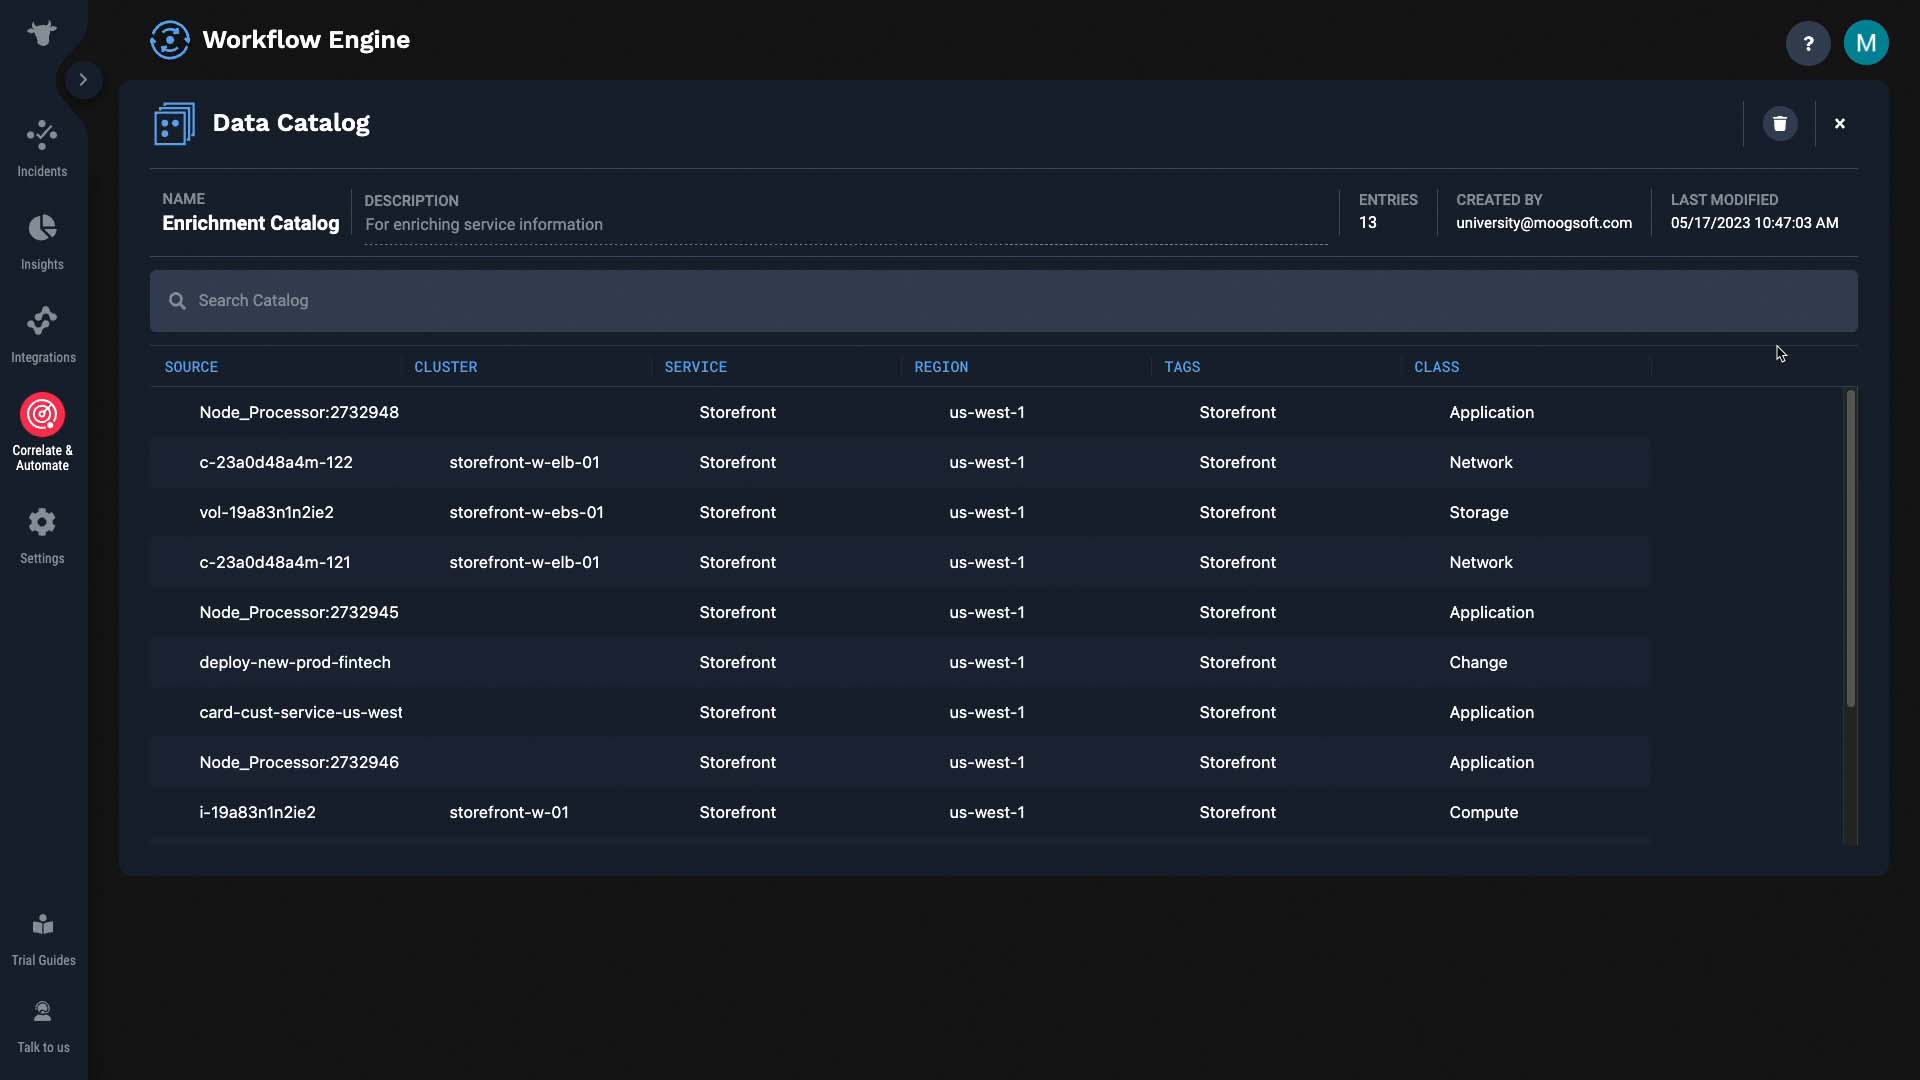
Now we need to tell APEX AIOps Incident Management which field to query by.
For that, we need to setup a workflow.
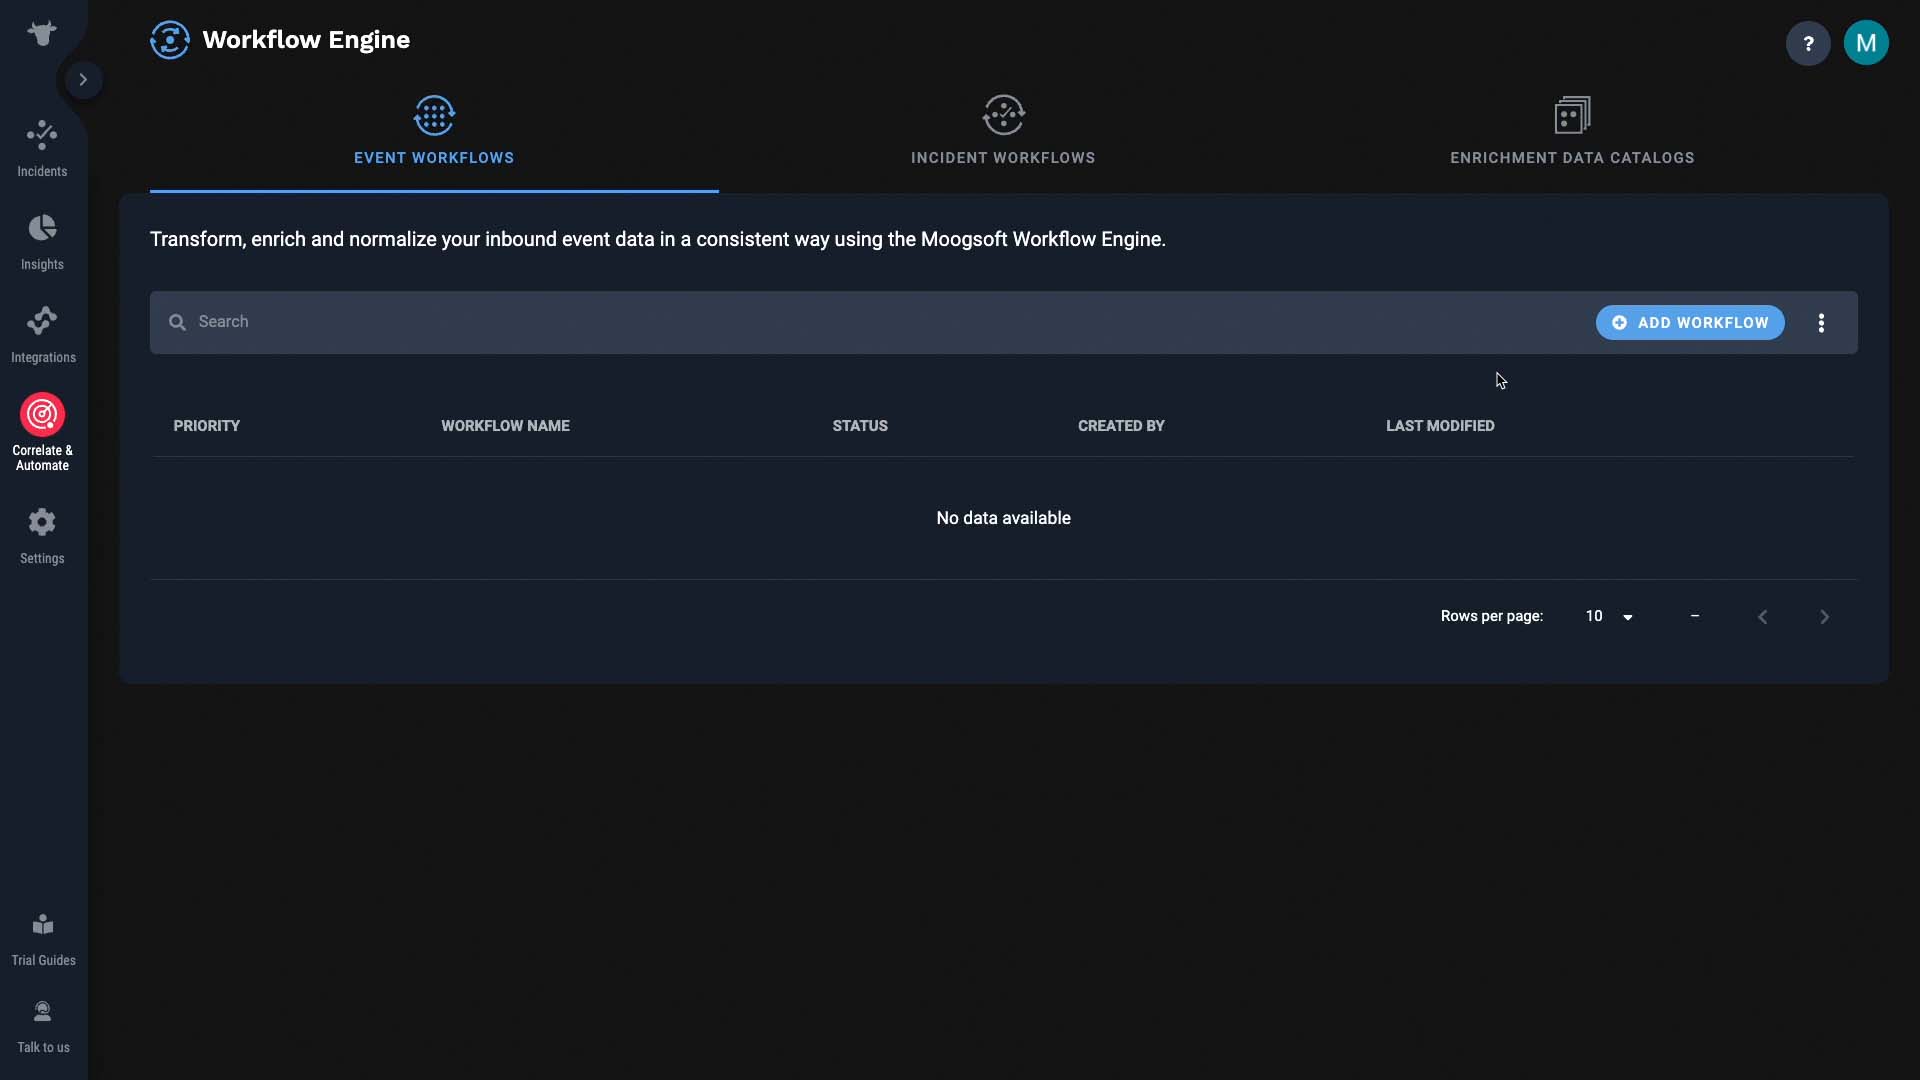
This workflow is for events.
We’ll process all incoming events, so we don’t need to set up a trigger.
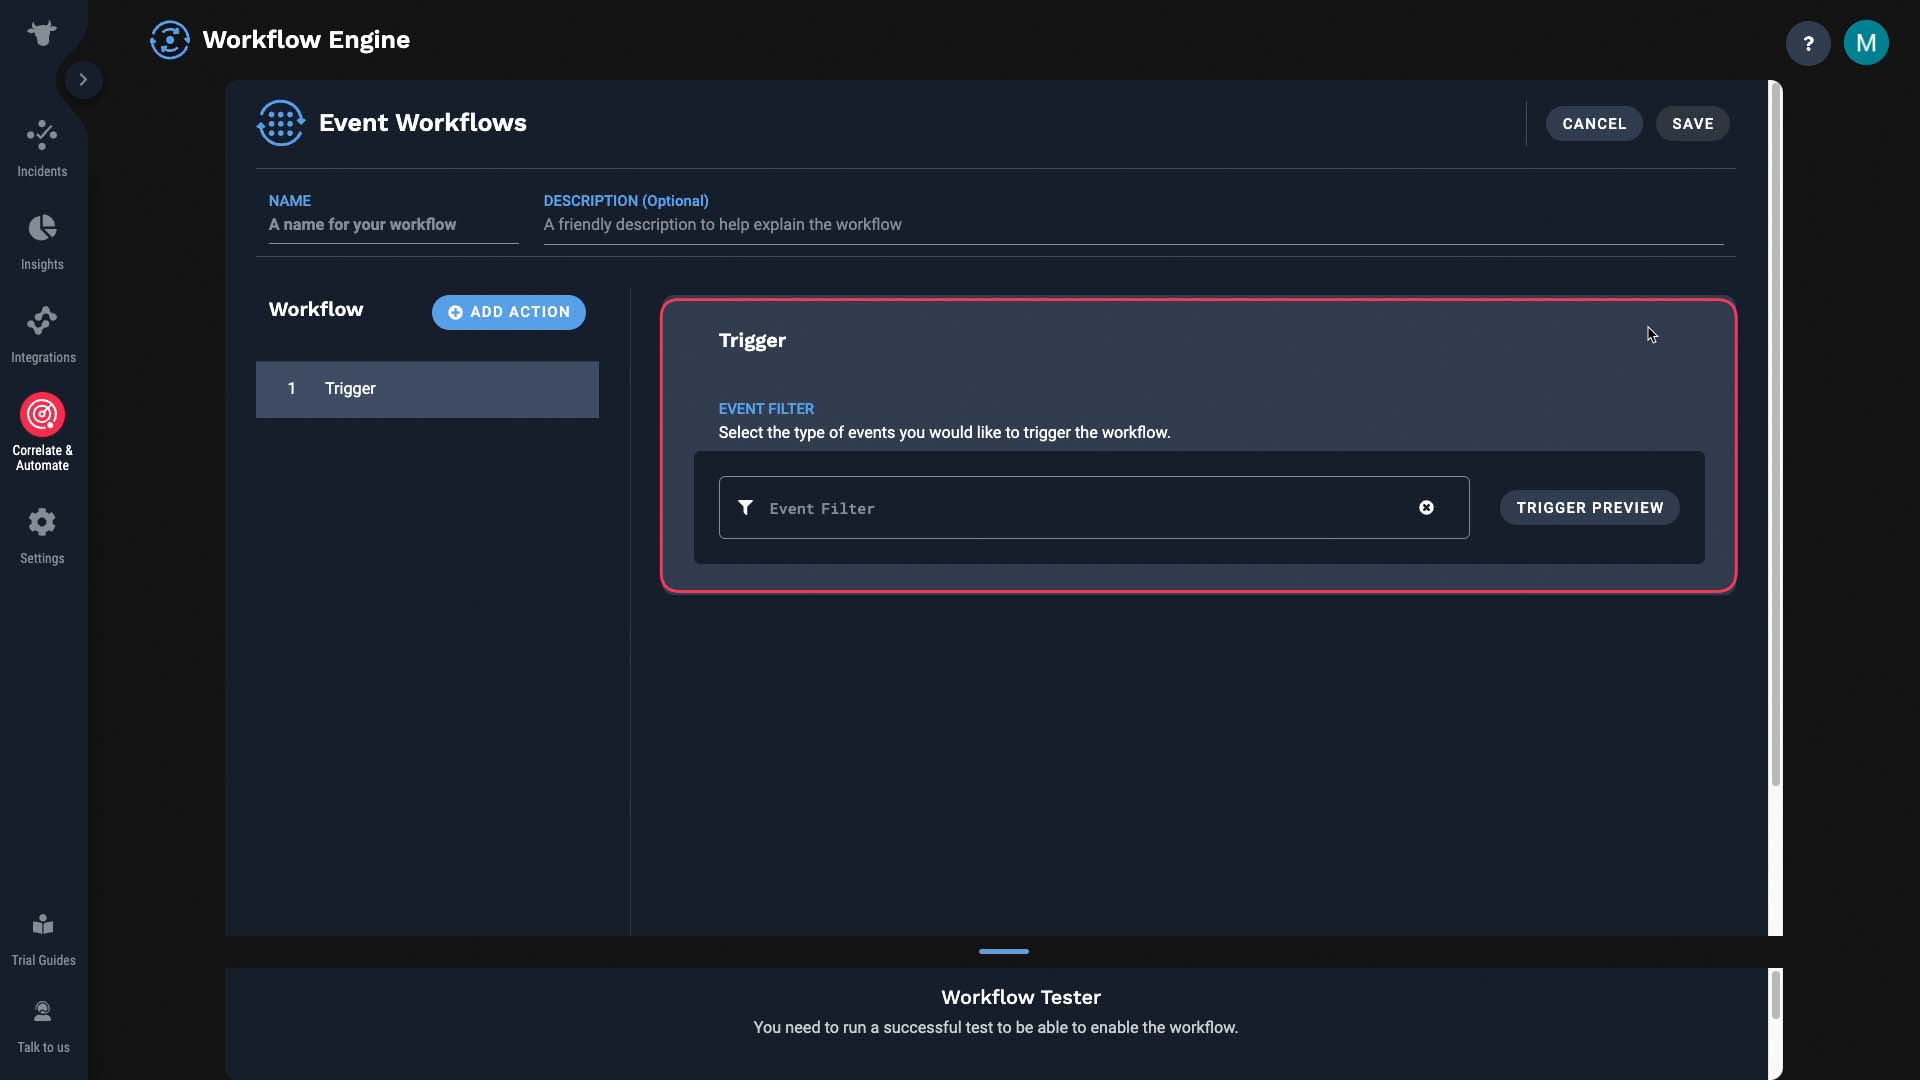
But let’s say you know only the events from a certain data source are missing the service information, then you can set up a trigger so only the applicable events will trigger this workflow. Once an event enters this workflow, we want to query a catalog.
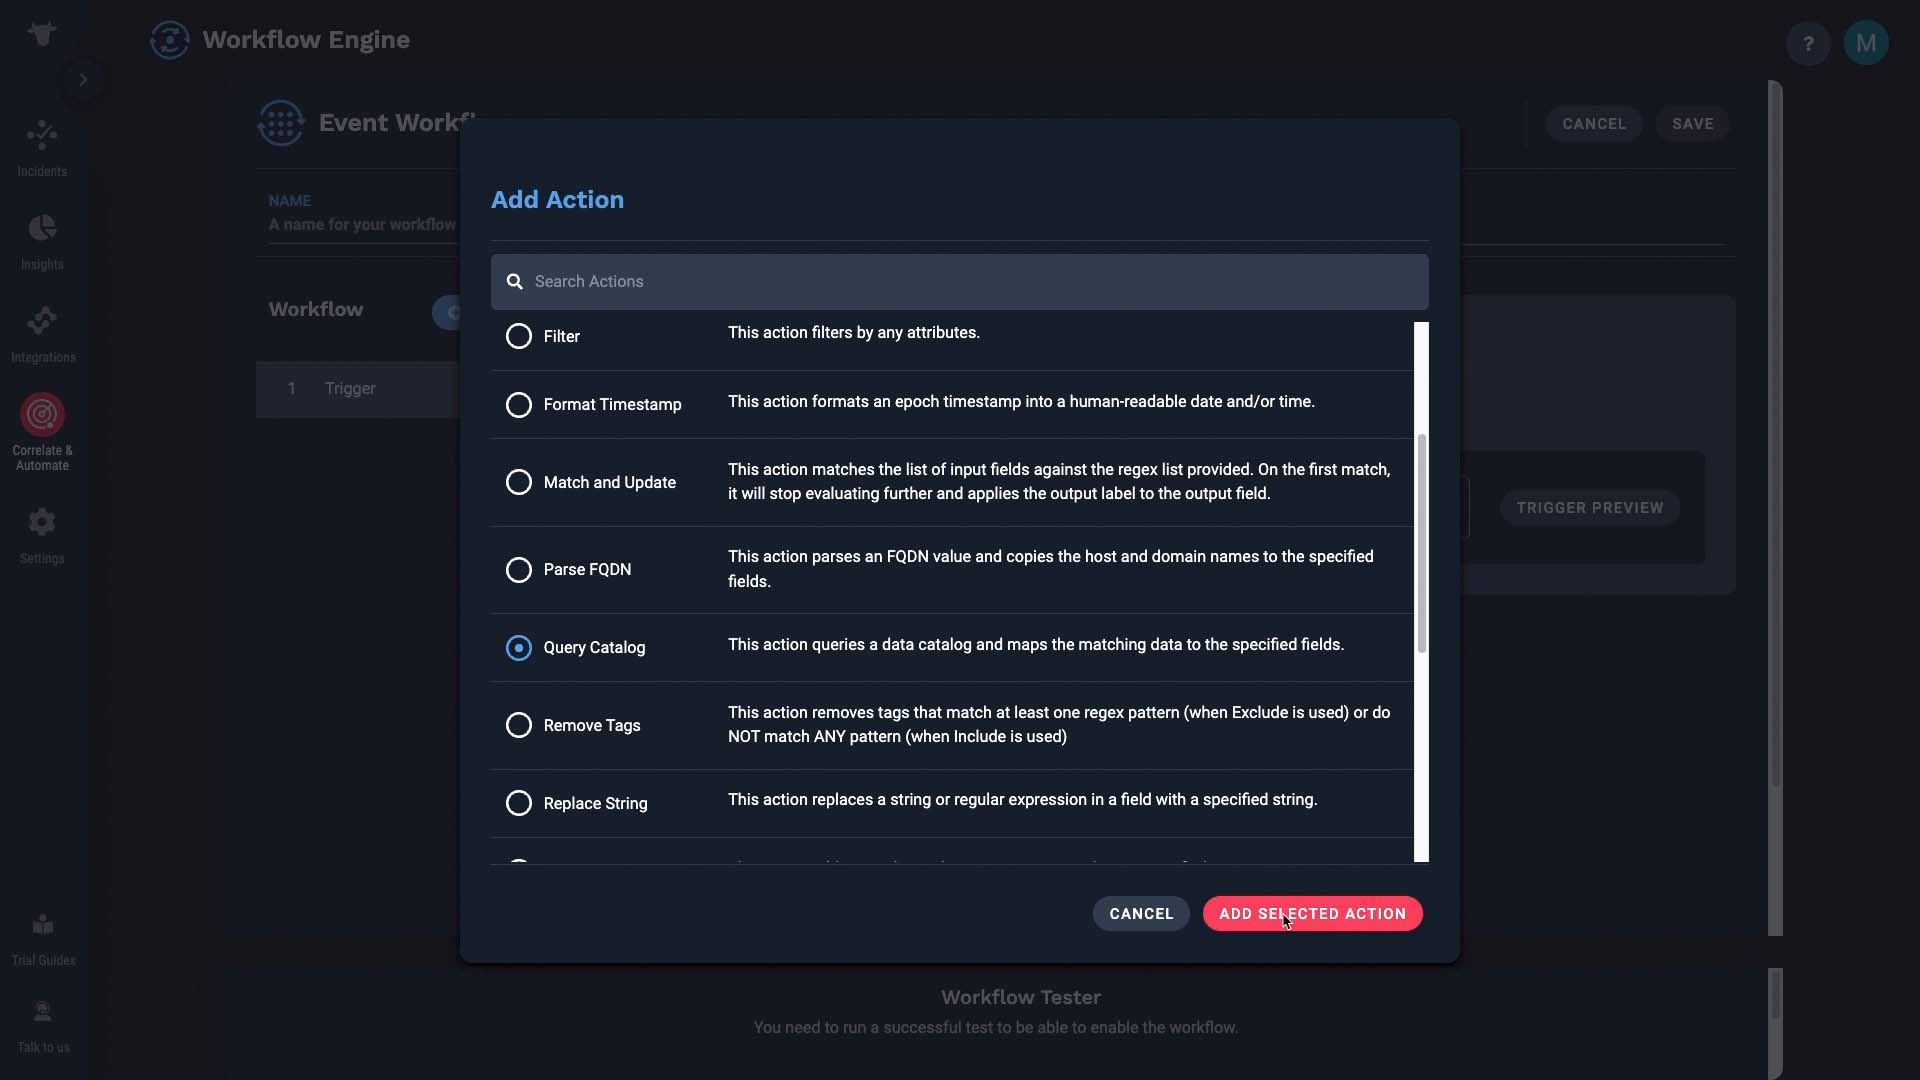
Pick the catalog you want to reference.. here’s the csv we just uploaded. (select from the catalog name dropdown)Now we are going to map the fields.
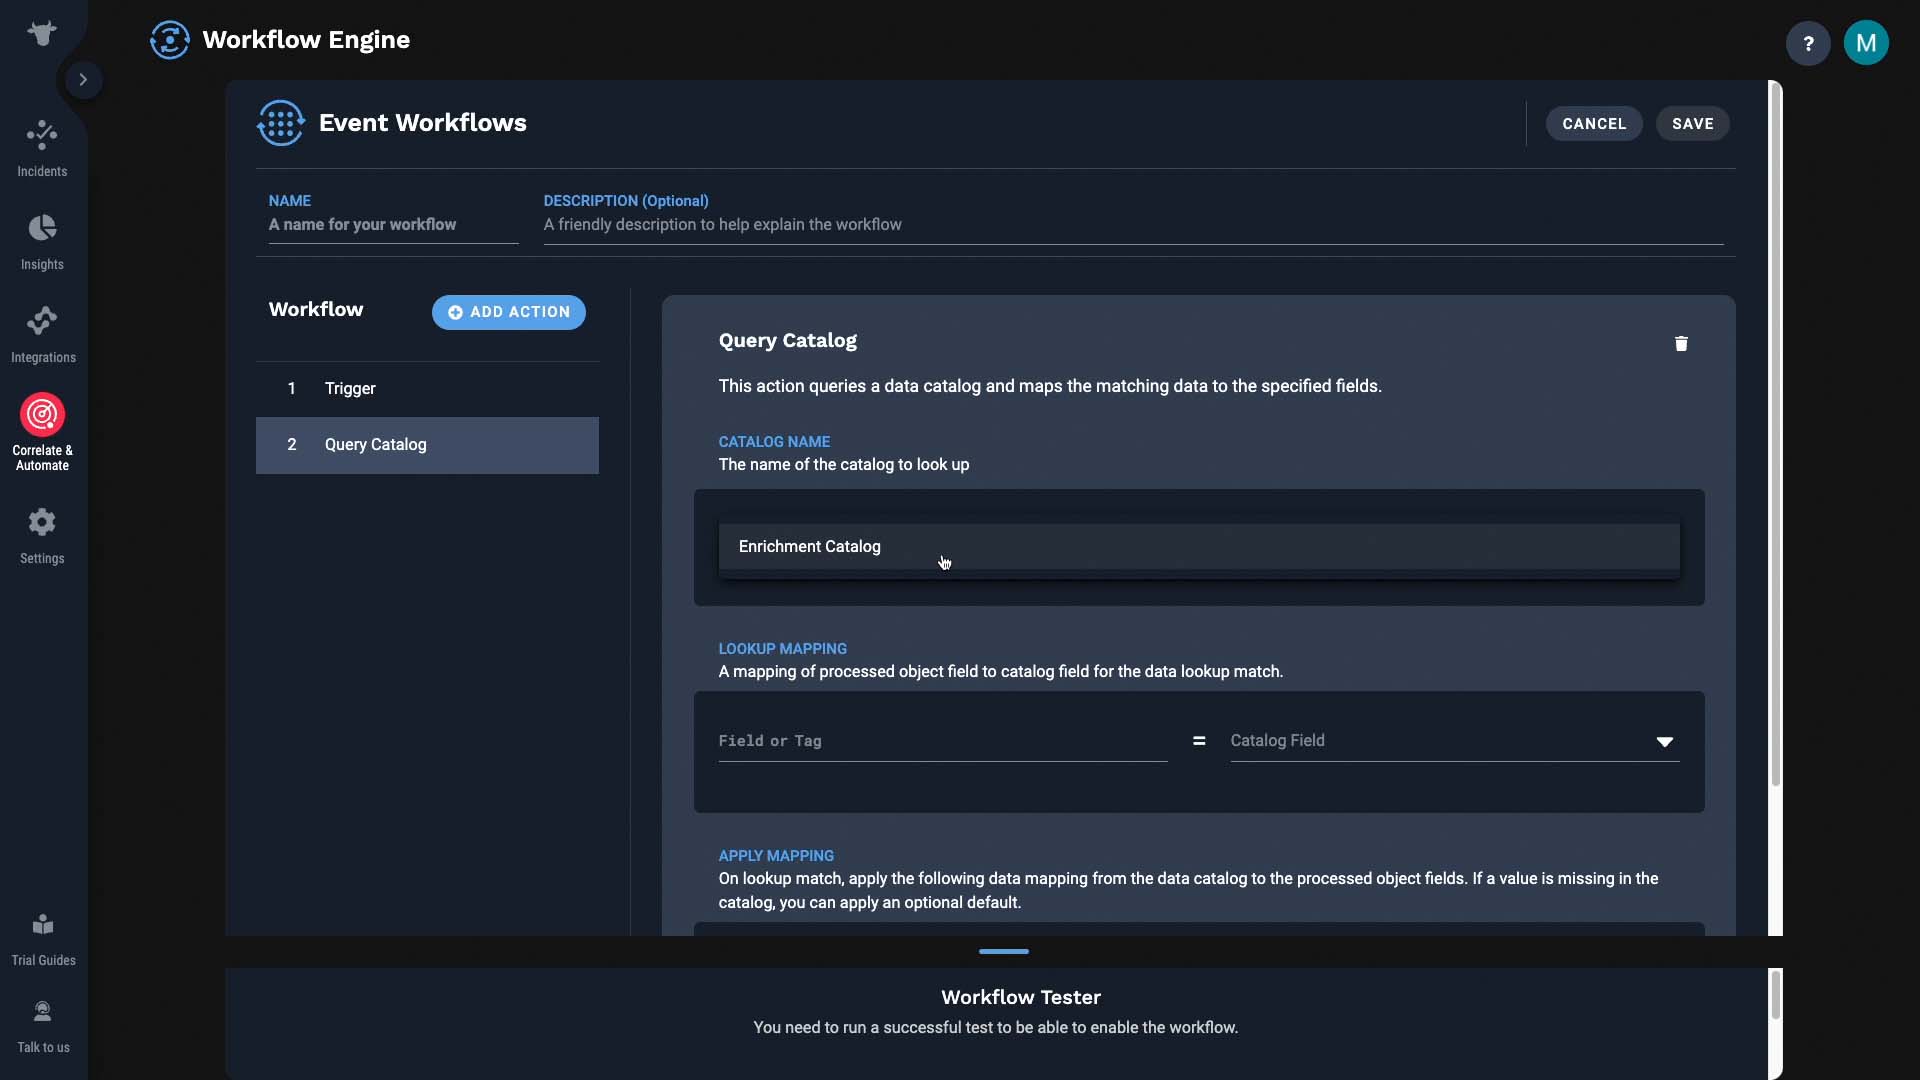
First, we need to tell Incident Management to query by the source value. All default fields in Incident Management are available under the base field category, and the source field is one of them. And, source information is also stored in the data catalog, under the source field.
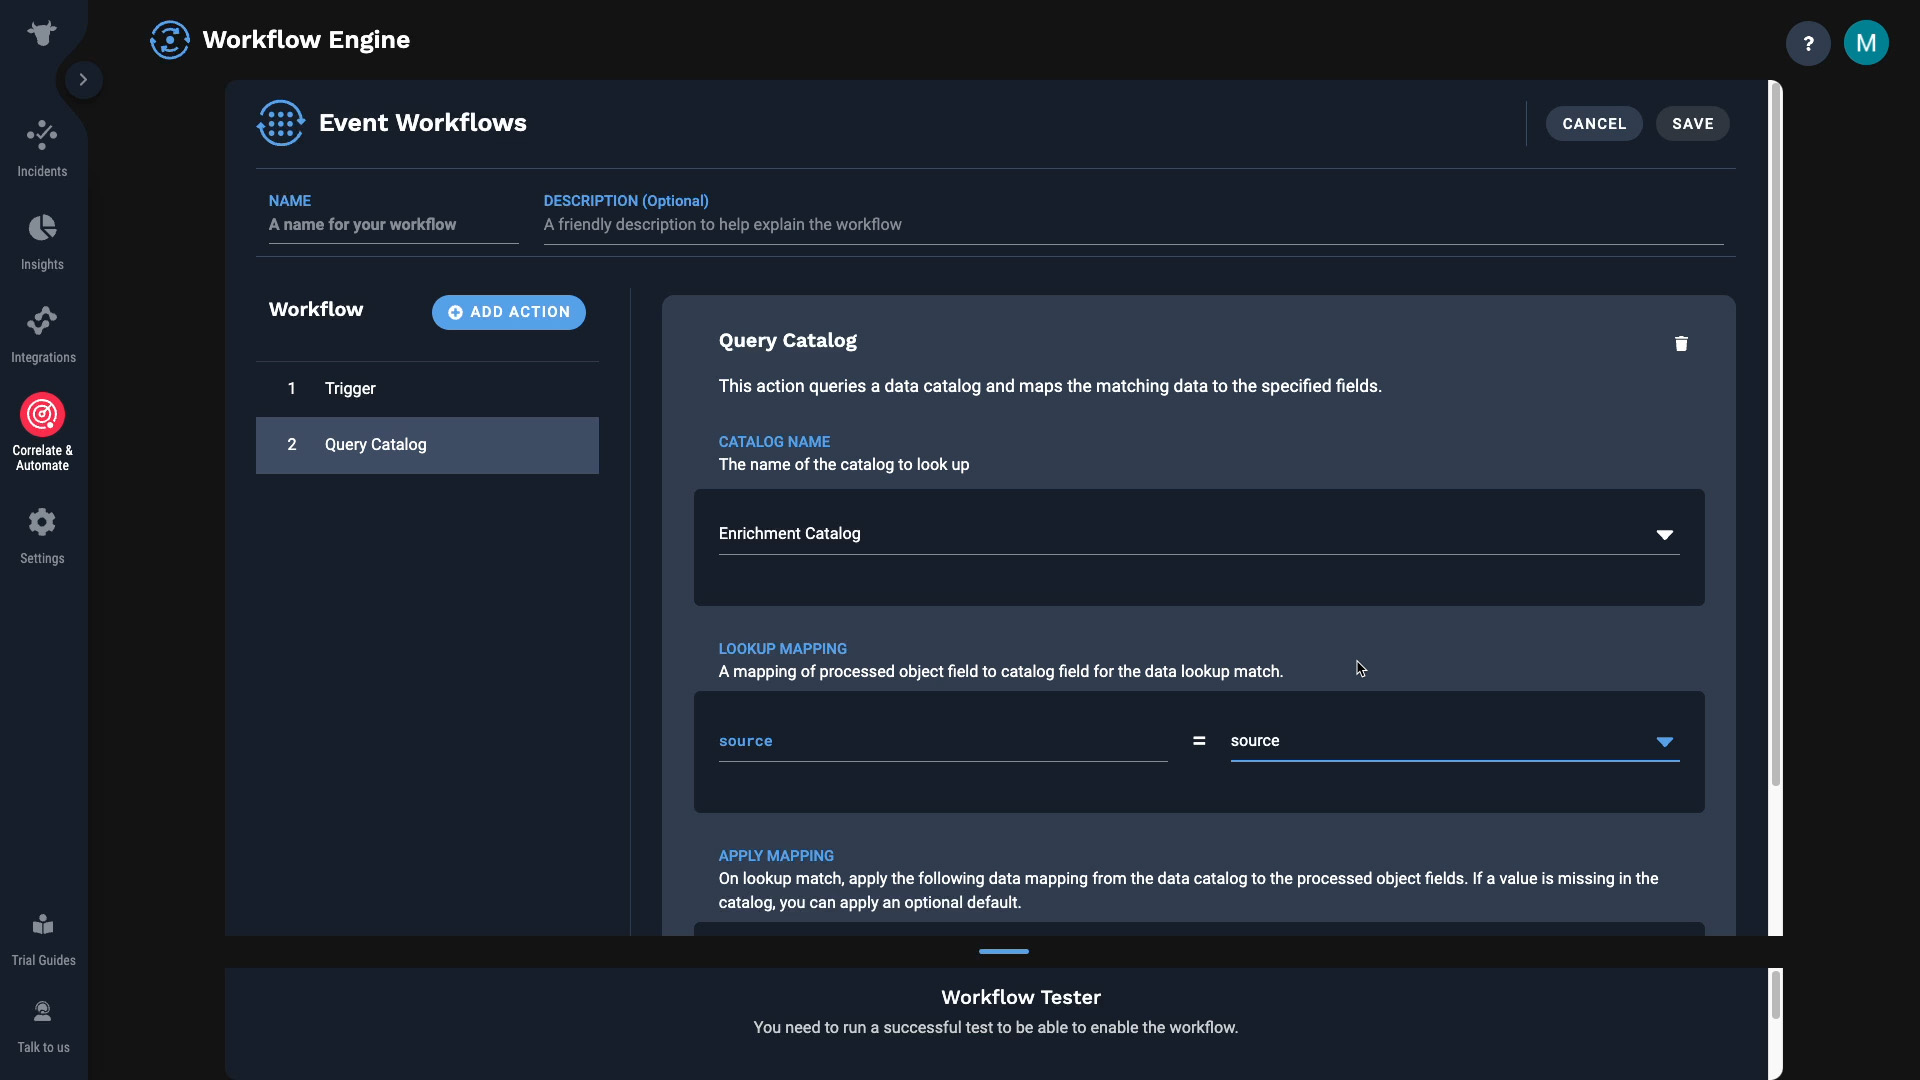
Next, specify what field value needs to go where. So in our case, we want to retrieve the service information from the data catalog, and feed that value into the Service field which is one of the base fields in Incident Management. Also, IF the data catalog has no value for the particular source, we’ll fill in “unknown."
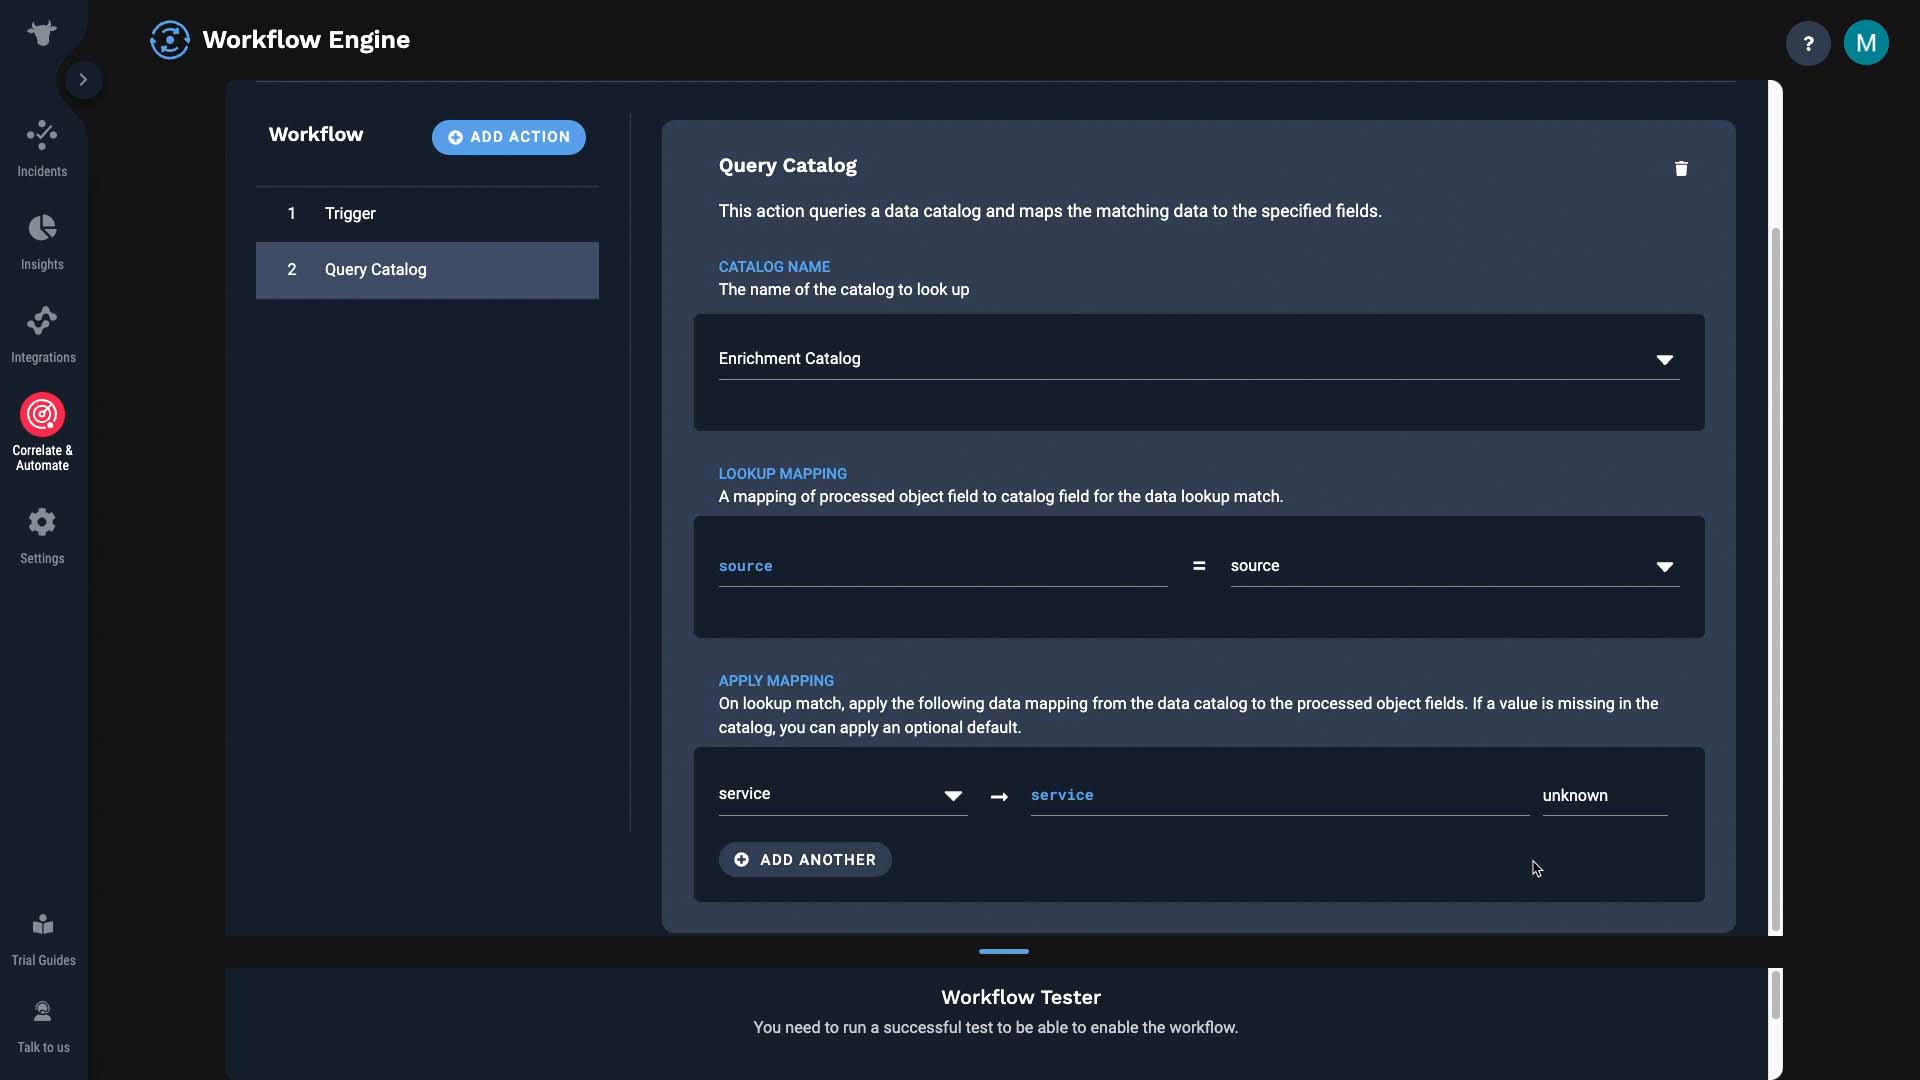
Once you name the workflow, you can test it. Testing a workflow is easy. Just pull this up and simulate an input here.
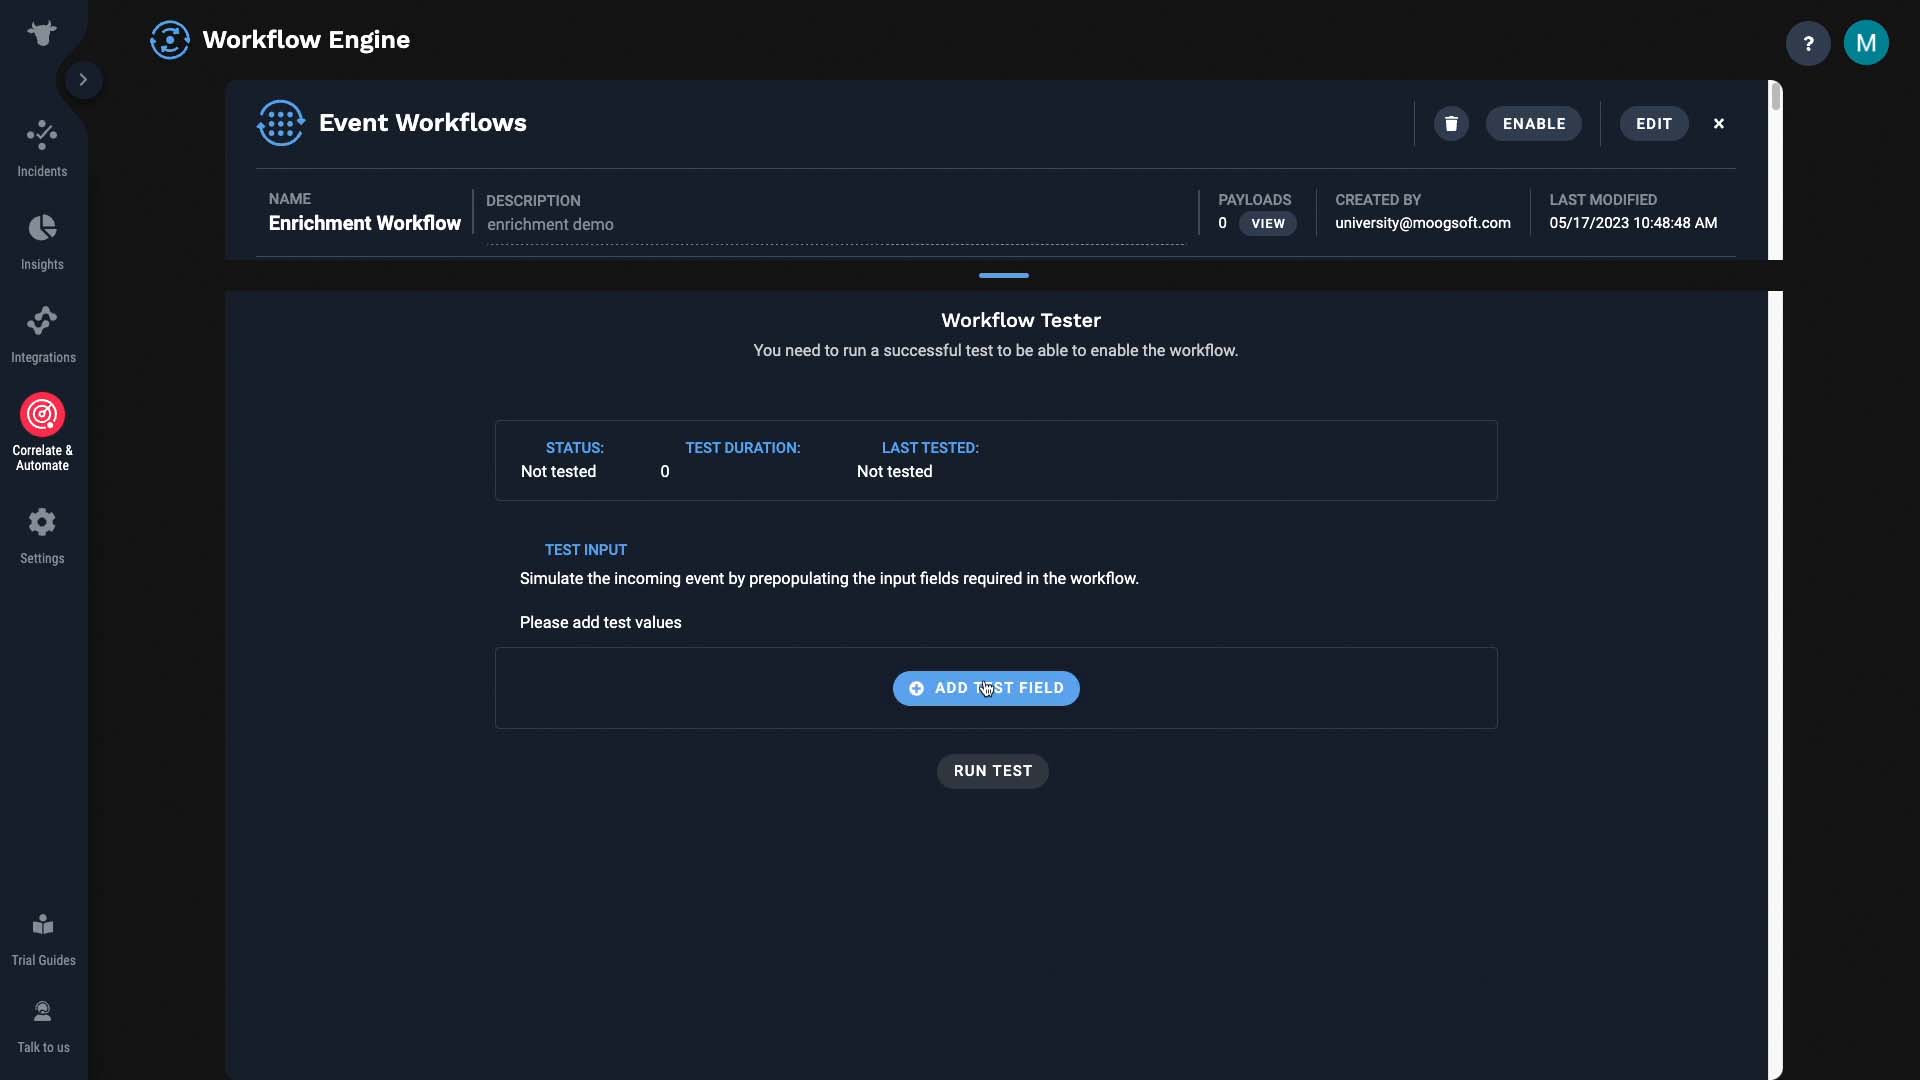
So let’s send in an event with one of the existing sources in the data catalog.
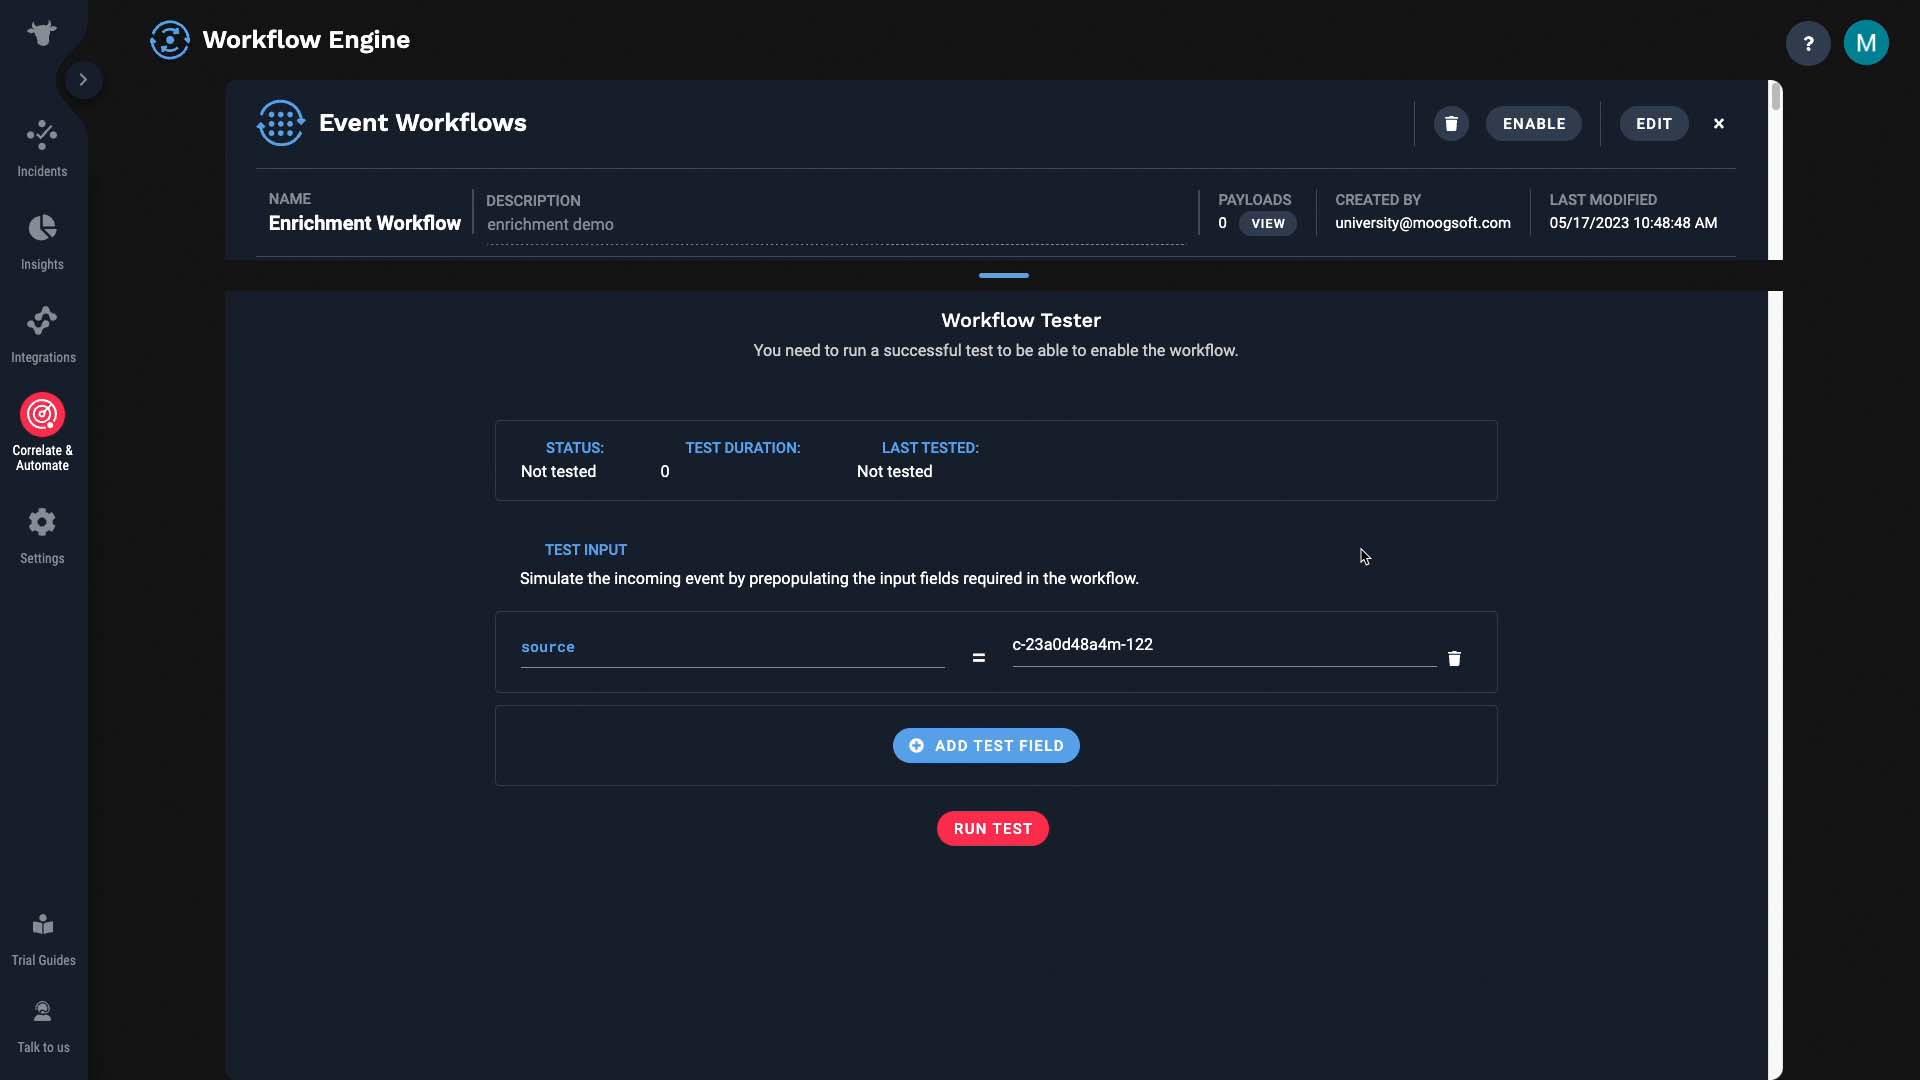
OK, it didn’t error out.
And now, although the event we sent in only had a source info, now it has the service information.
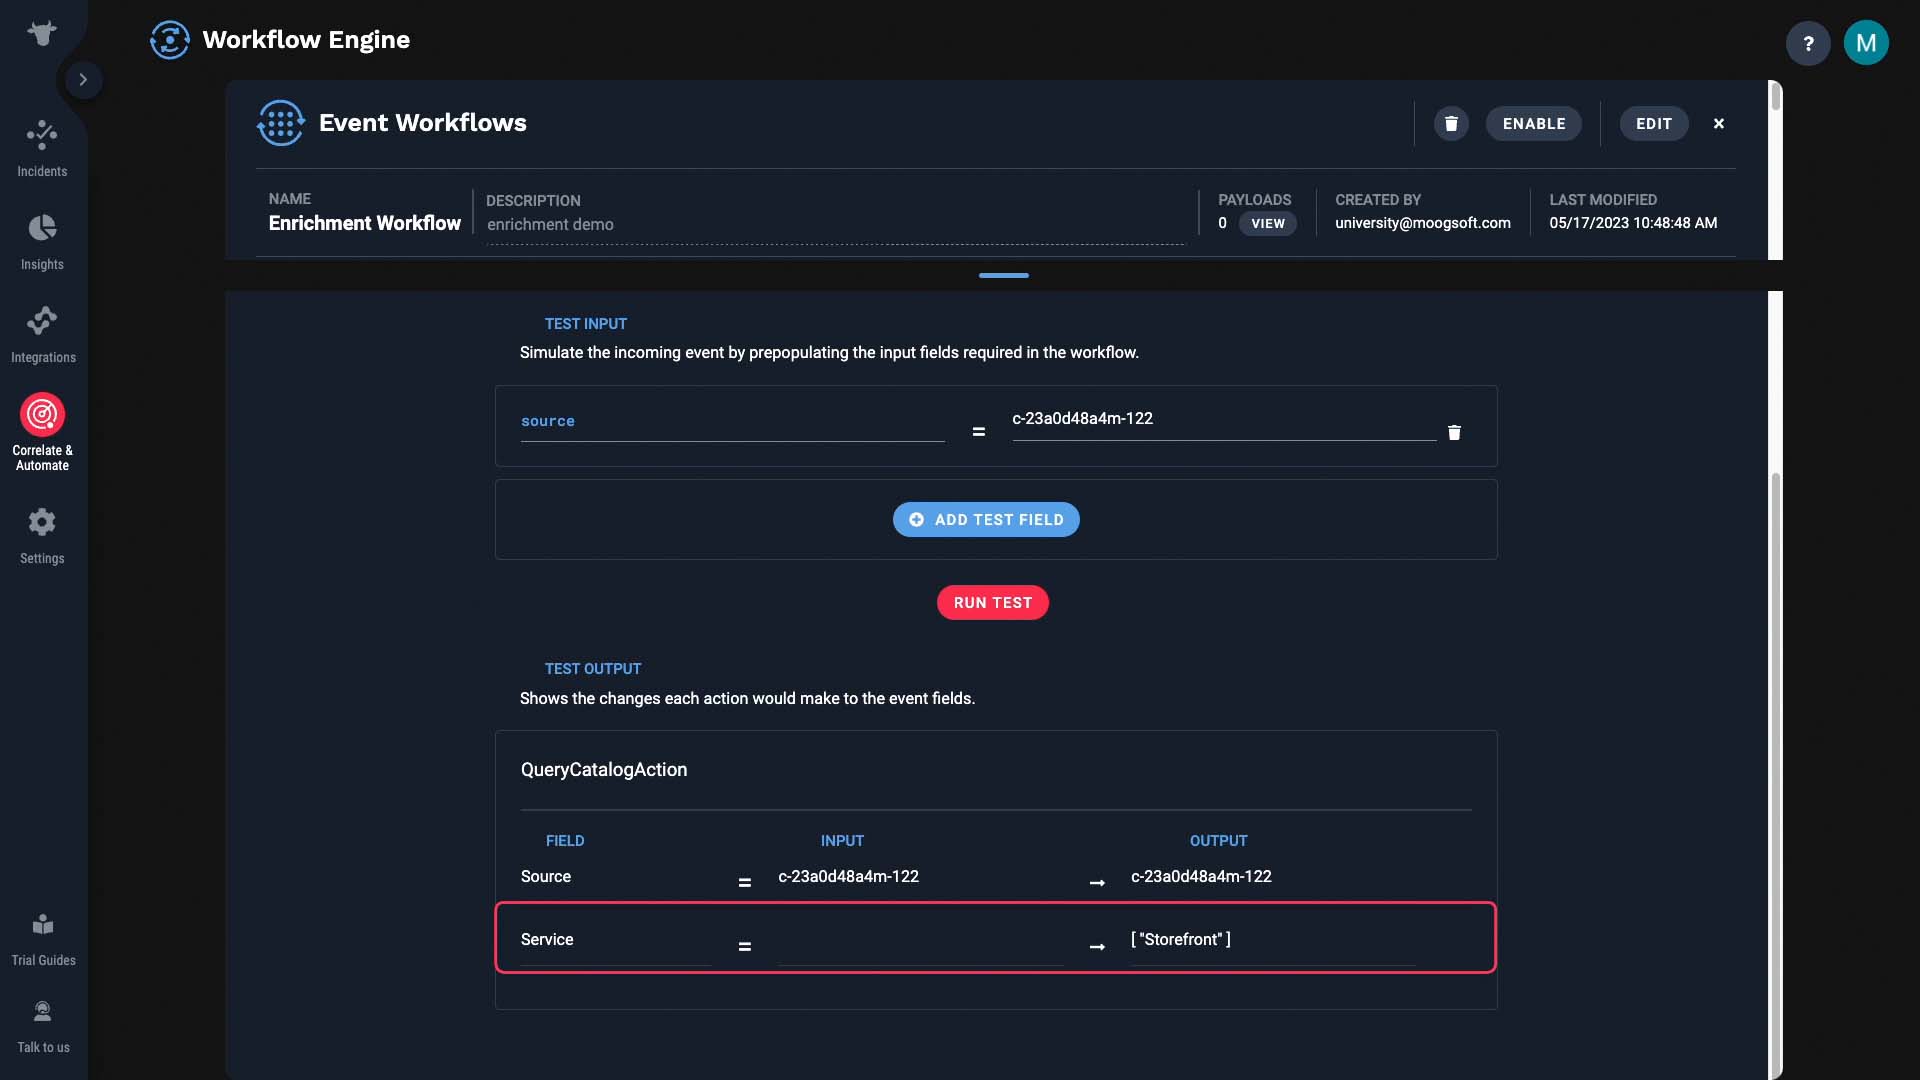
Also note that you can configure enrichment programmatically using our APIs. Consult the Catalog API and Workflow Service API sections in our documentation.
Finally, set up a correlation engine to cluster by service. We have a separate tutorial that explains how to add a new correlation setting, so consult that for a step by step instruction. Basically this correlation will process alerts that match the scope filter, and cluster them if they have identical service information into incidents.
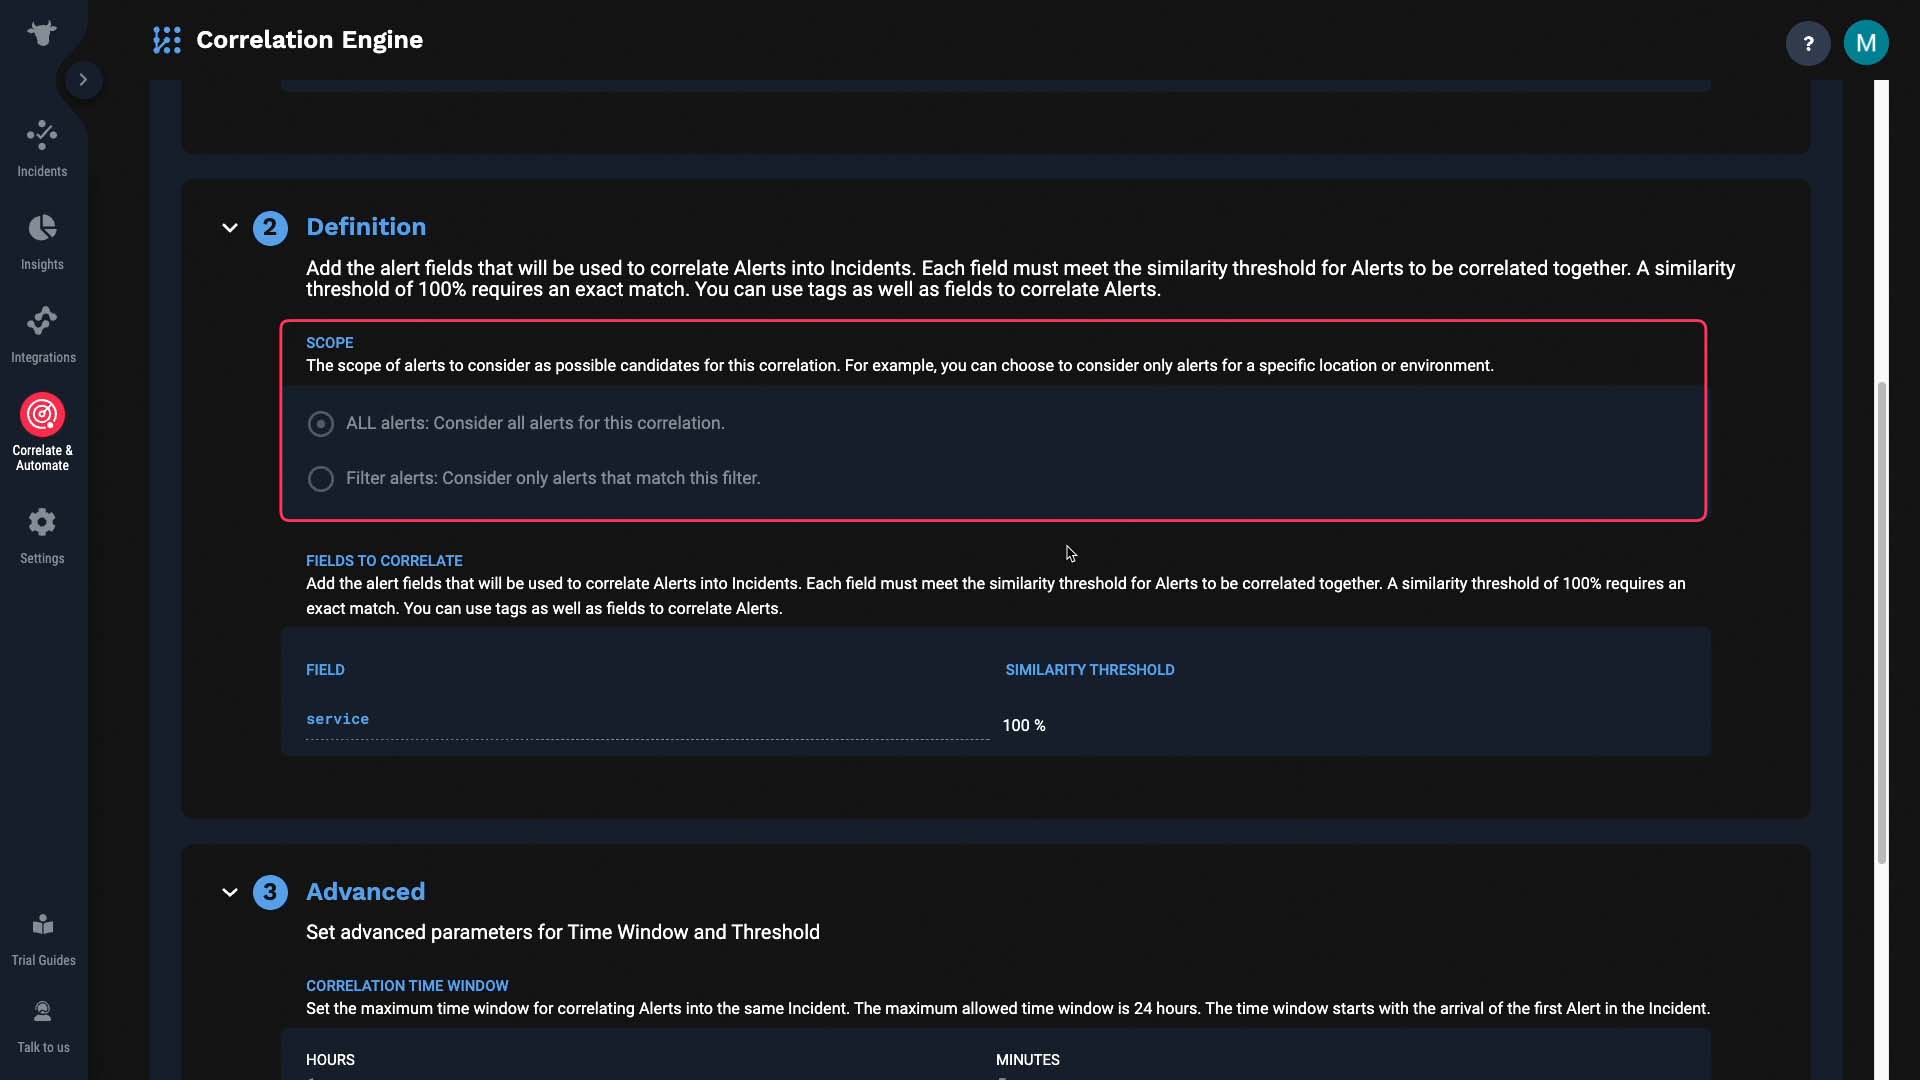
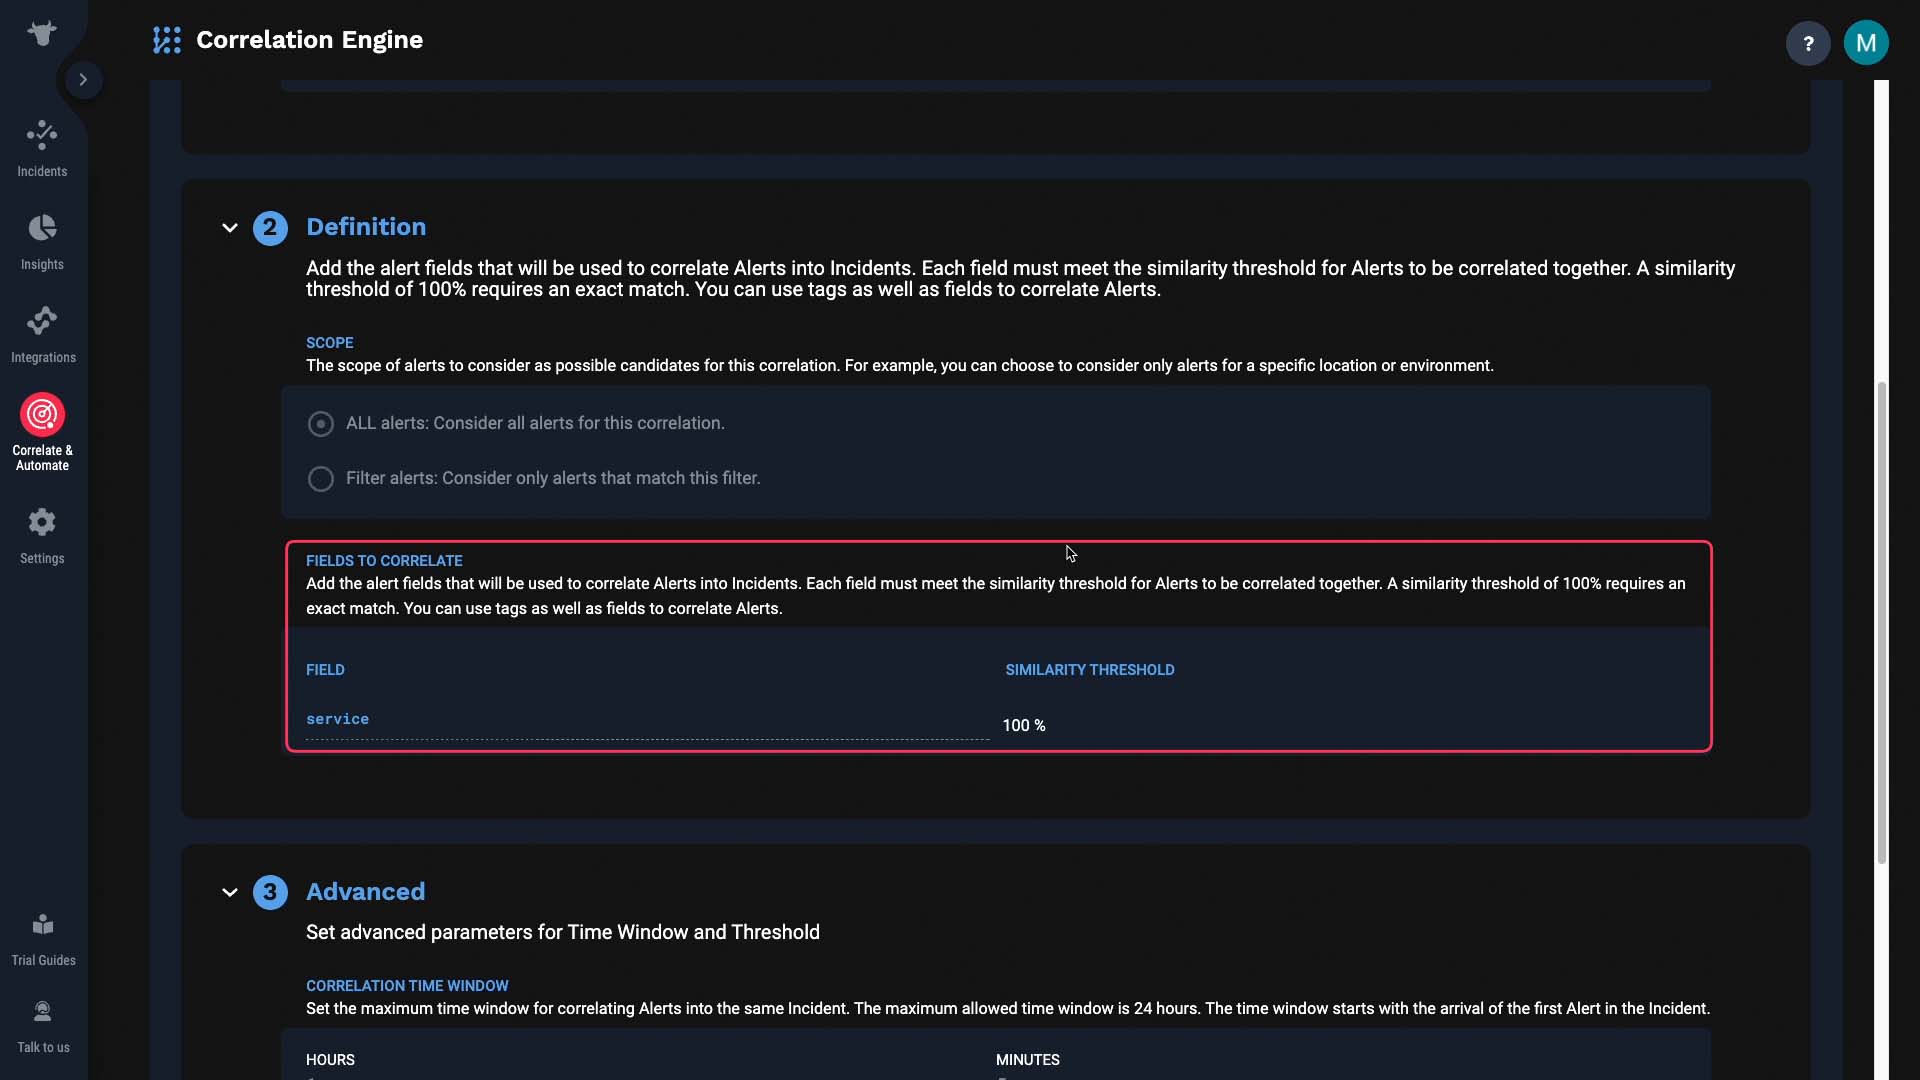
We’ve done the entire setup, so now the final test. We are going to send in fifteen events with varying attributes but with the same source information. If our setup is correct, all events should be enriched with the same service information, and end up being in one incident. Here we go.
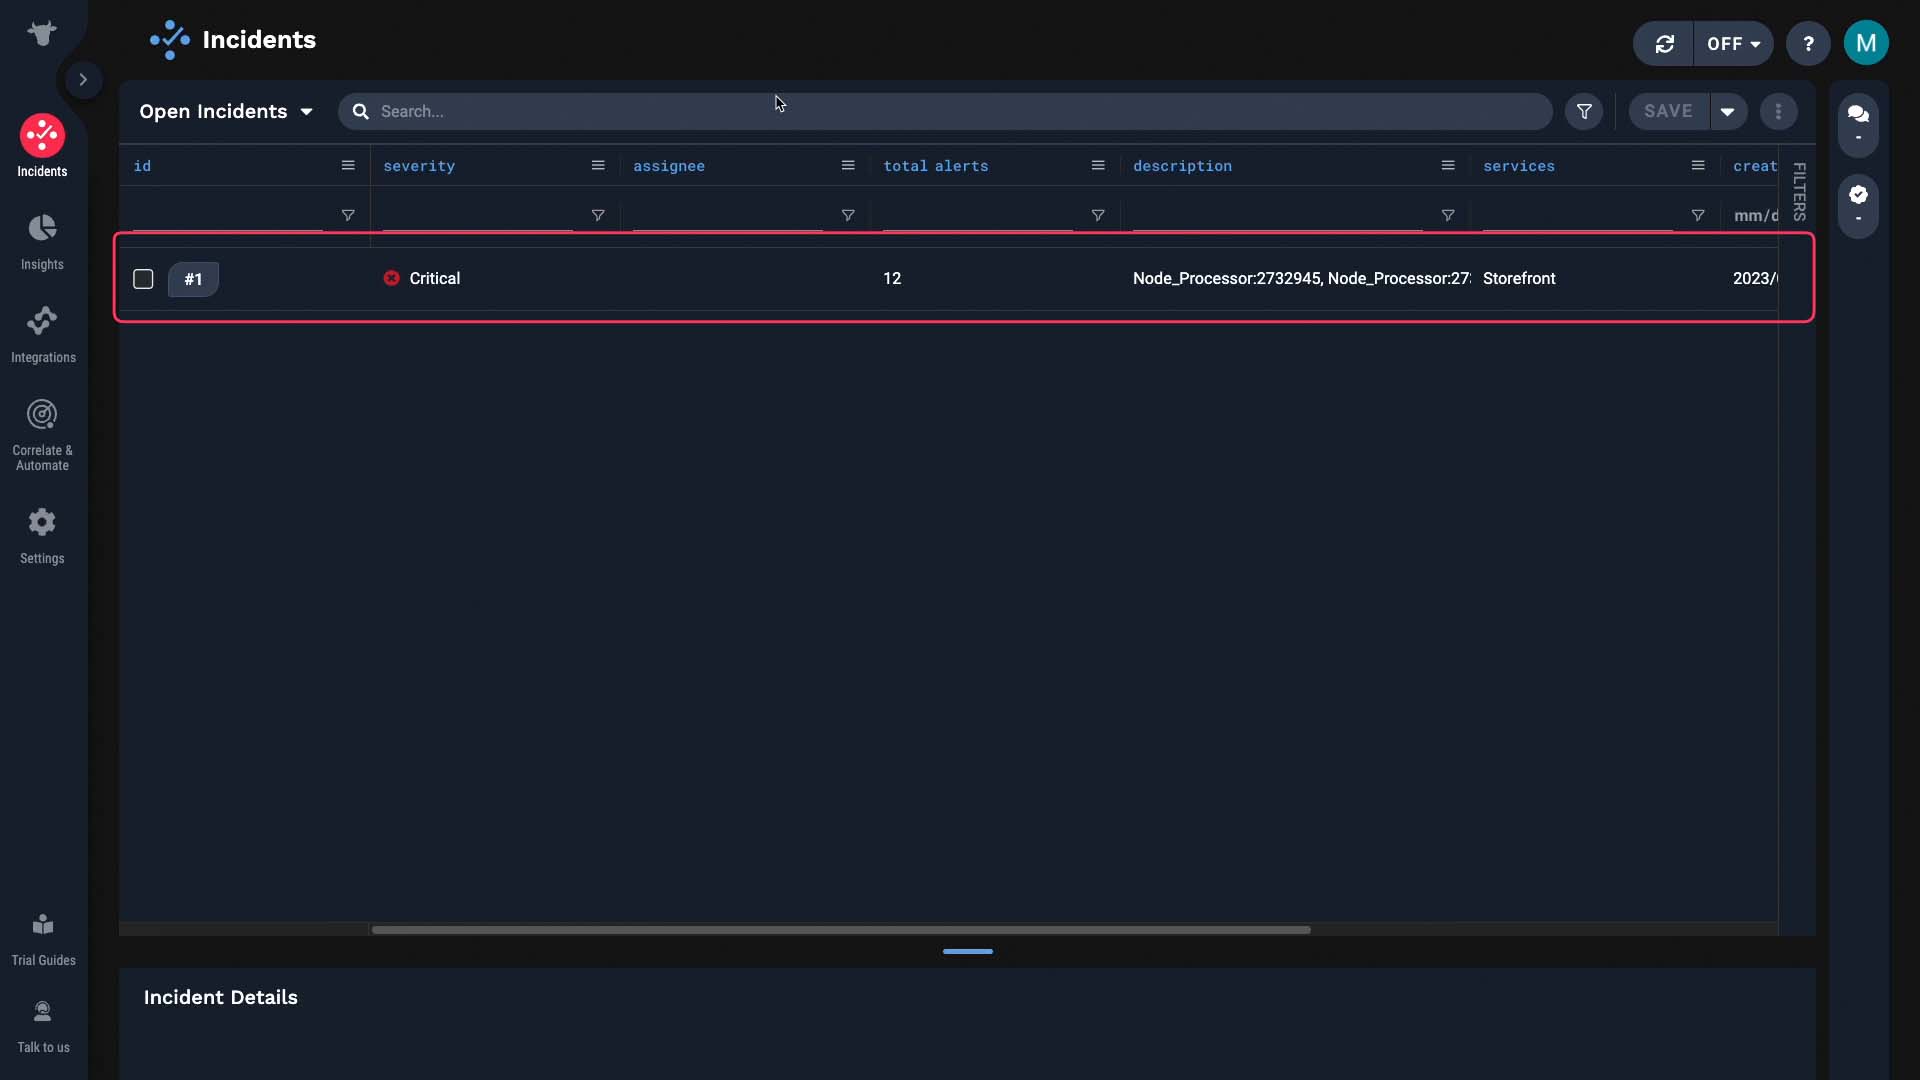
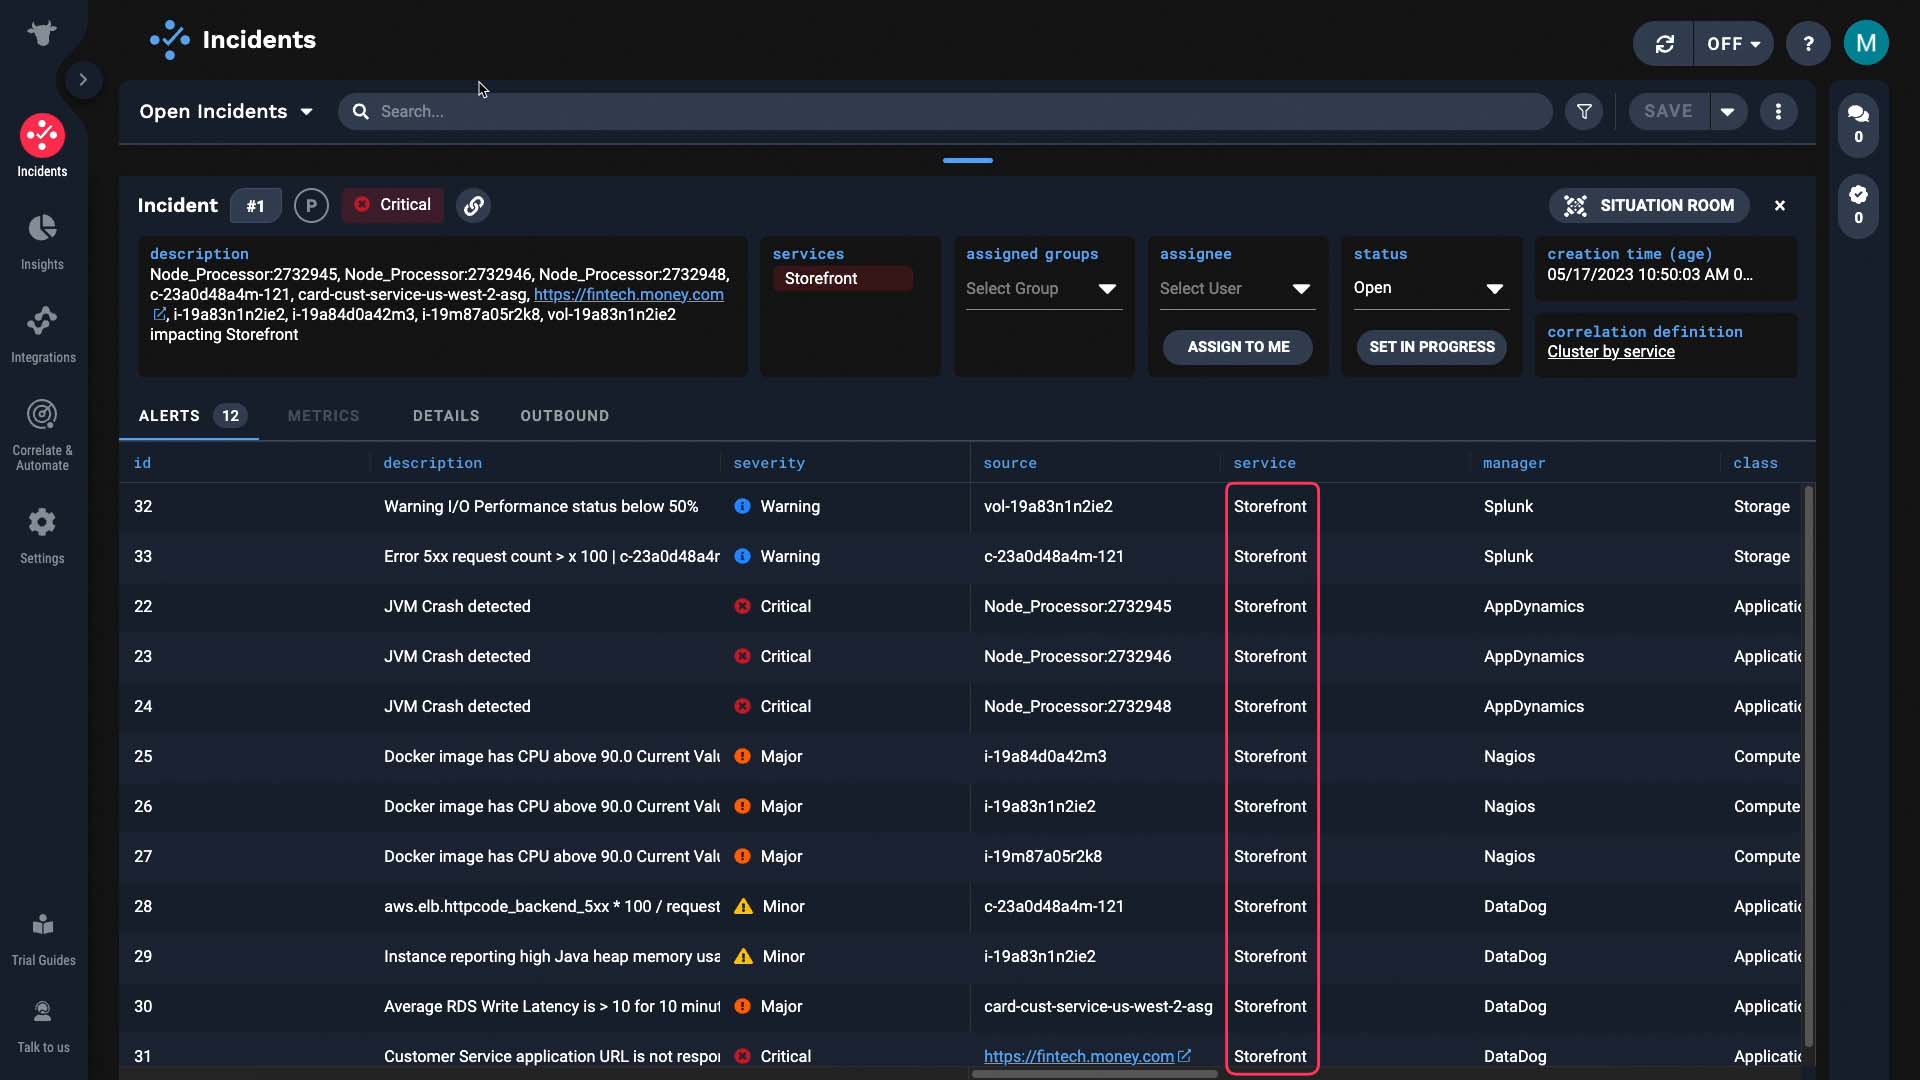
Here’s an incident. It has twelve alerts s in it. And you can verify that each were properly enriched to have the service information.
Thanks for watching!
BASIC | 3 MIN
In this video, you will learn how to set up maintenance windows in APEX AIOps Incident Management.
Demo video: Setting up maintenance windows in APEX AIOps Incident Management ►
This video provides a demo on how to set up maintenance windows in APEX AIOps Incident Management and suppress noise.
*Please note Moogsoft is now part of Dell's IT Operations solution called APEX AIOps, and changed its name to APEX AIOps Incident Management. The UI in this video may differ slightly but the content covered is still relevant.
When an asset is undergoing maintenance, the data could look anomalous.
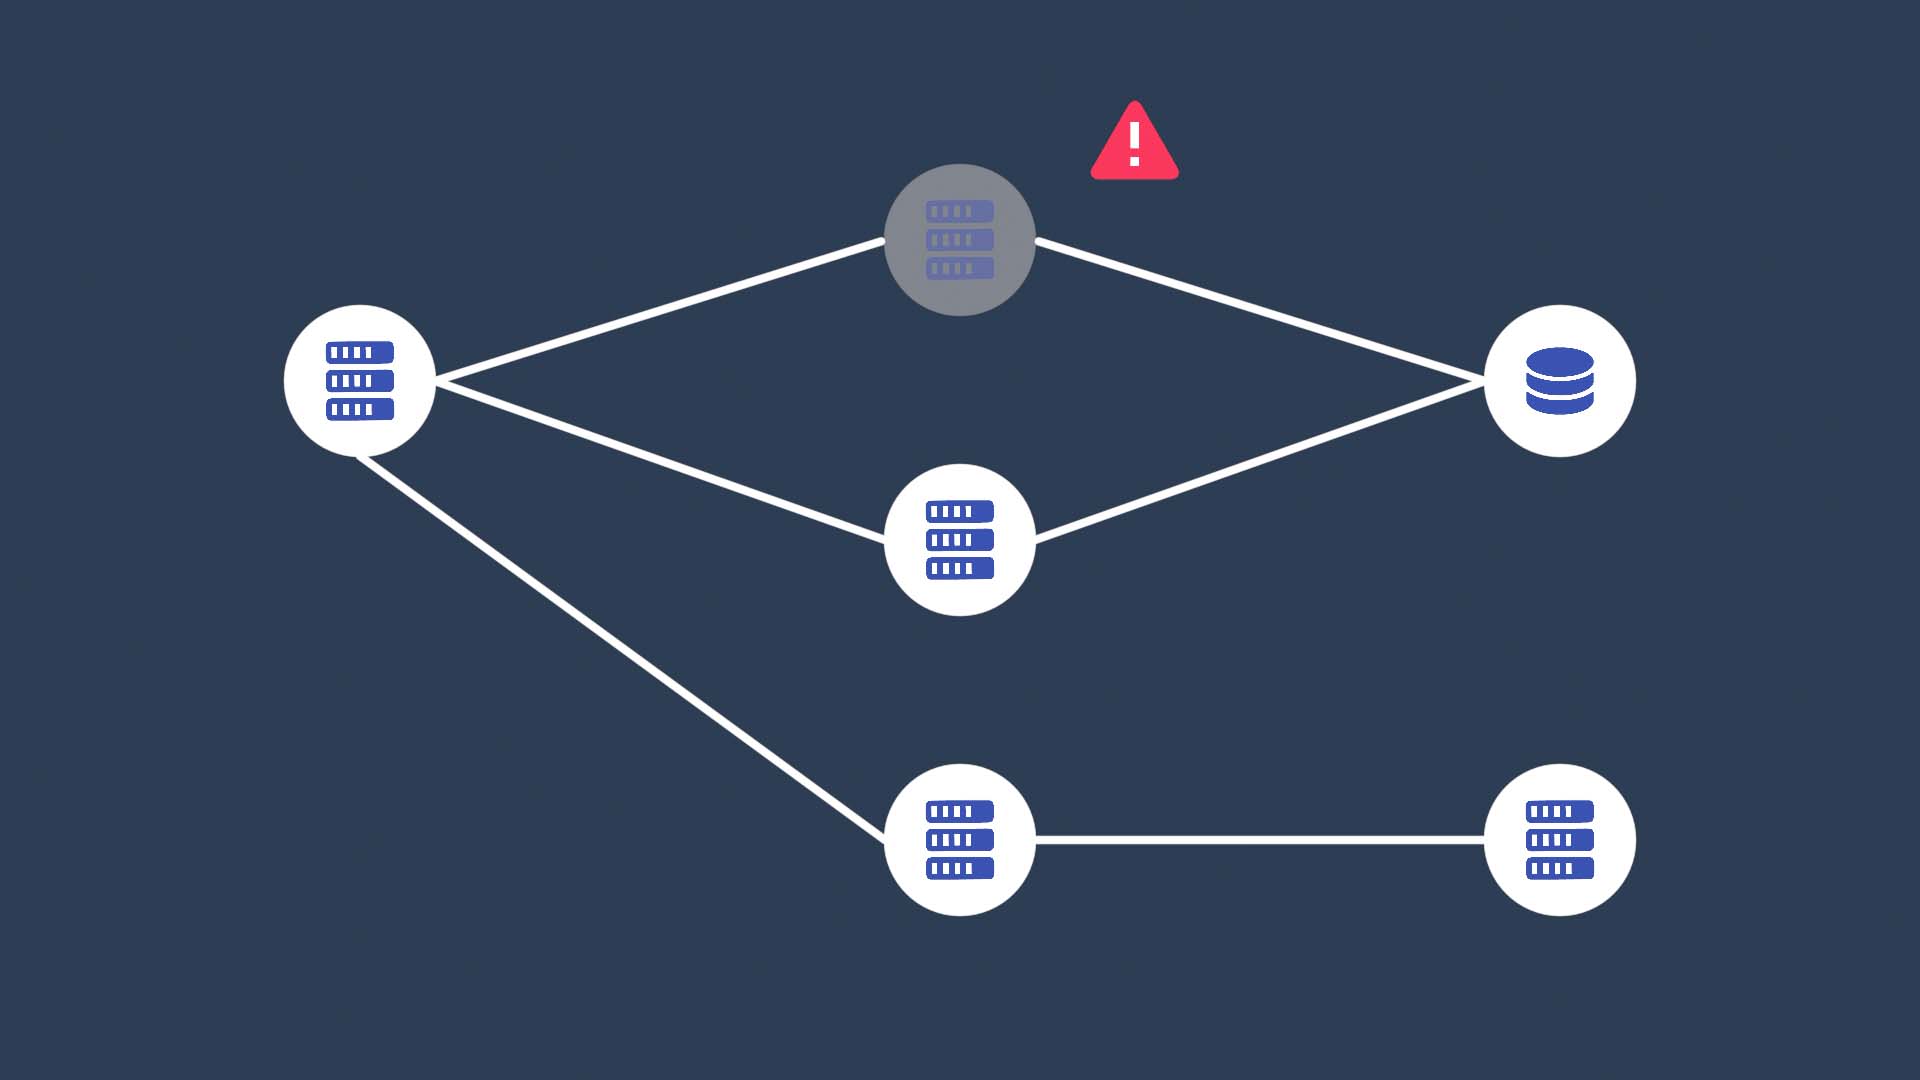
But we don’t need to worry about it since we know the cause and the effect is temporary. In this video, we’ll show you how to tag those alerts so you won’t be distracted by them.
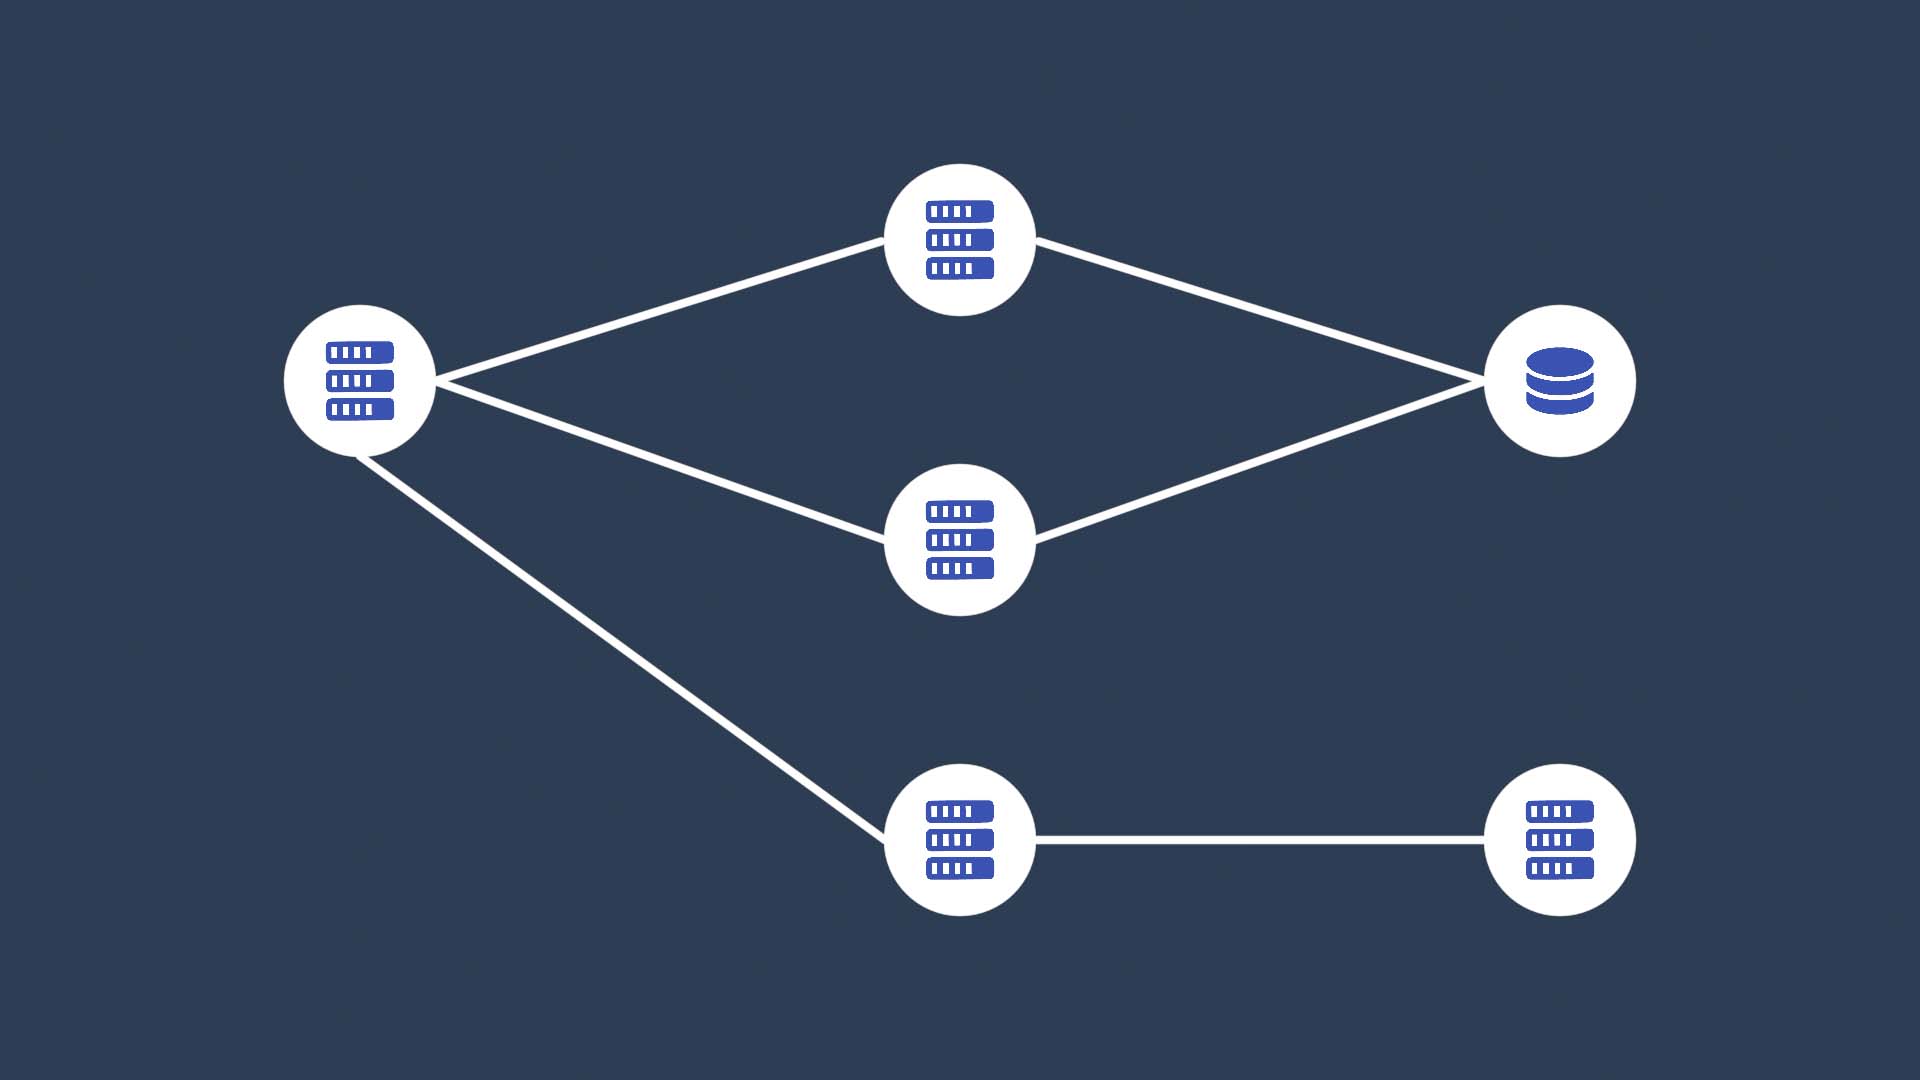
Let’s say this resource will go into maintenance, so, during that time, we want to tag all the events that come in from there as “in maintenance”.
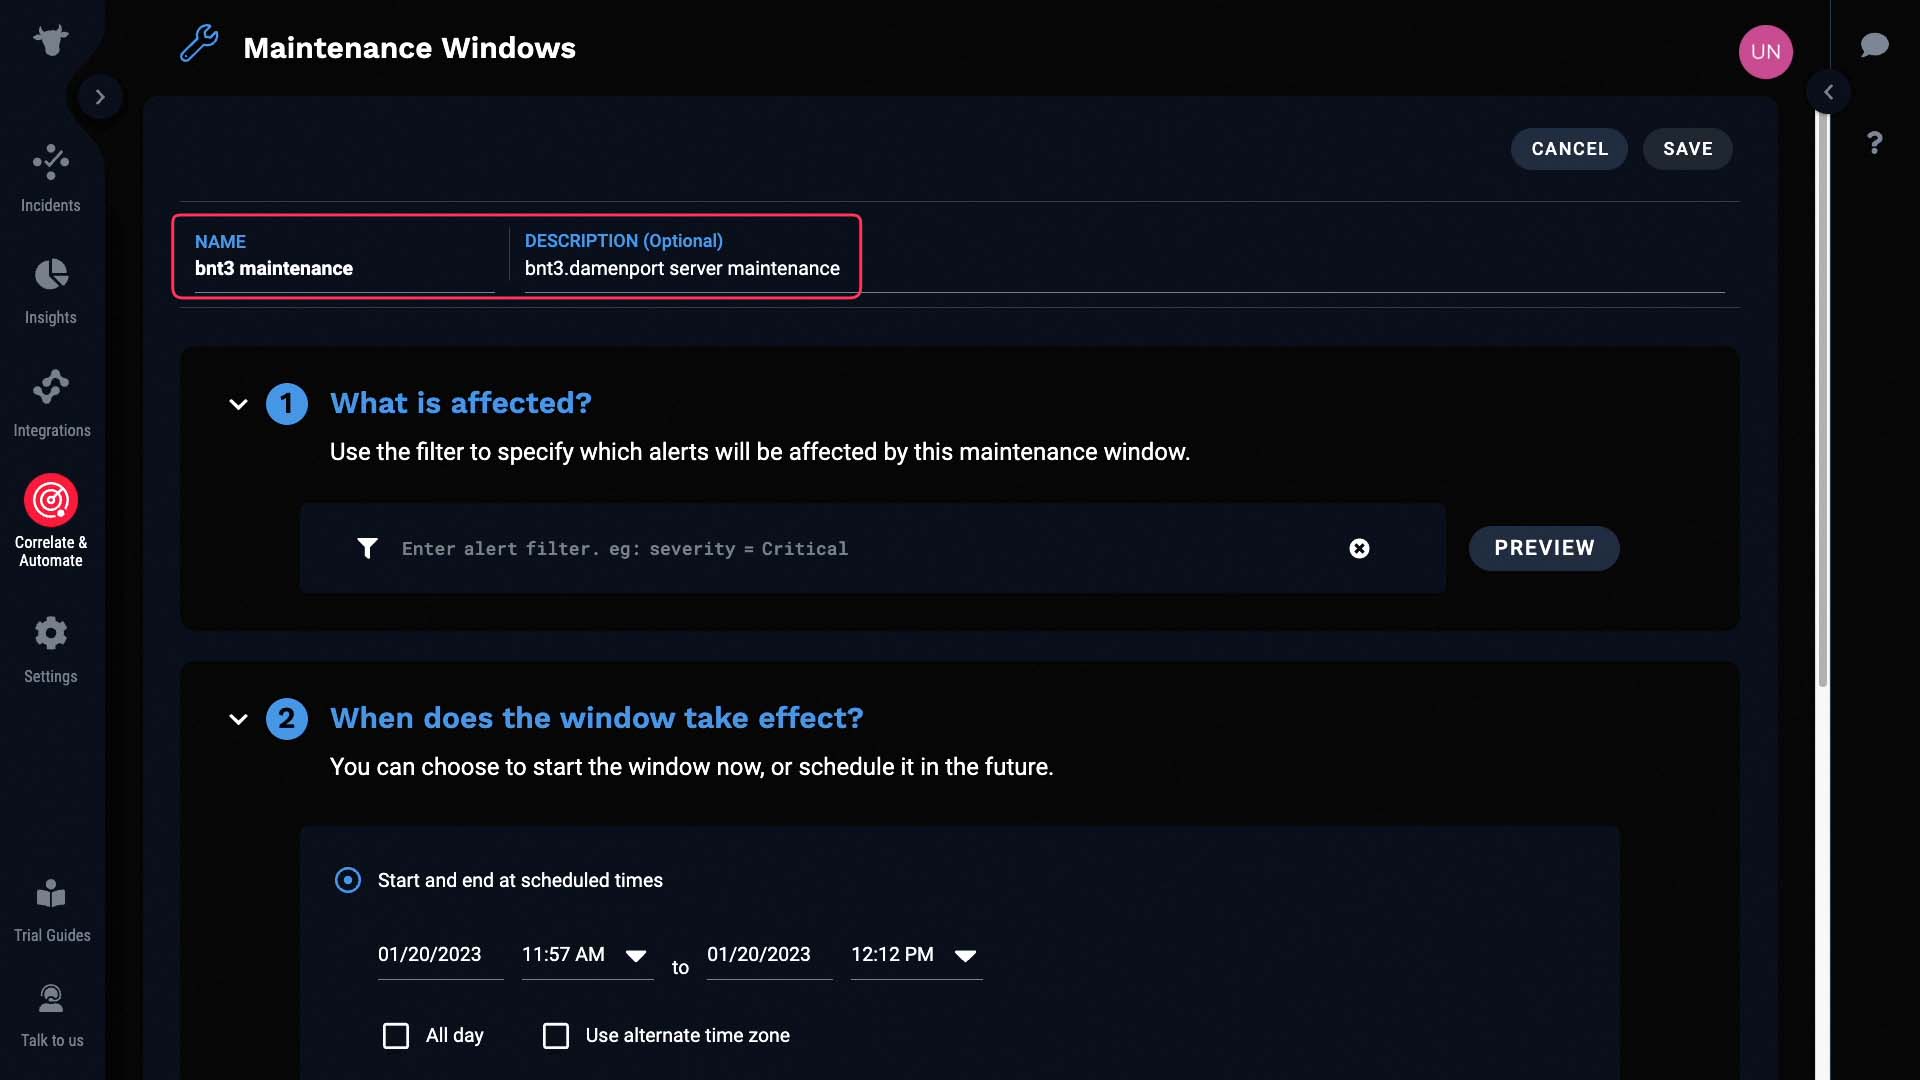
Specify what’s in maintenance here.
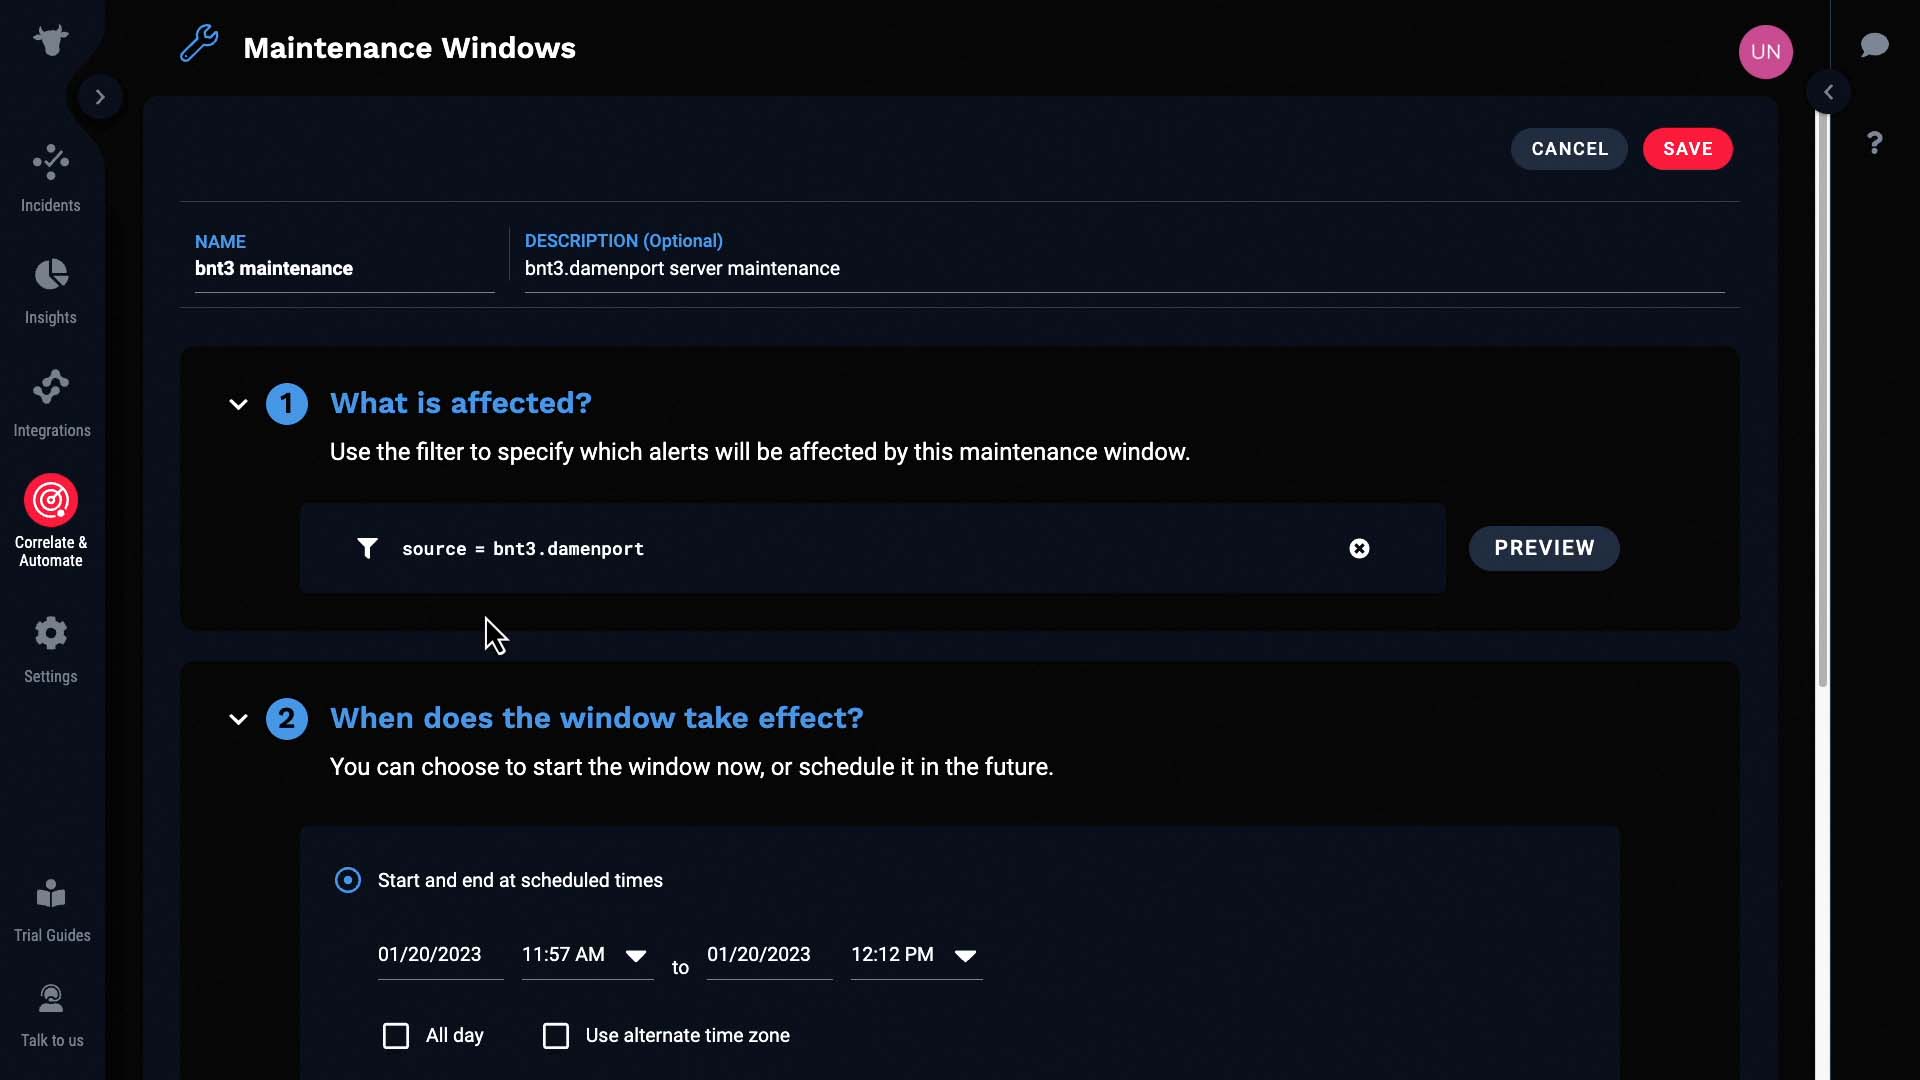
And when the maintenance window takes effect. You can schedule it ahead of time, and make it recurring if you want to.
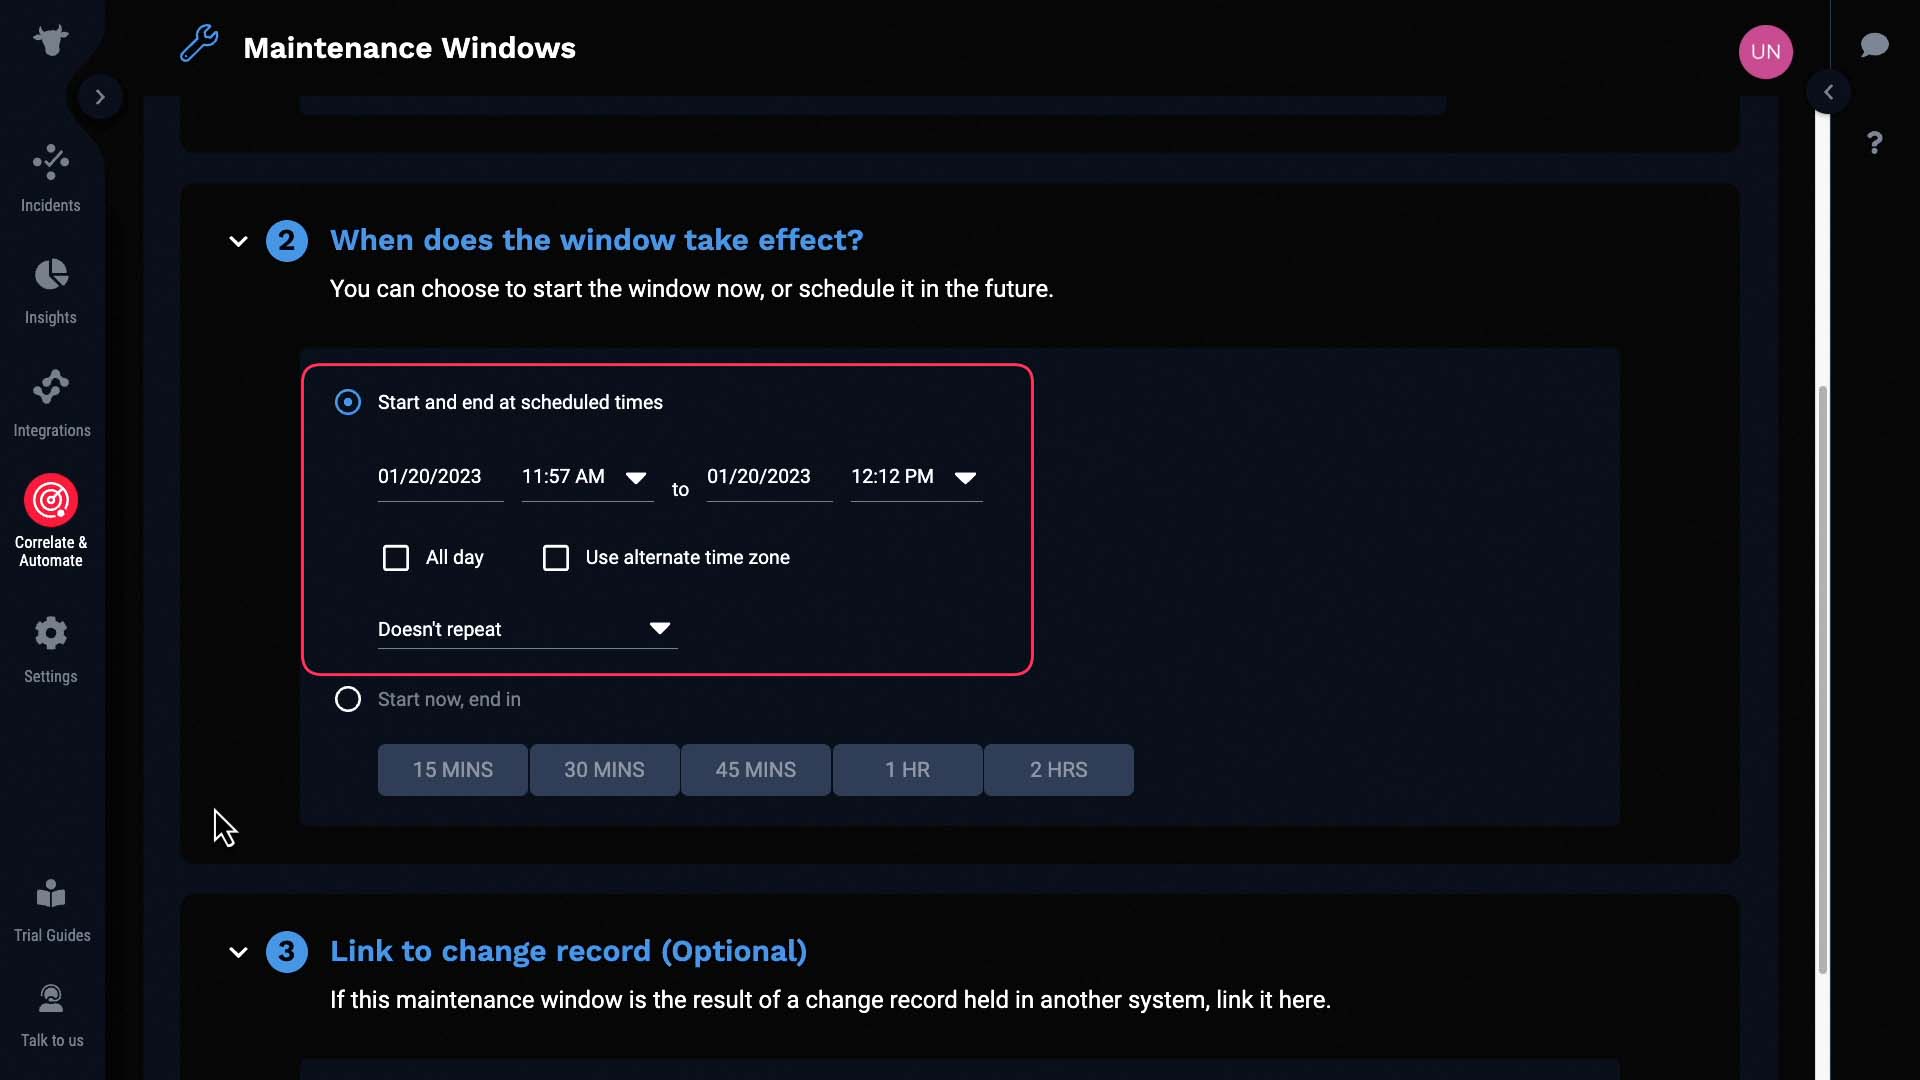
But, let’s set it to start now so I can show you the result right away.
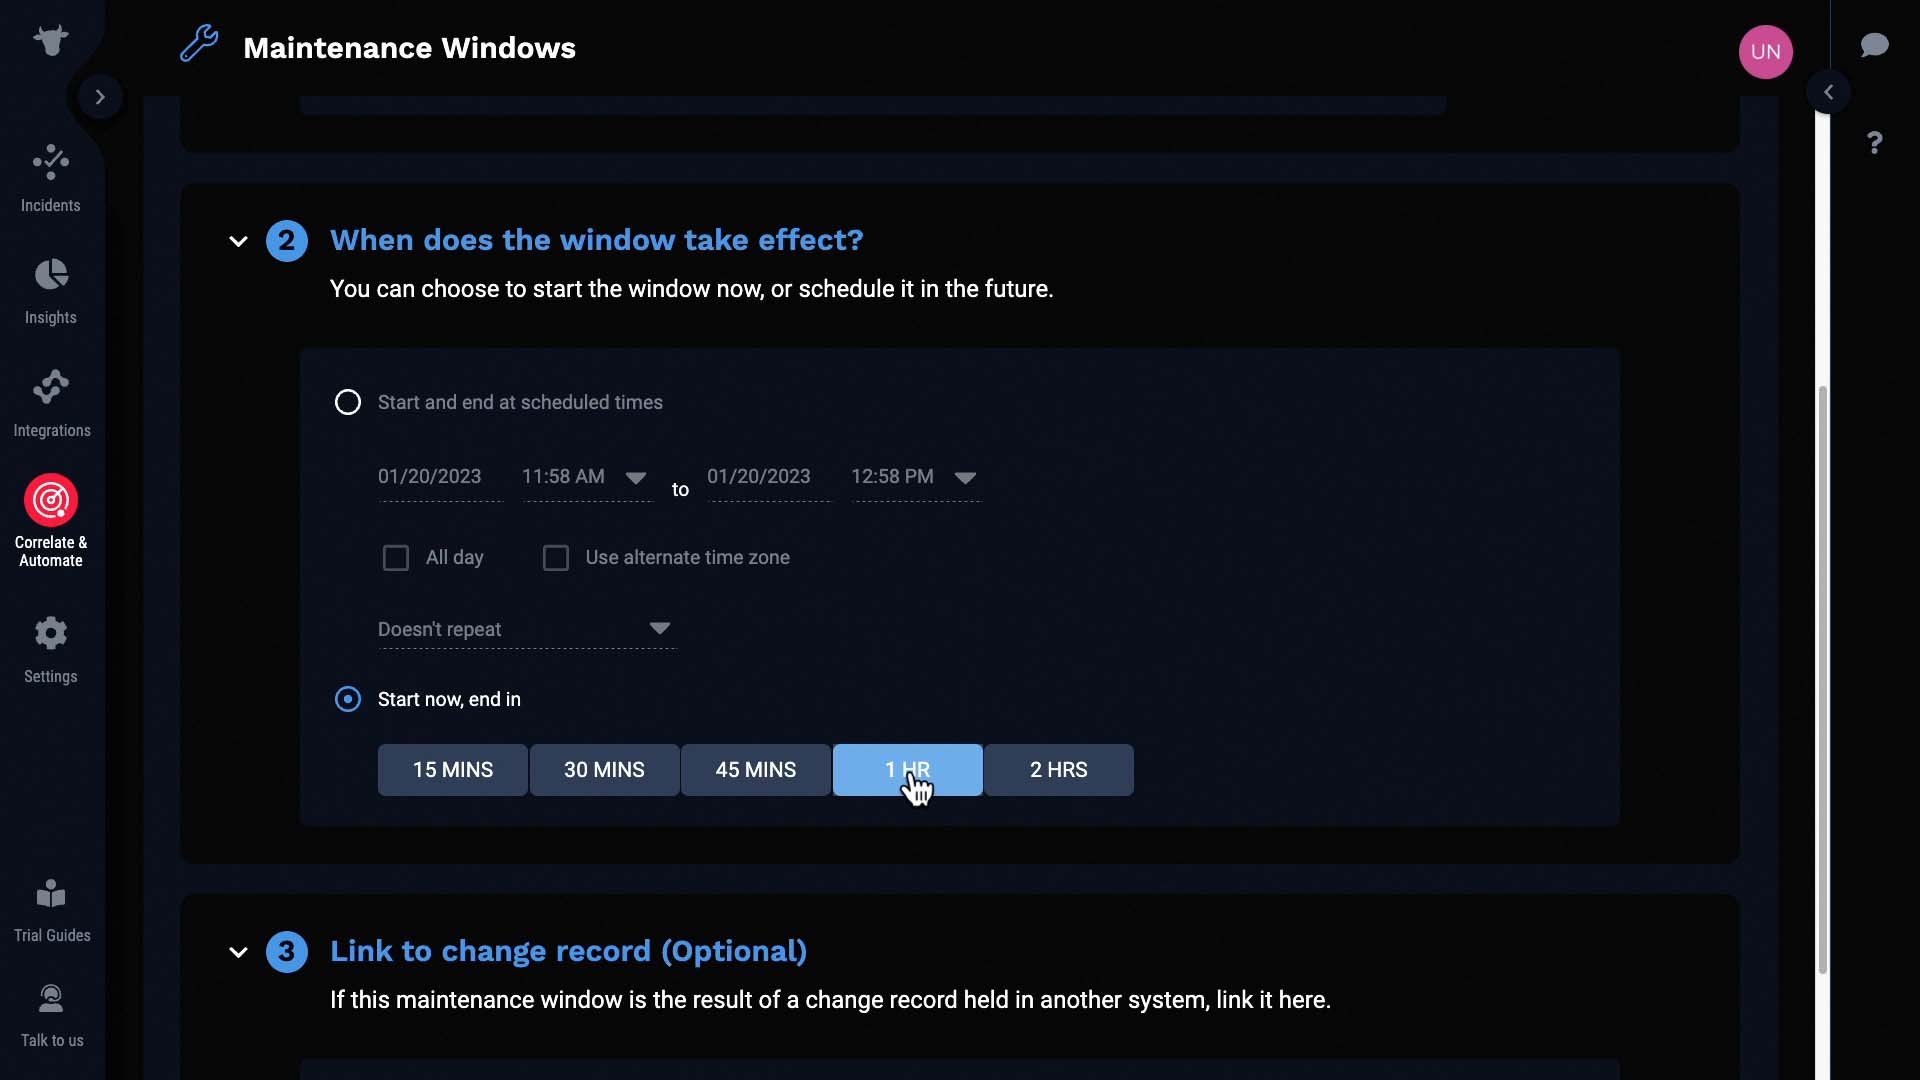
Now, the alerts that match the maintenance window criteria will be marked as such, giving the users more context for the incidents.
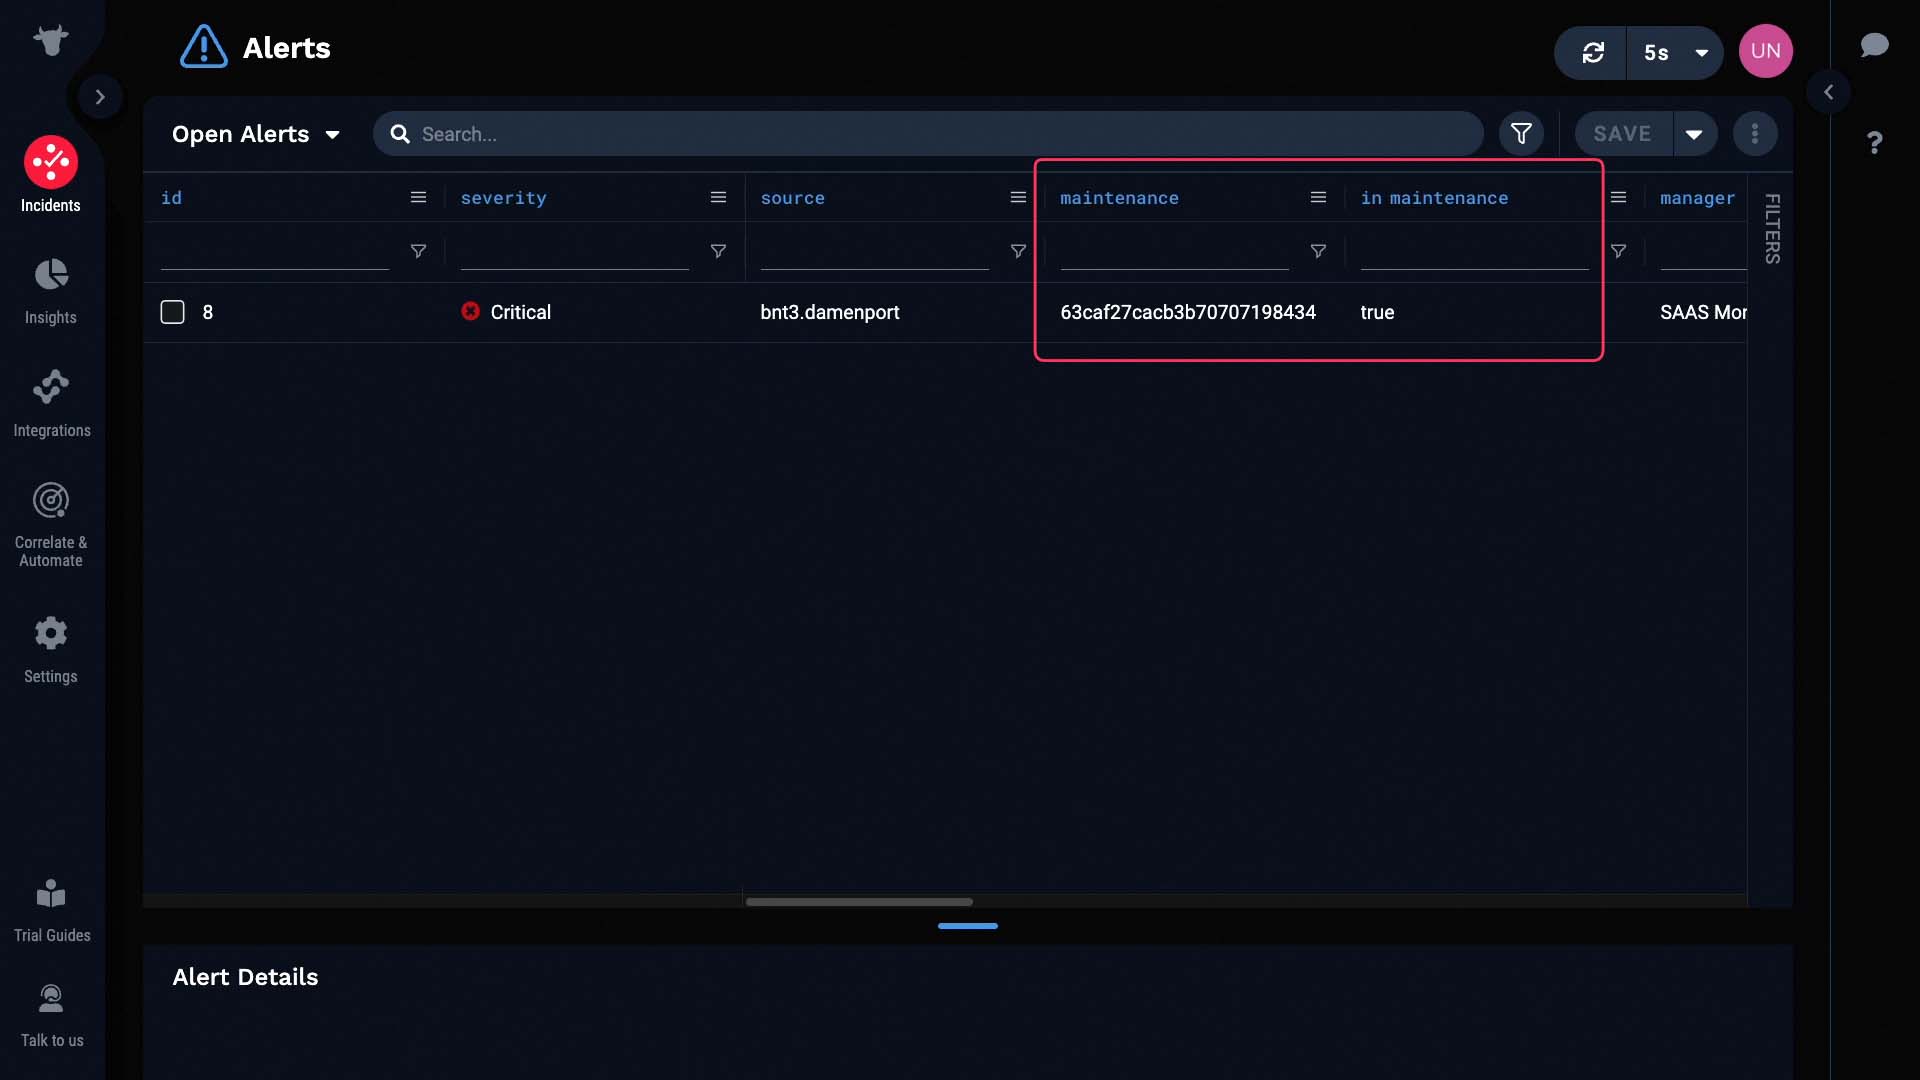
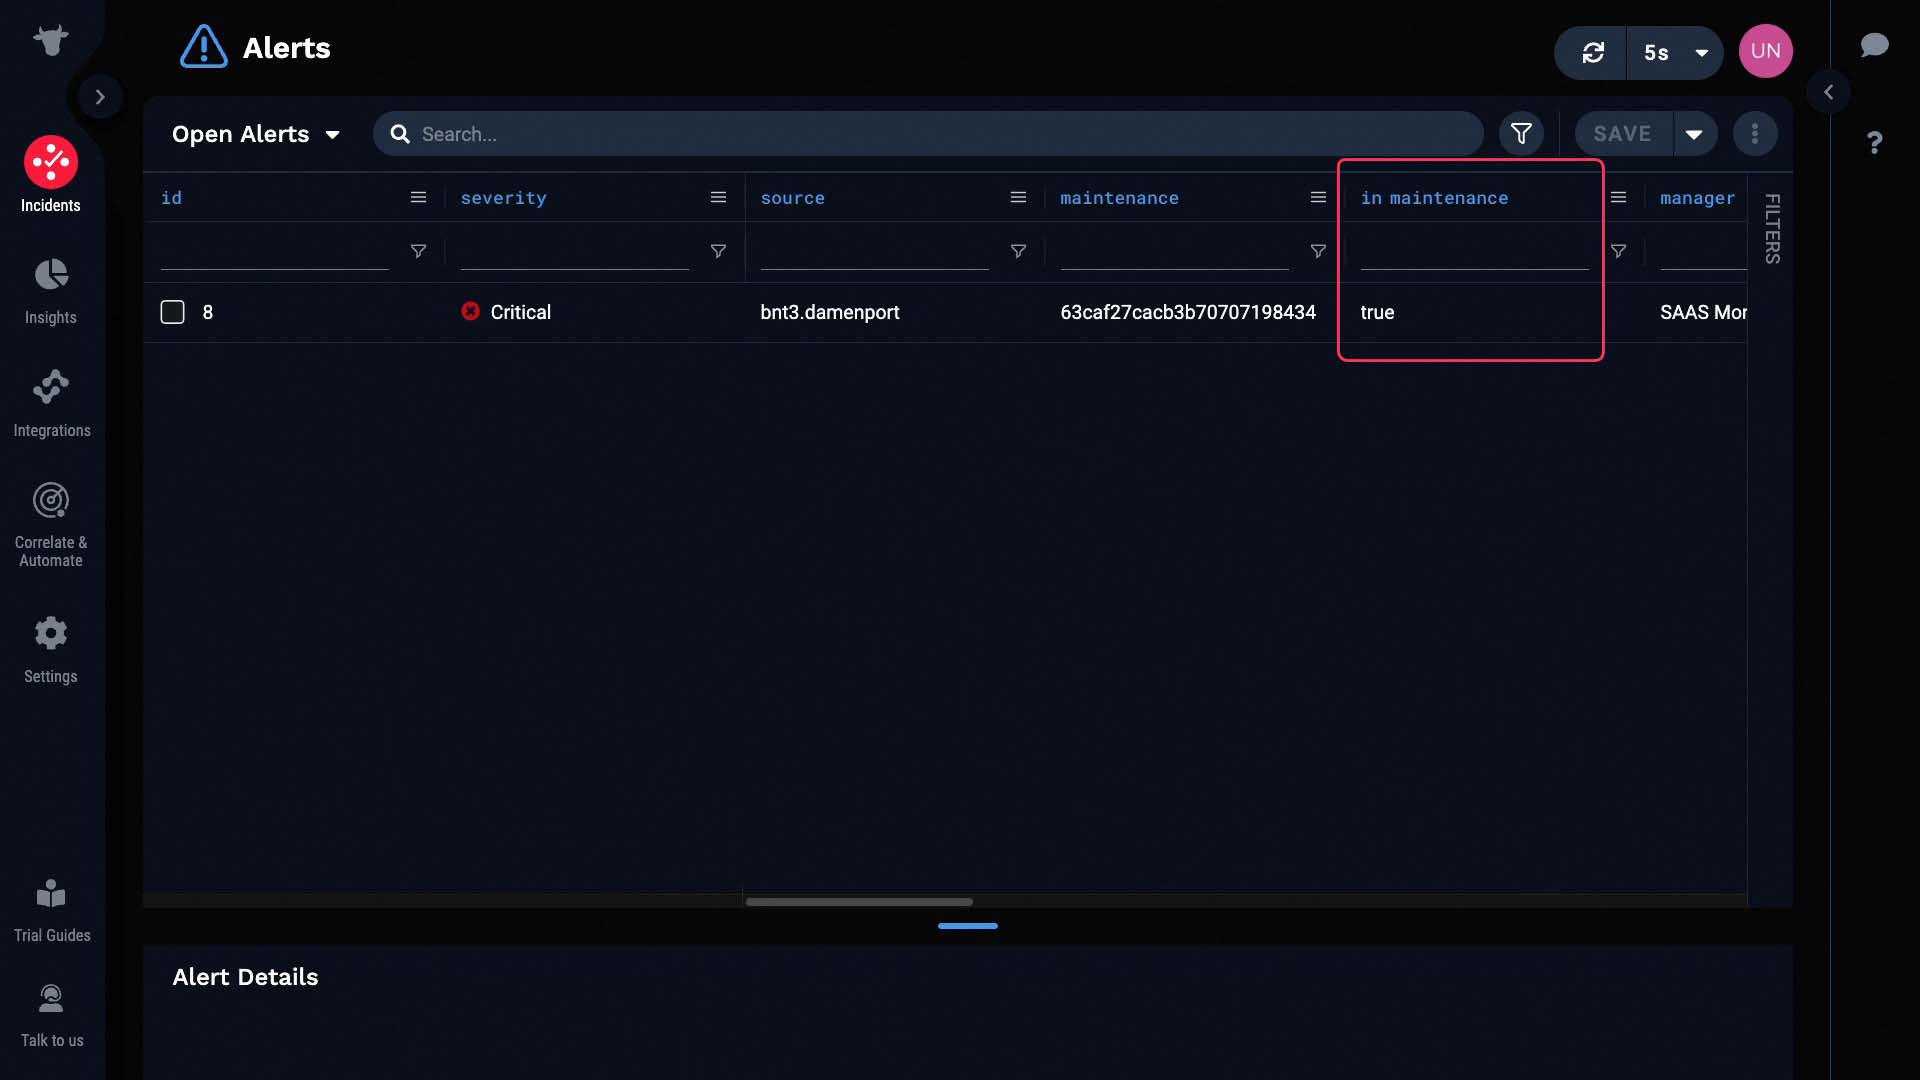
One thing to keep in mind here is the difference between these two columns. The “In maintenance” column indicates whether the alert is in a currently active maintenance window. So even though it says true for this alert, after this maintenance window closes it will turn to false.
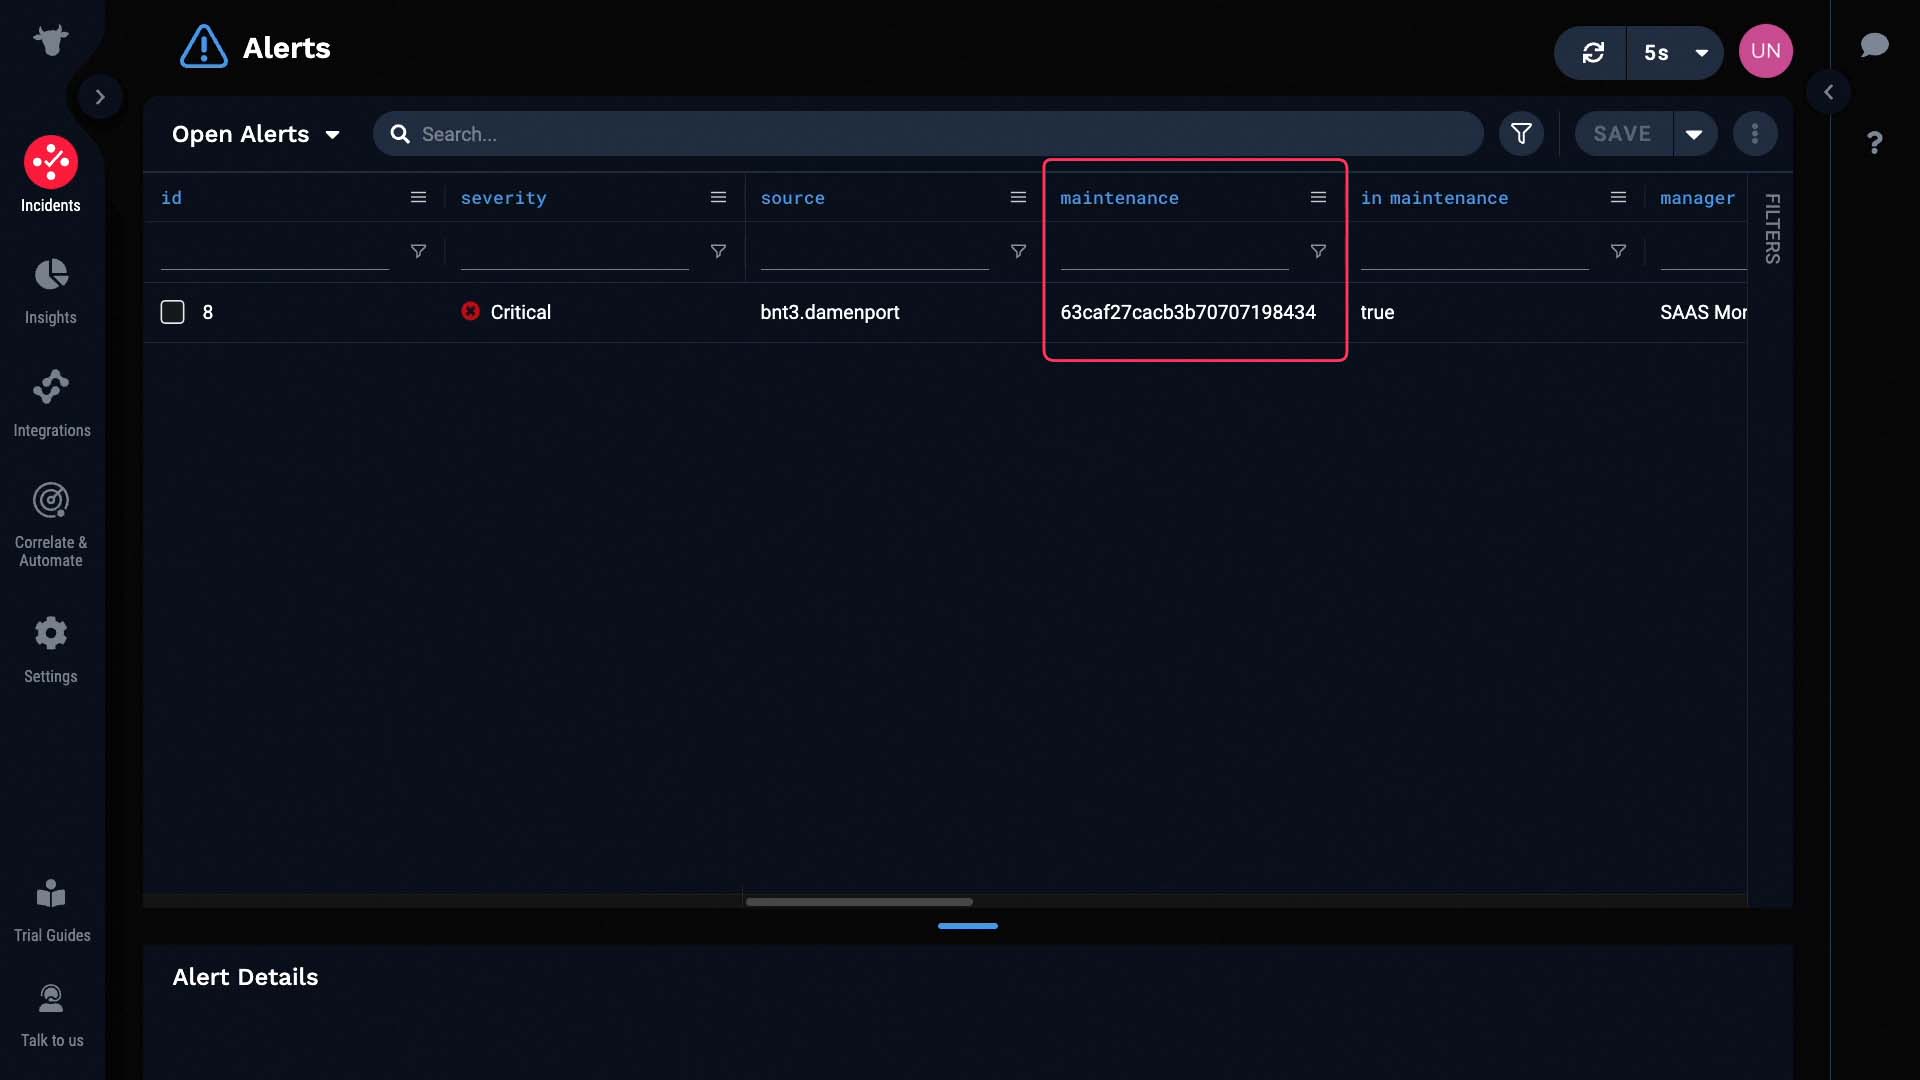
After that, you can still tell if the alert happened during a maintenance window or not by checking the “maintenance” column.
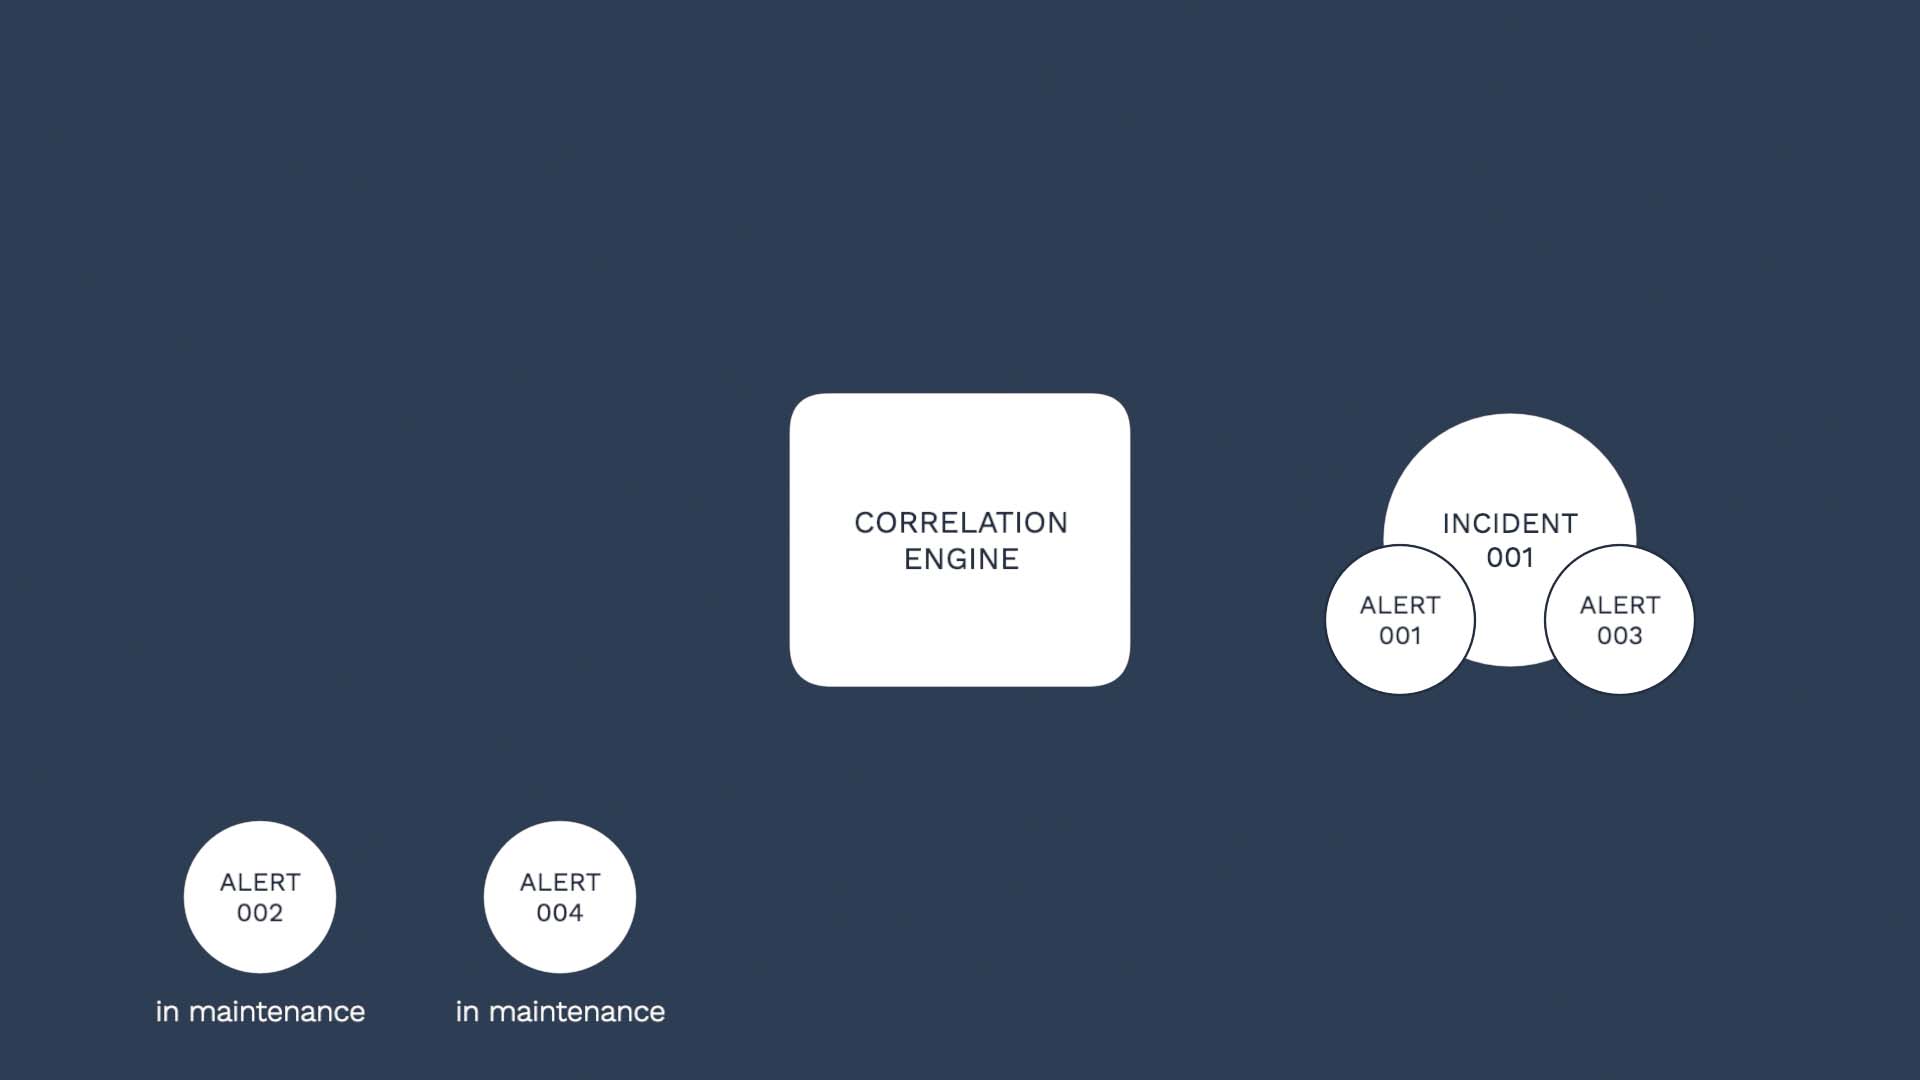
Now, you may prefer not seeing the alerts that happened during the maintenance window at all.
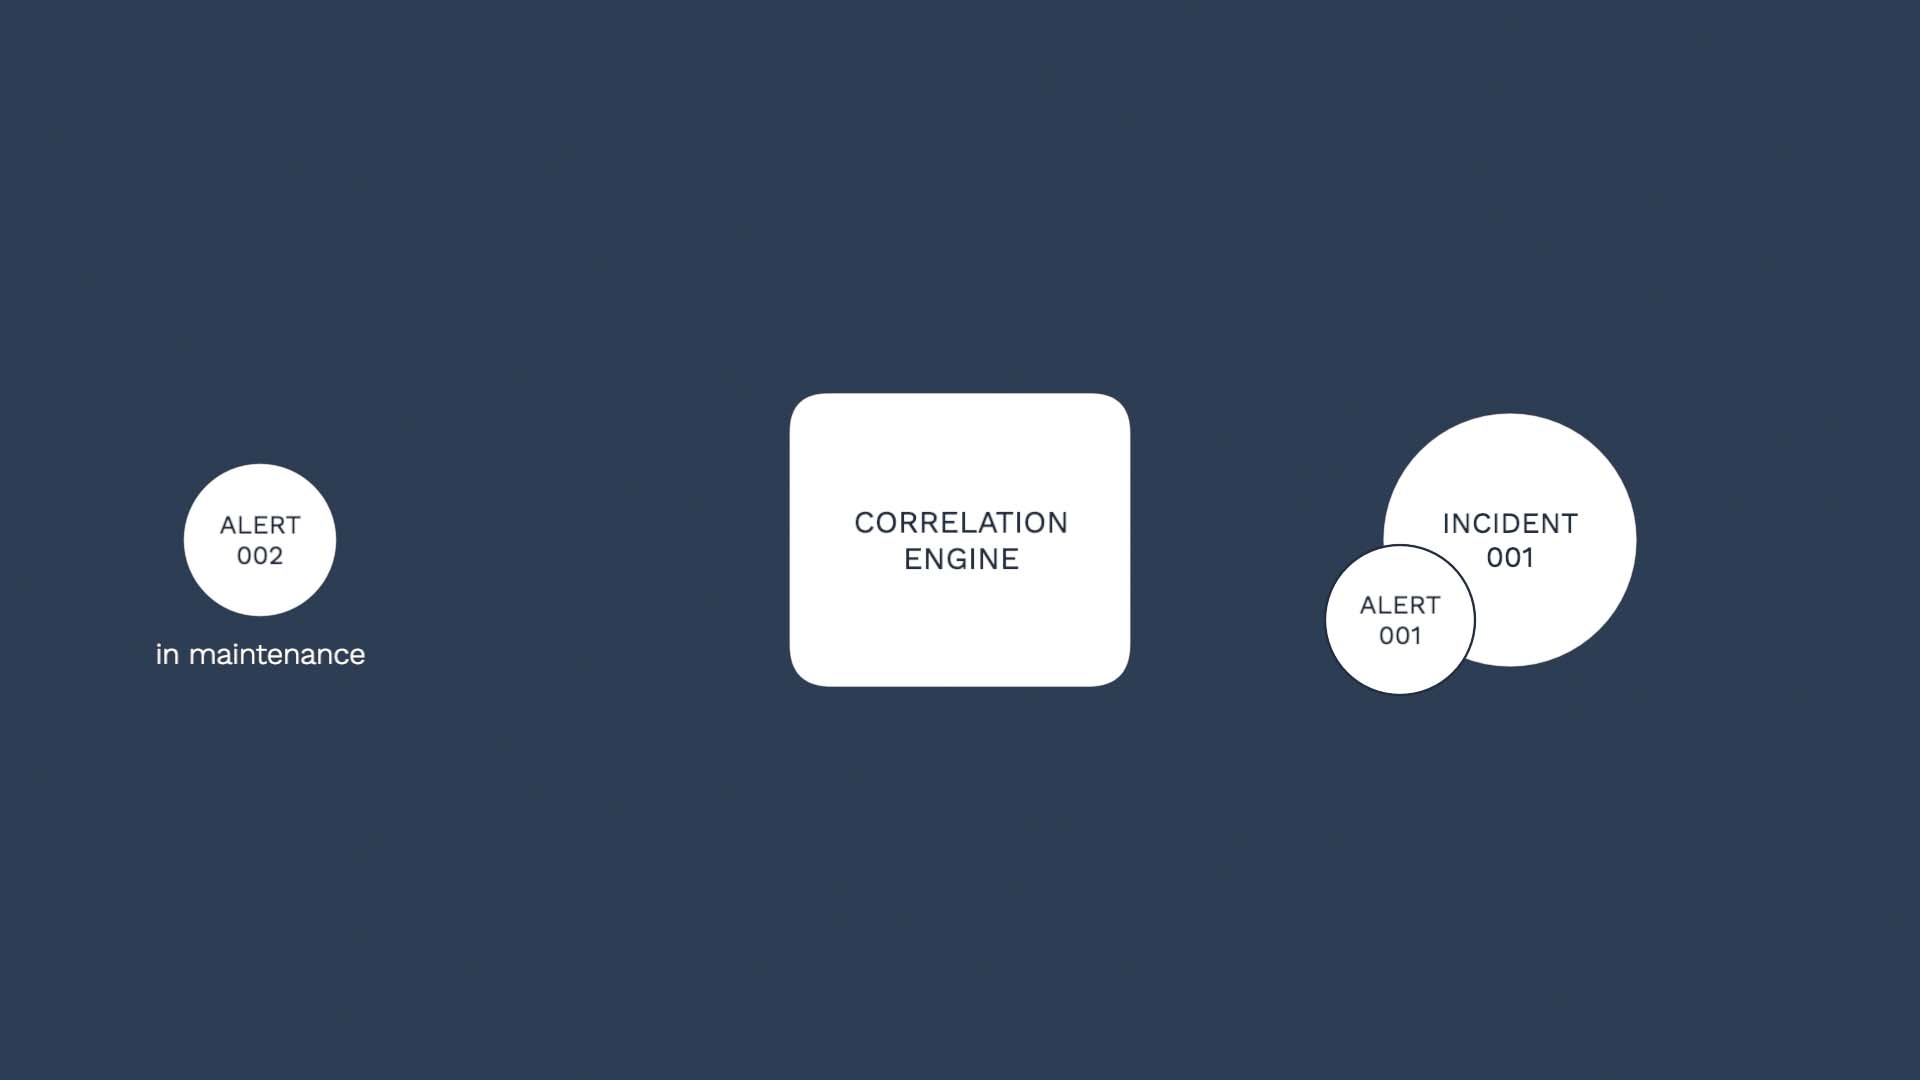
Let me show you how to do that. We can set up a filter to ignore those alerts raised during the maintenance window from the impacted assets.
This way we can reduce noise and surface what truly requires the user’s attention.
To filter out the alerts in maintenance, we are going to add a scope filter to our correlation definition.
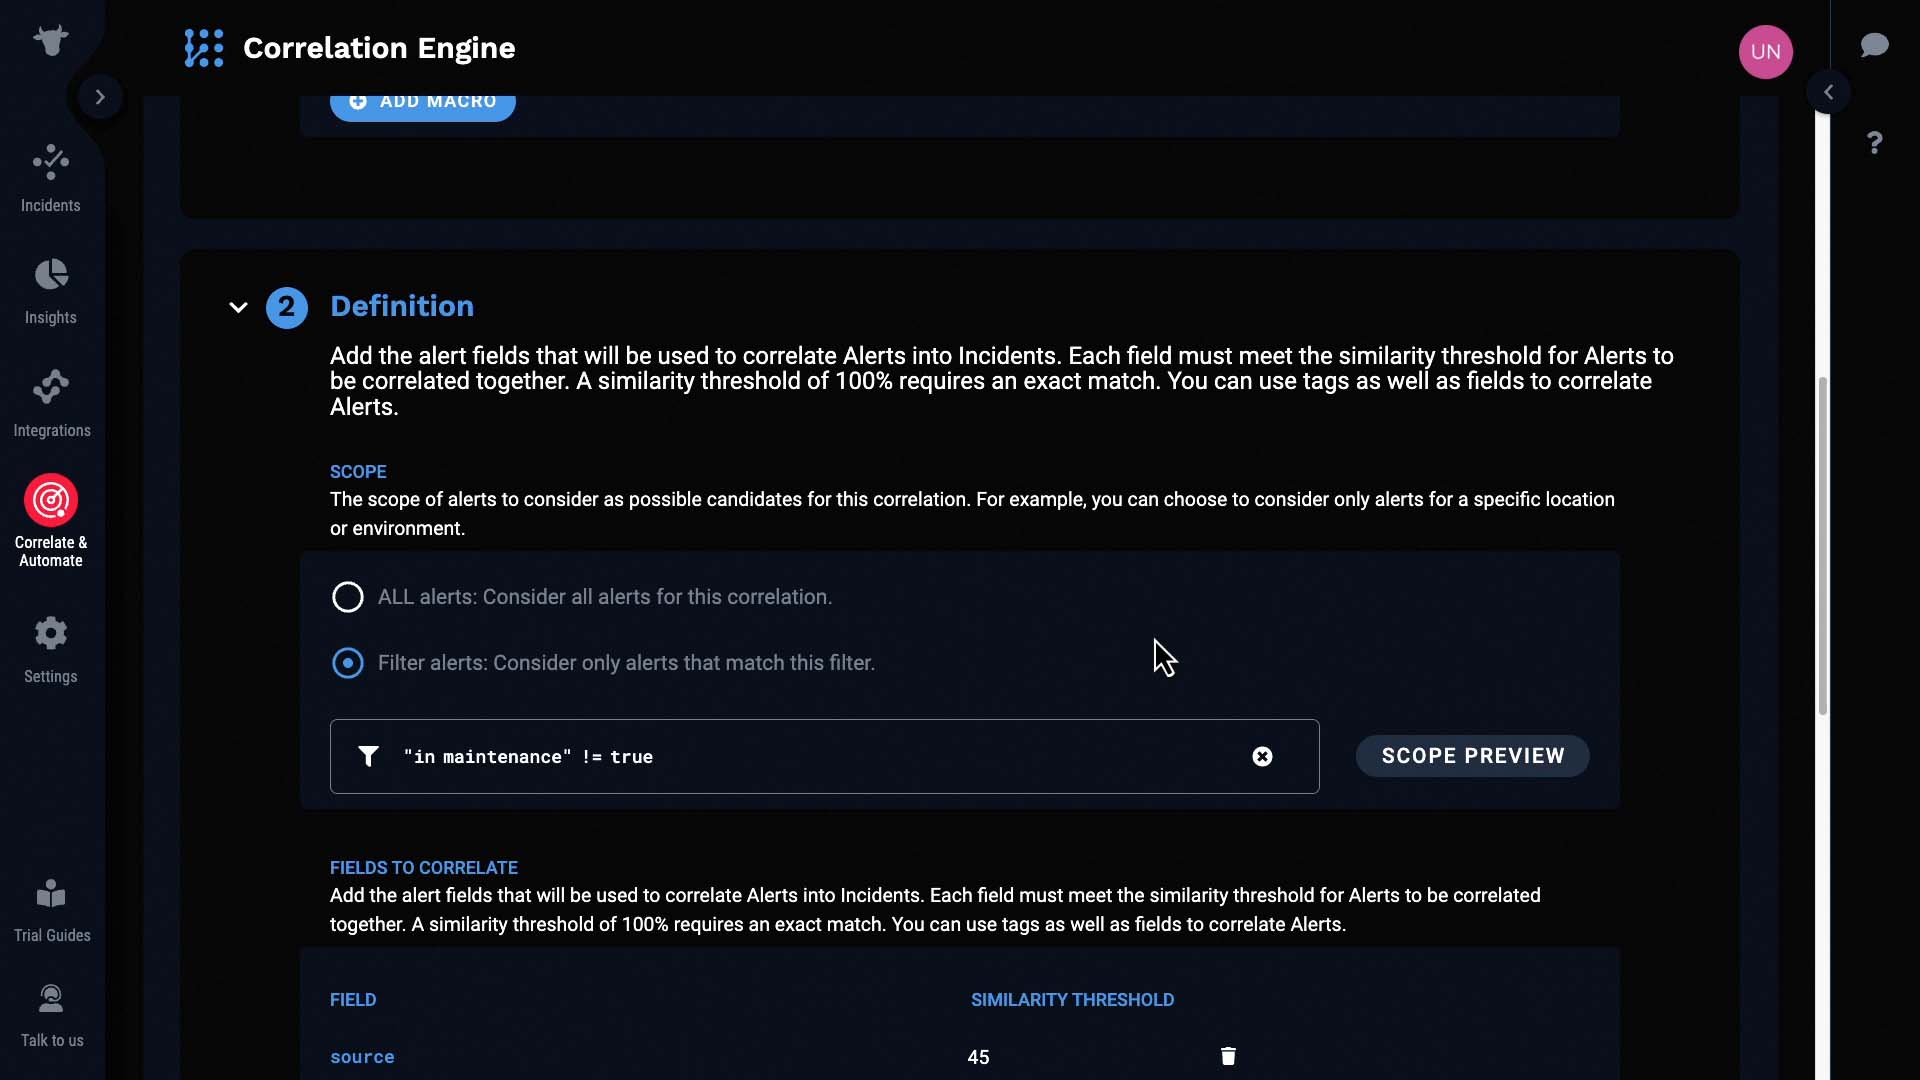
Now, only the alerts that are not in maintenance will be processed by this correlation engine.
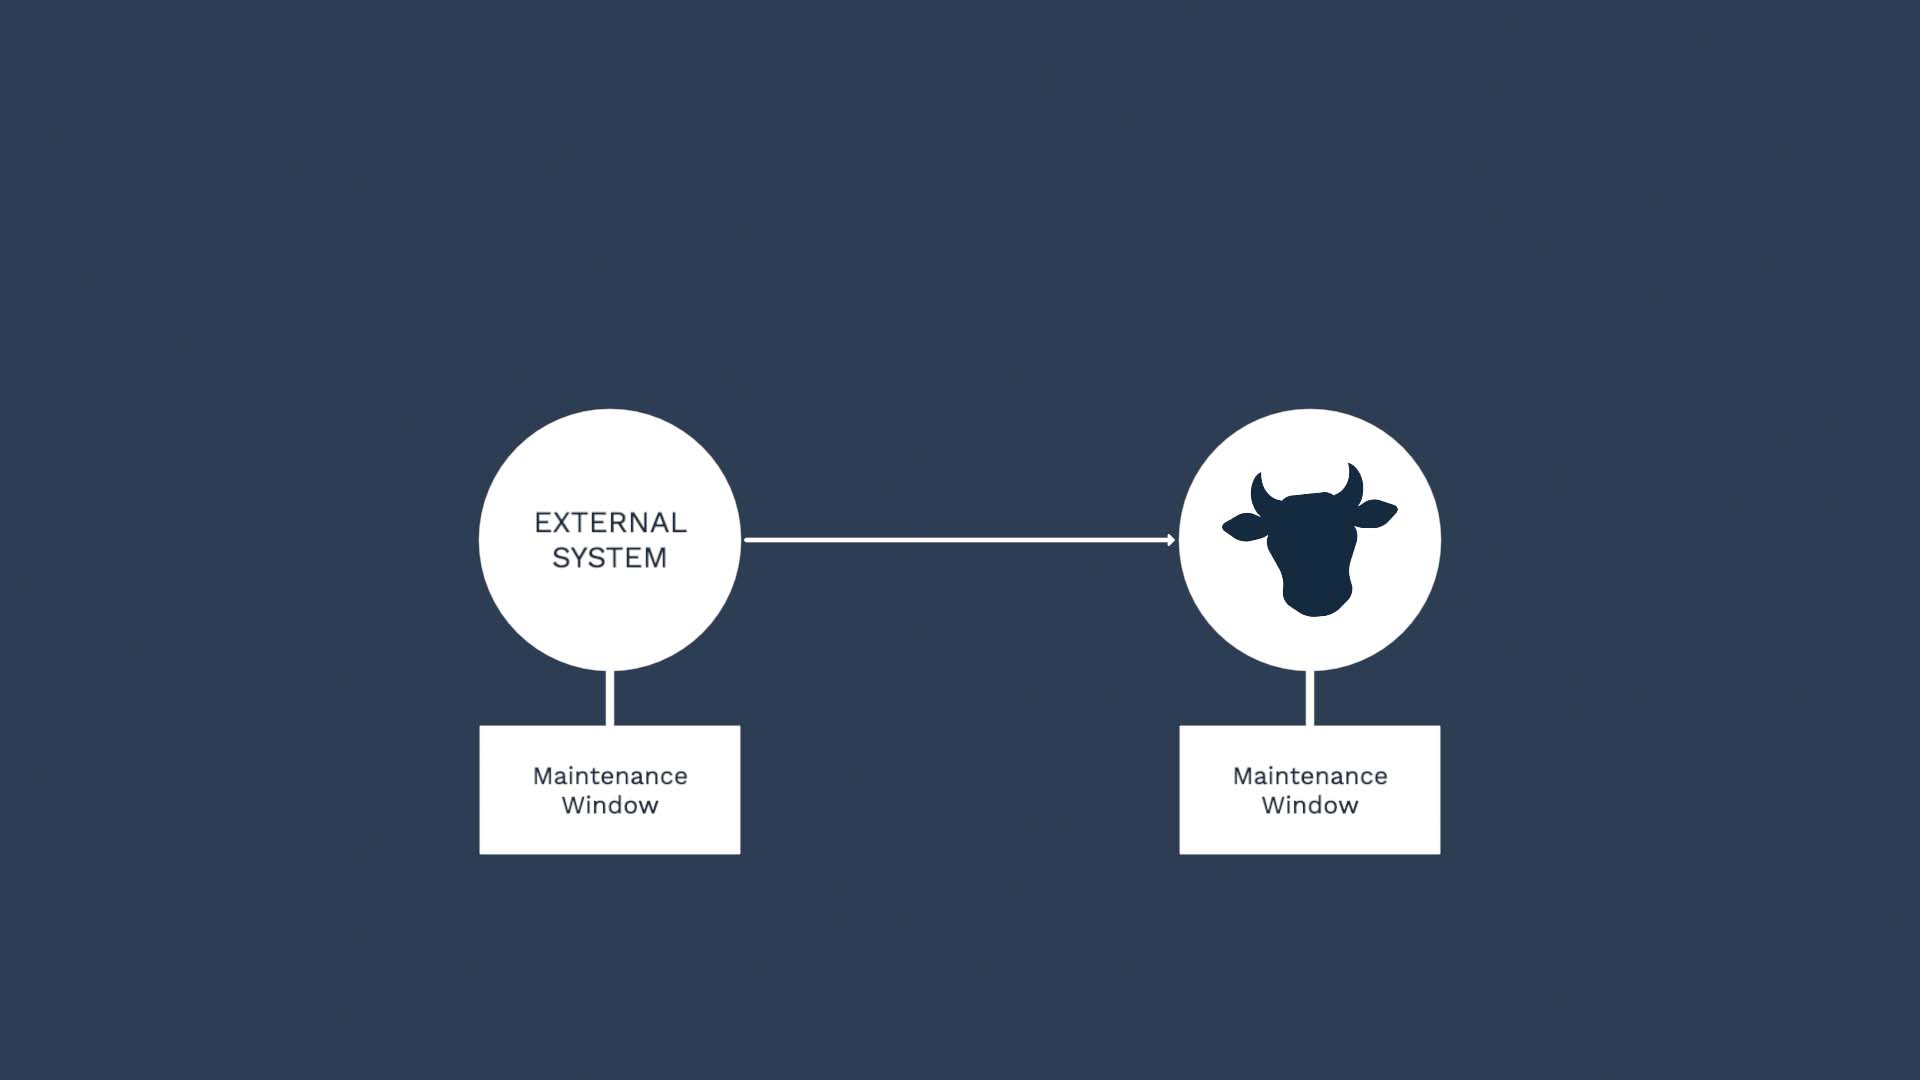
So that’s the UI-based way of creating and managing maintenance windows. We also offer API-based method. For example, you may currently set up maintenance windows in ServiceNow. Then rather than entering the same information in Incident Management, you can make an API call from ServiceNow to create a window in Incident Management.
Now you know how to set up maintenance windows and suppress noise. Thanks for watching!
BASIC | 2 MIN
Have you ever wondered how alerts behave when there are overlapping maintenance windows? In this video, you will learn just that!
Concept explainer: Overlapping maintenance windows in APEX AIOps Incident Management ►
This video explains the concept of overlapping maintenance windows in APEX AIOps Incident Management.
*Please note Moogsoft is now part of Dell's IT Operations solution called APEX AIOps, and changed its name to APEX AIOps Incident Management. The UI in this video may differ slightly but the content covered is still relevant.
The behavior of alerts is a bit tricky when you have multiple, active maintenance windows. Let’s walk through a few examples together.
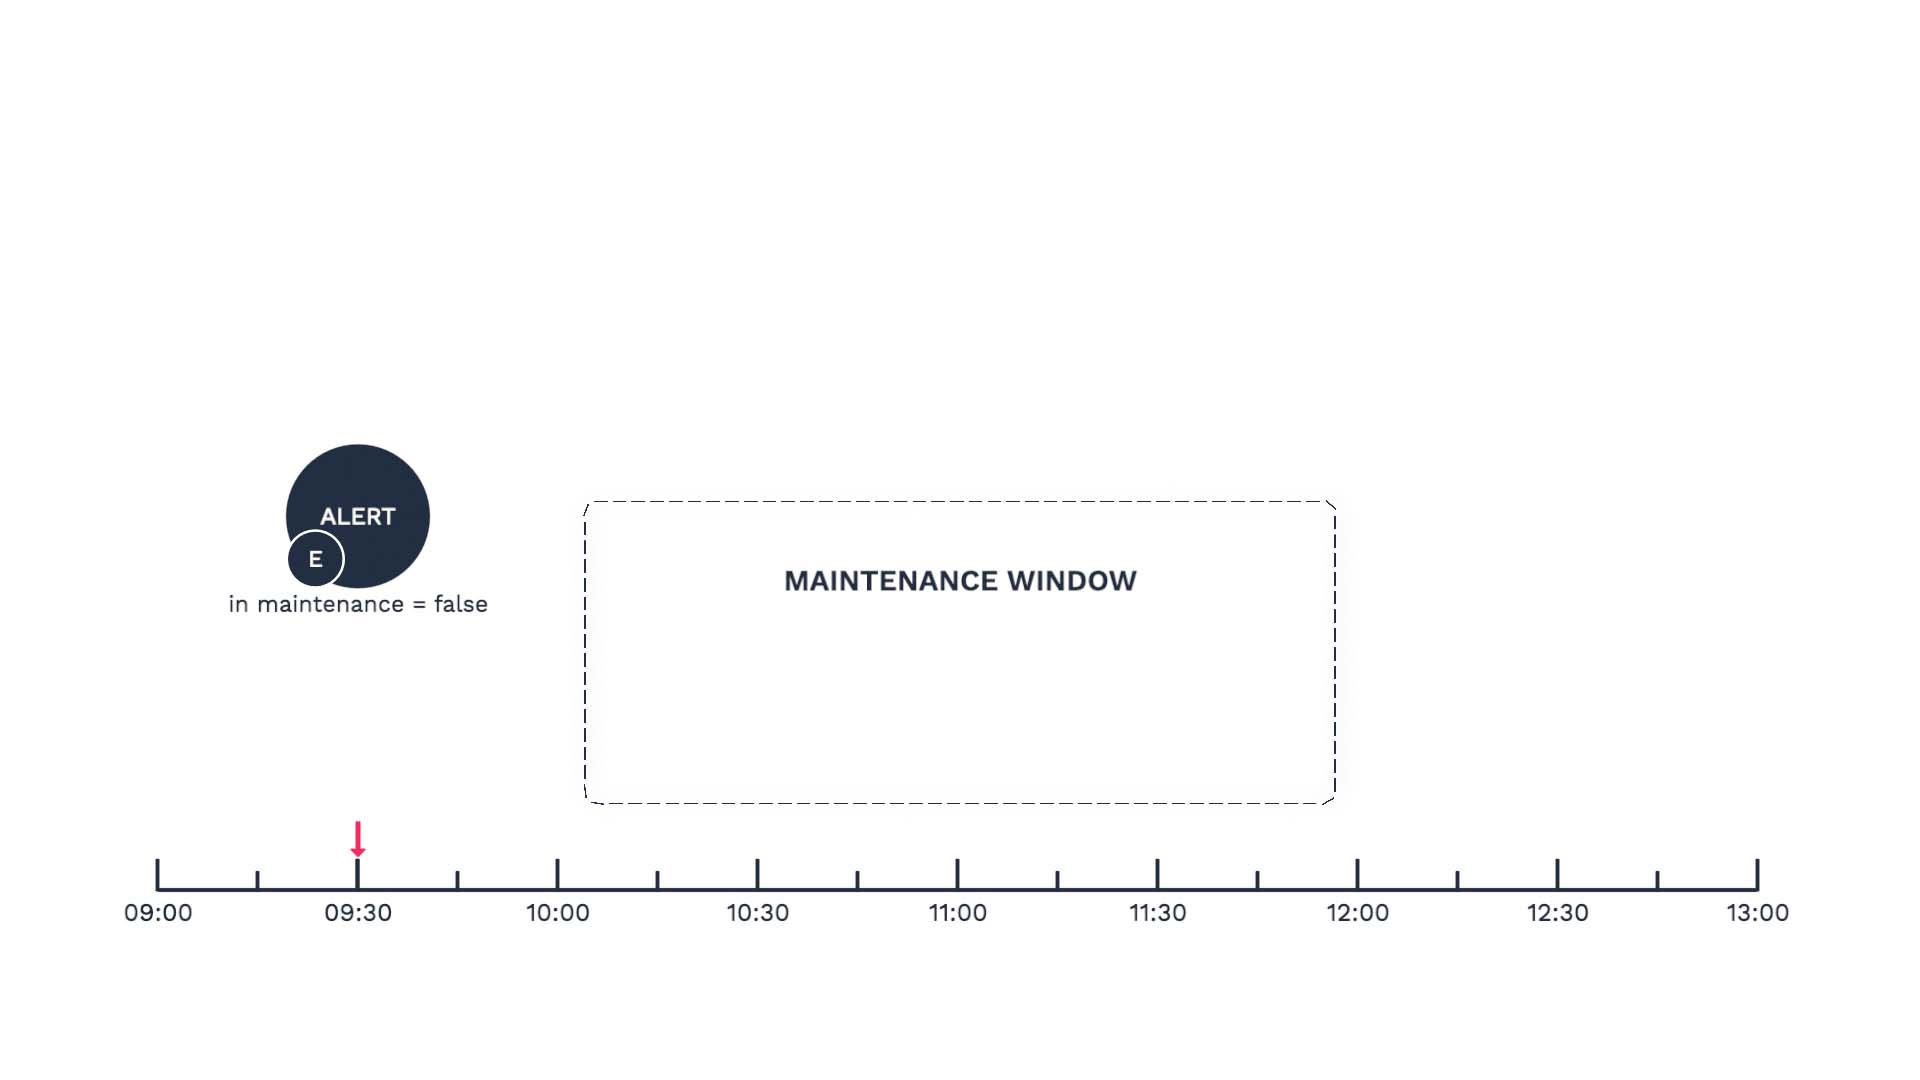
An event arrives, and it becomes an alert. At this point, the in maintenance field value is false.
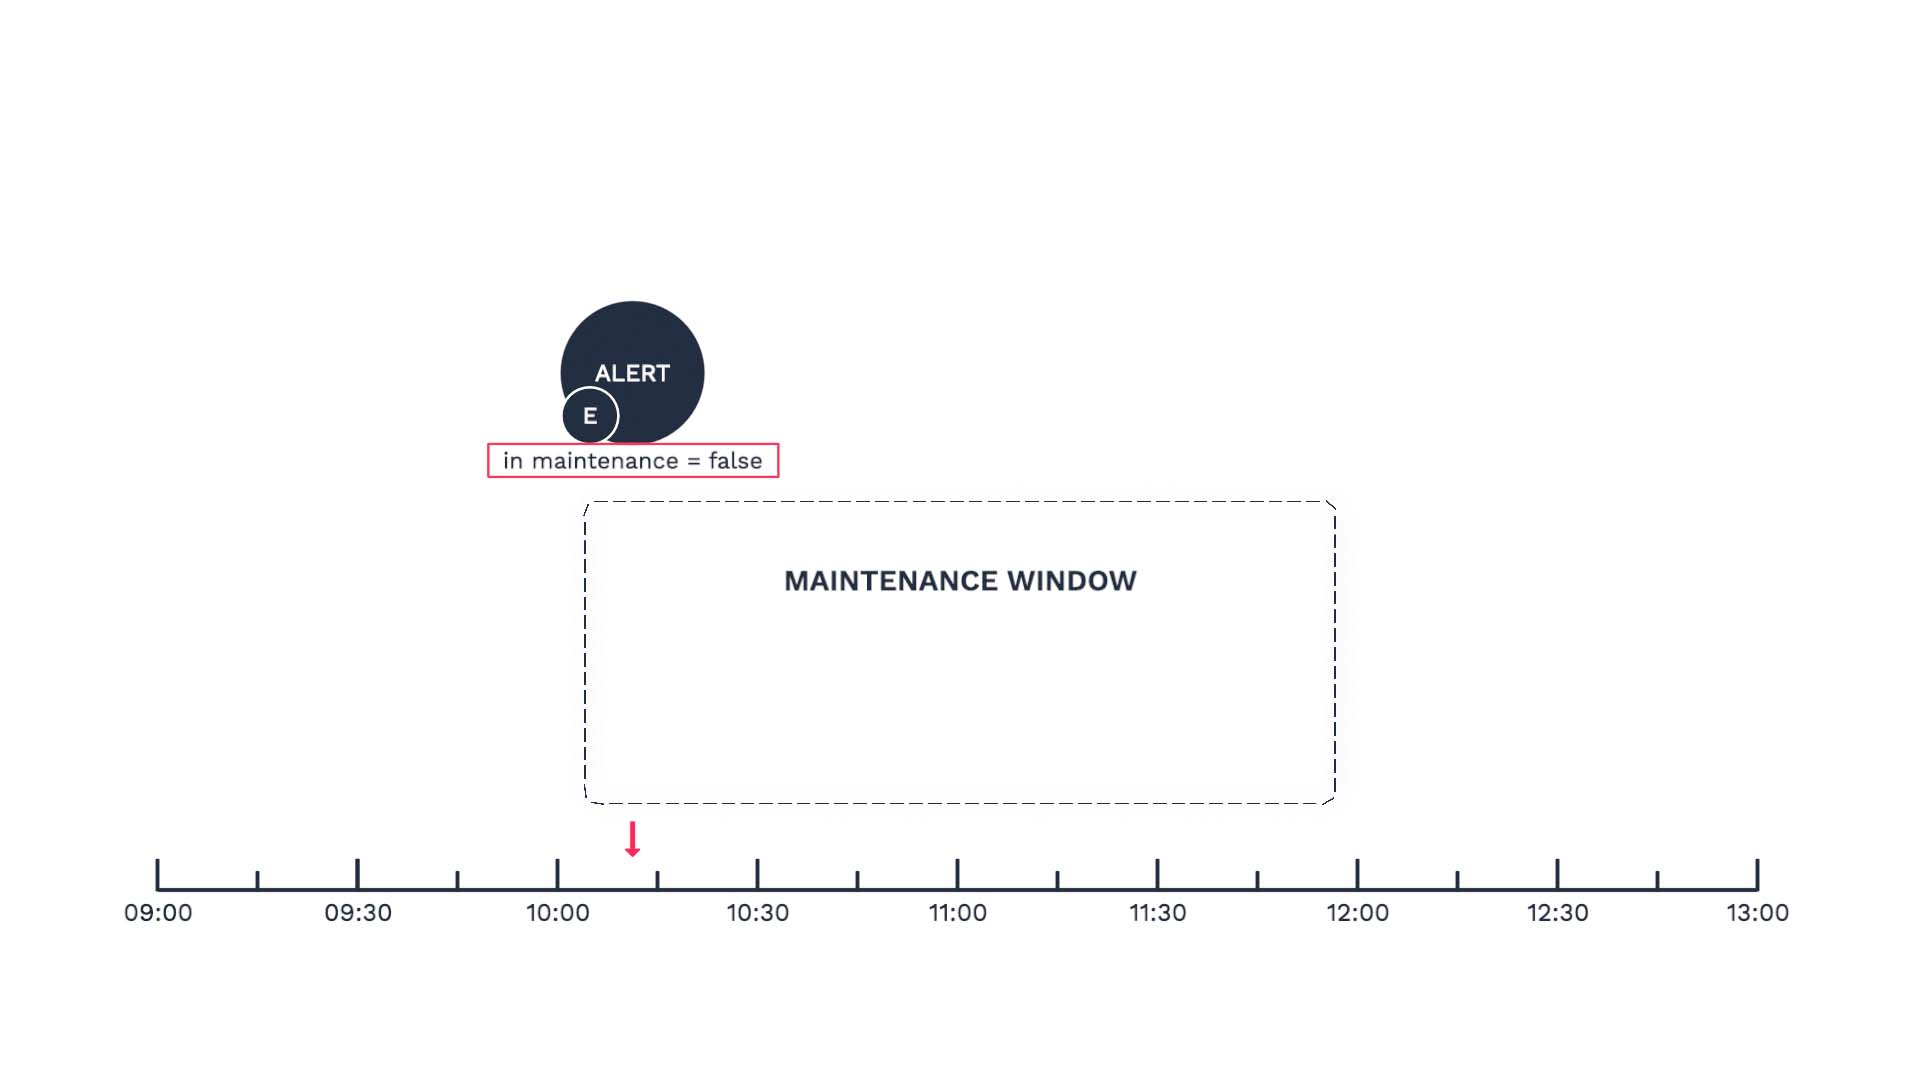
Then the alert enters the maintenance window time period, and at this point the “in maintenance” value is still false.
Now, a new event arrives and is added to the alert during the maintenance time window. This turns the in maintenance value to be true.
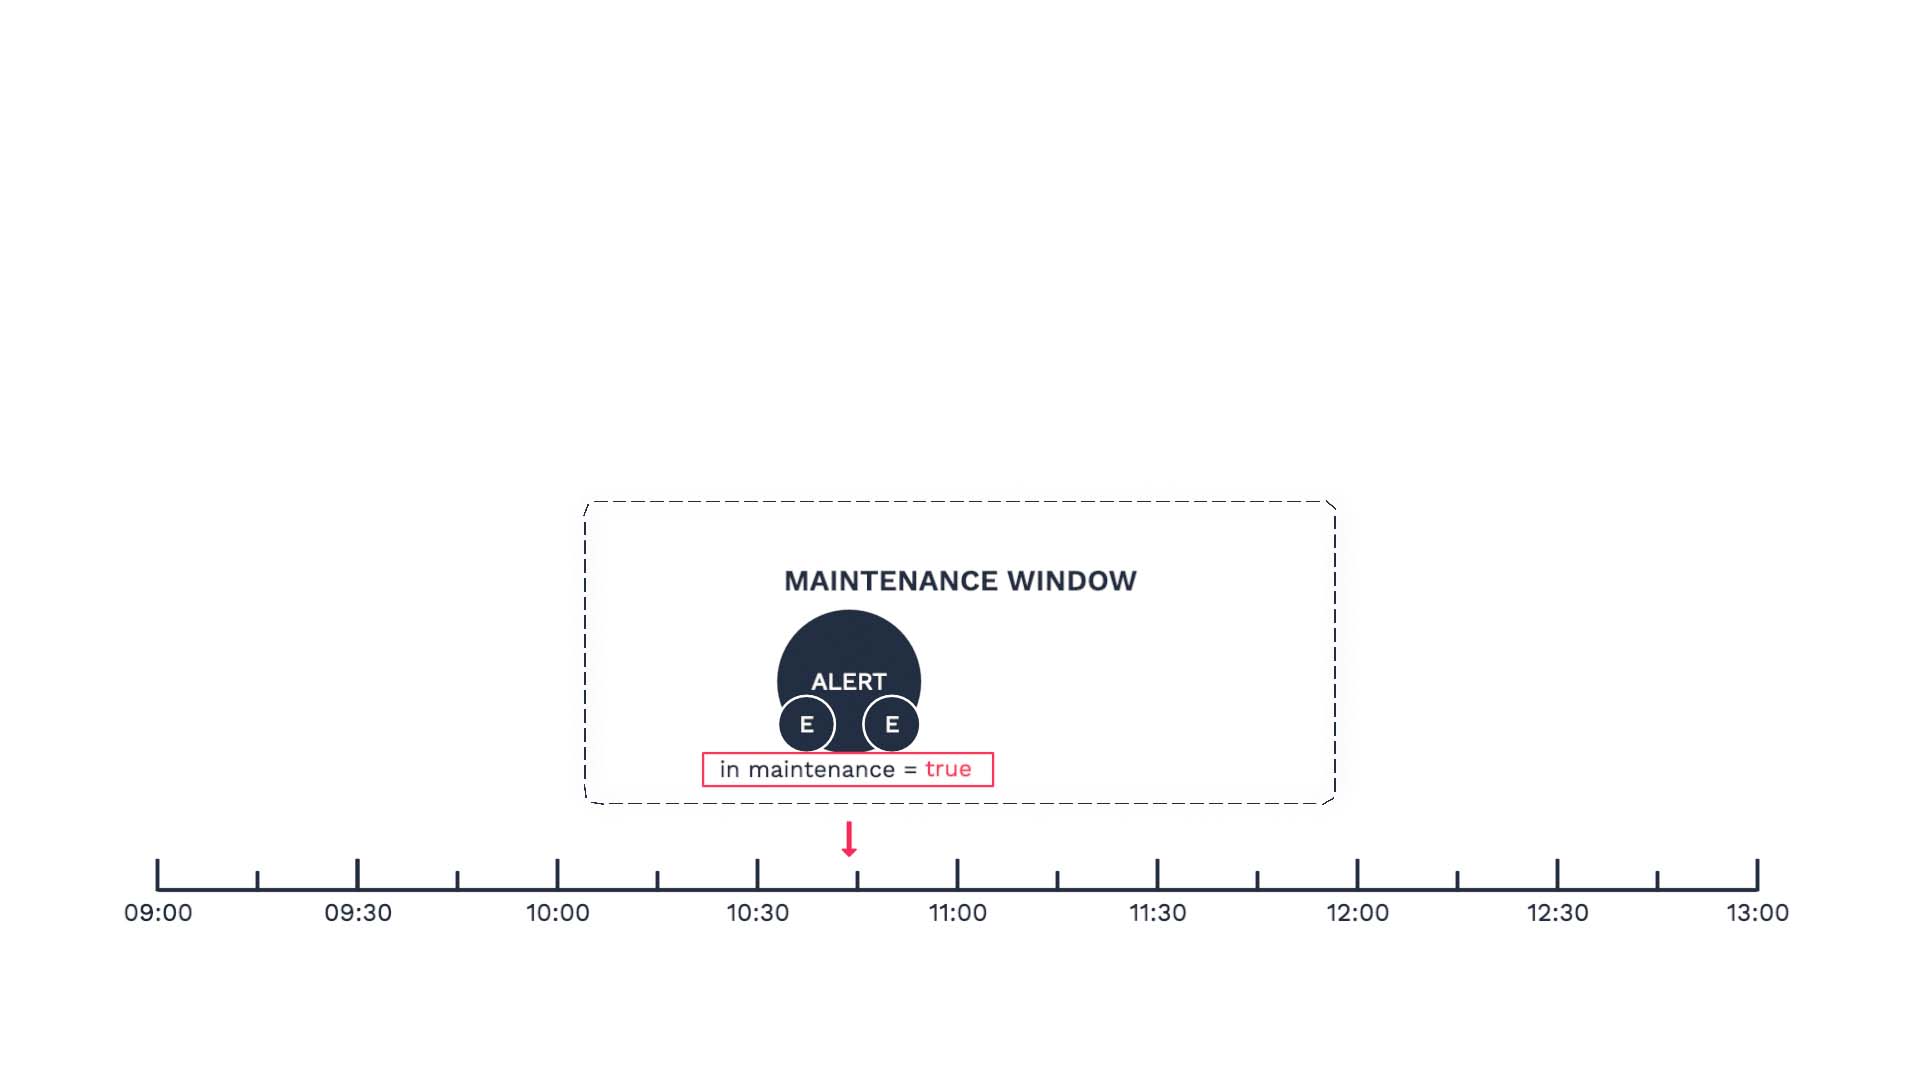
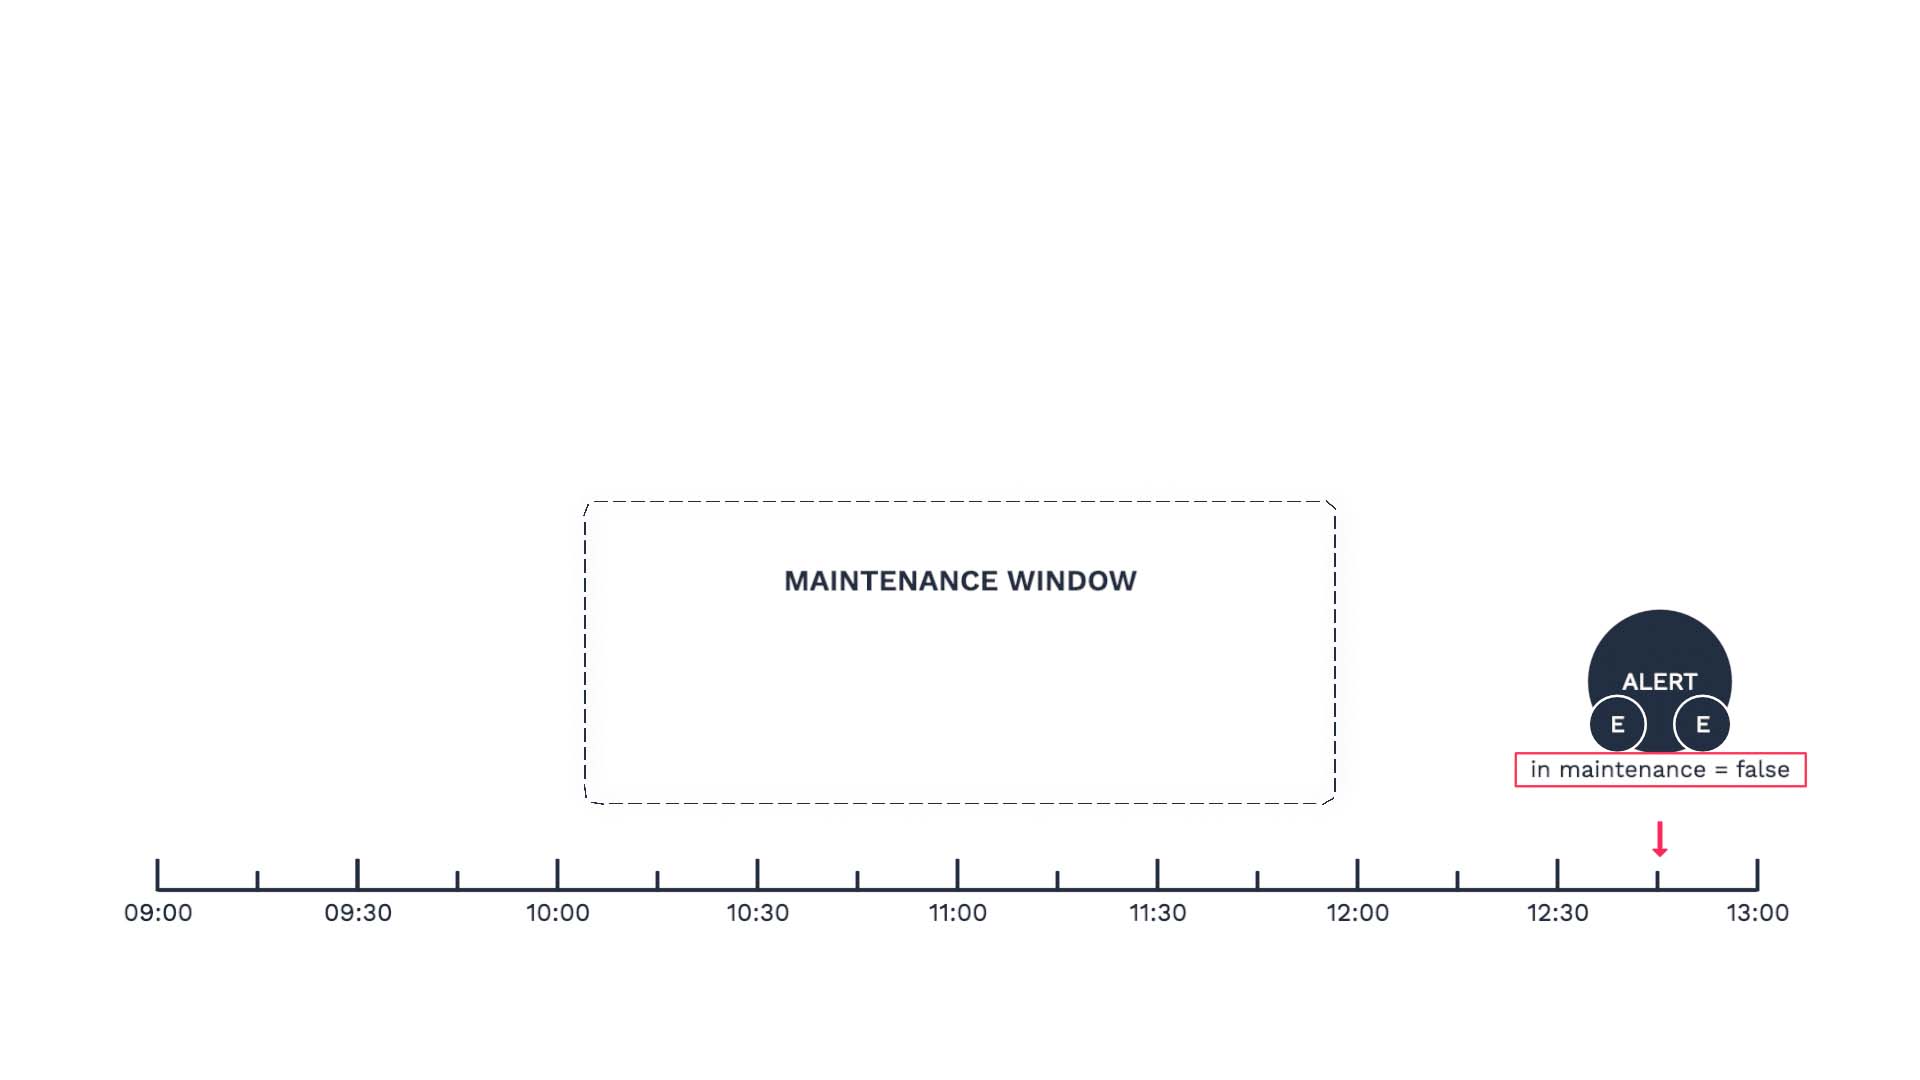
When the alert exits the window, understandably, the in maintenance value turns back to false.
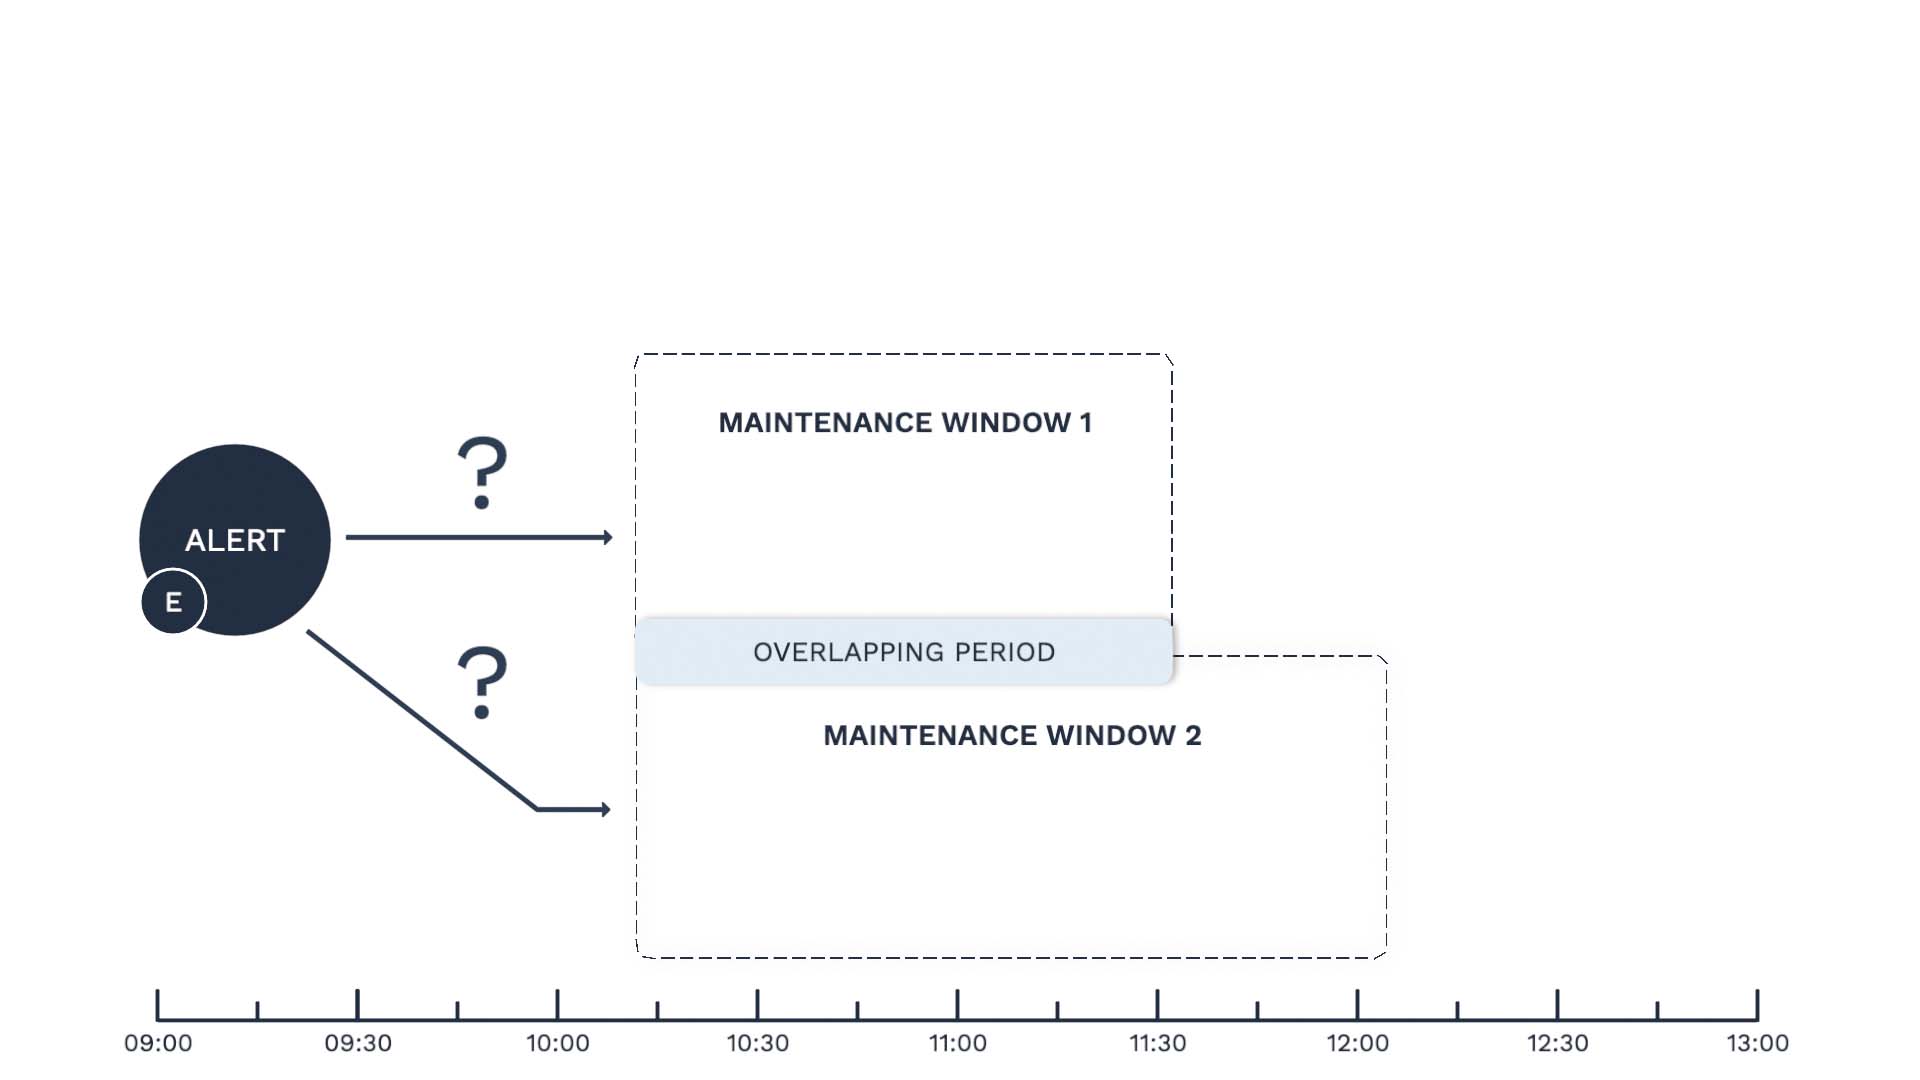
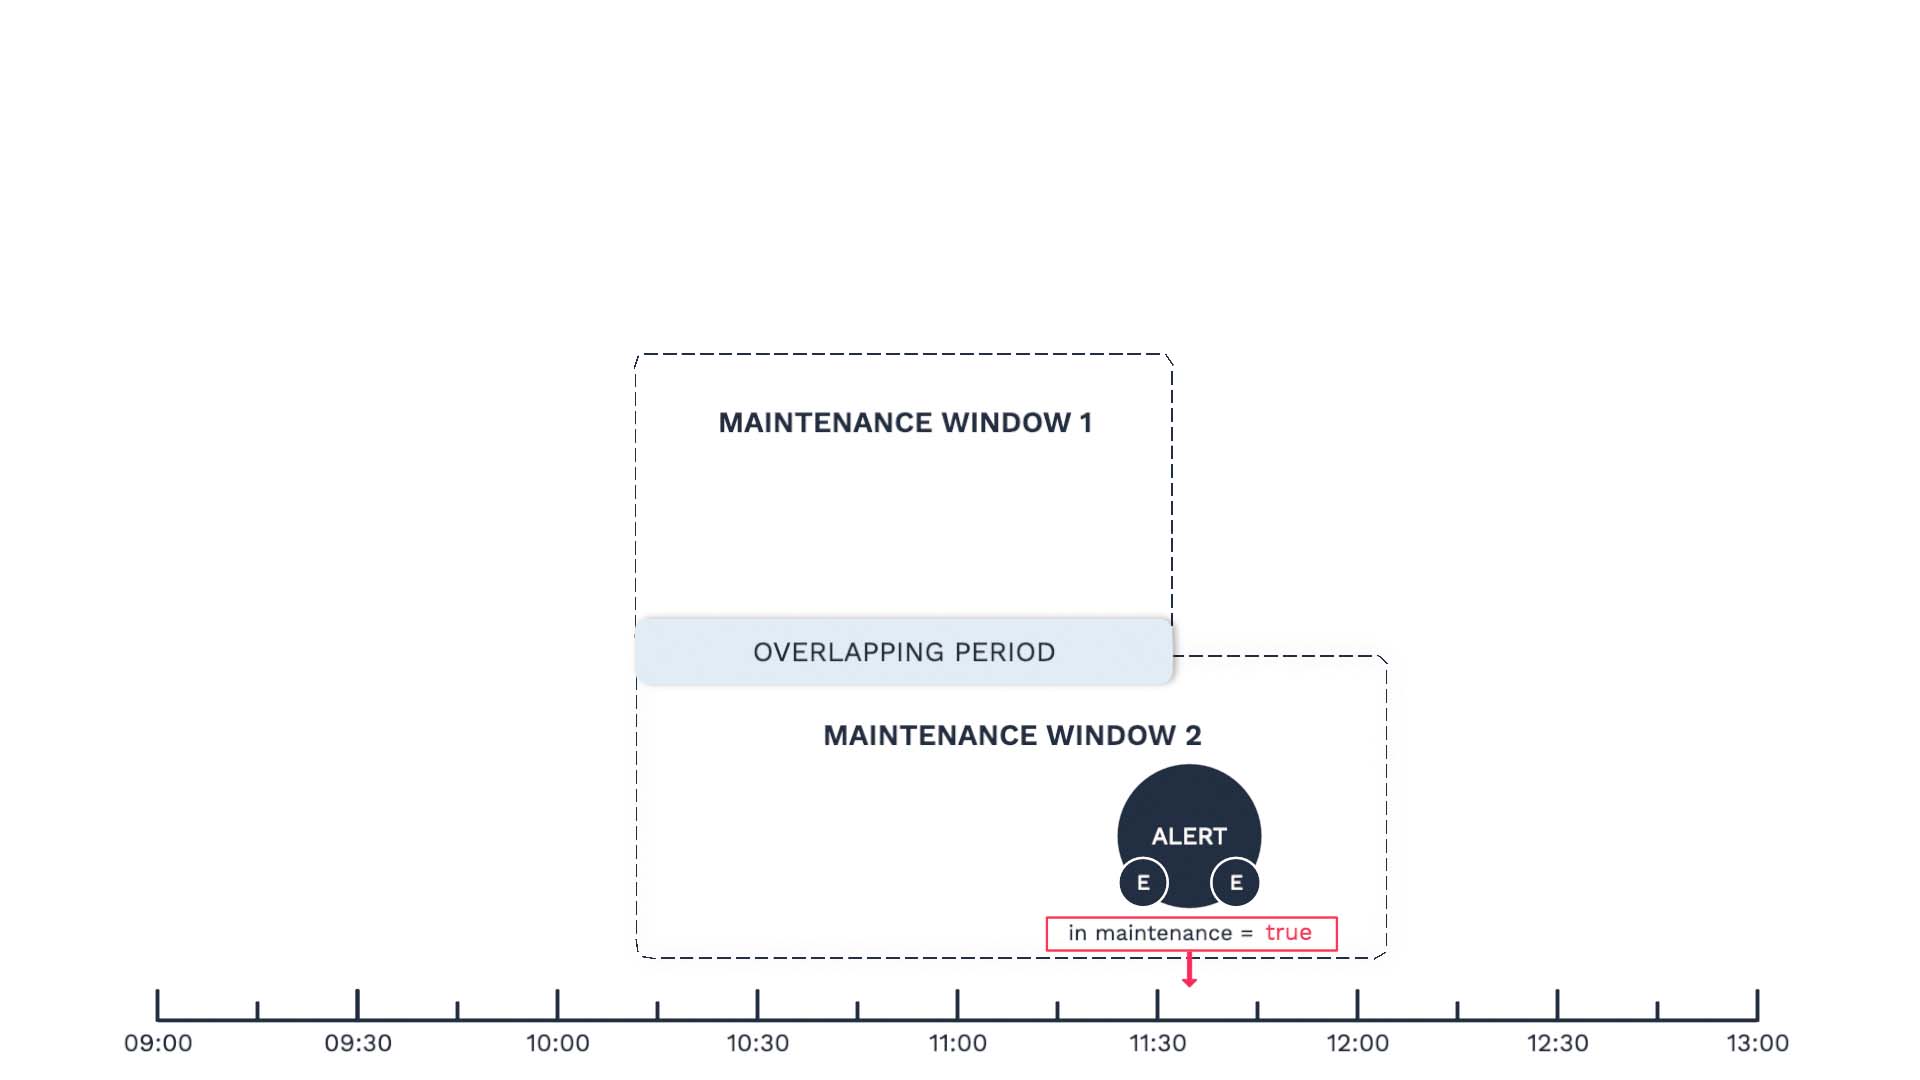
What if there’s an overlapping period? Let’s say there are two maintenance windows, and this alert matches the criteria of both.
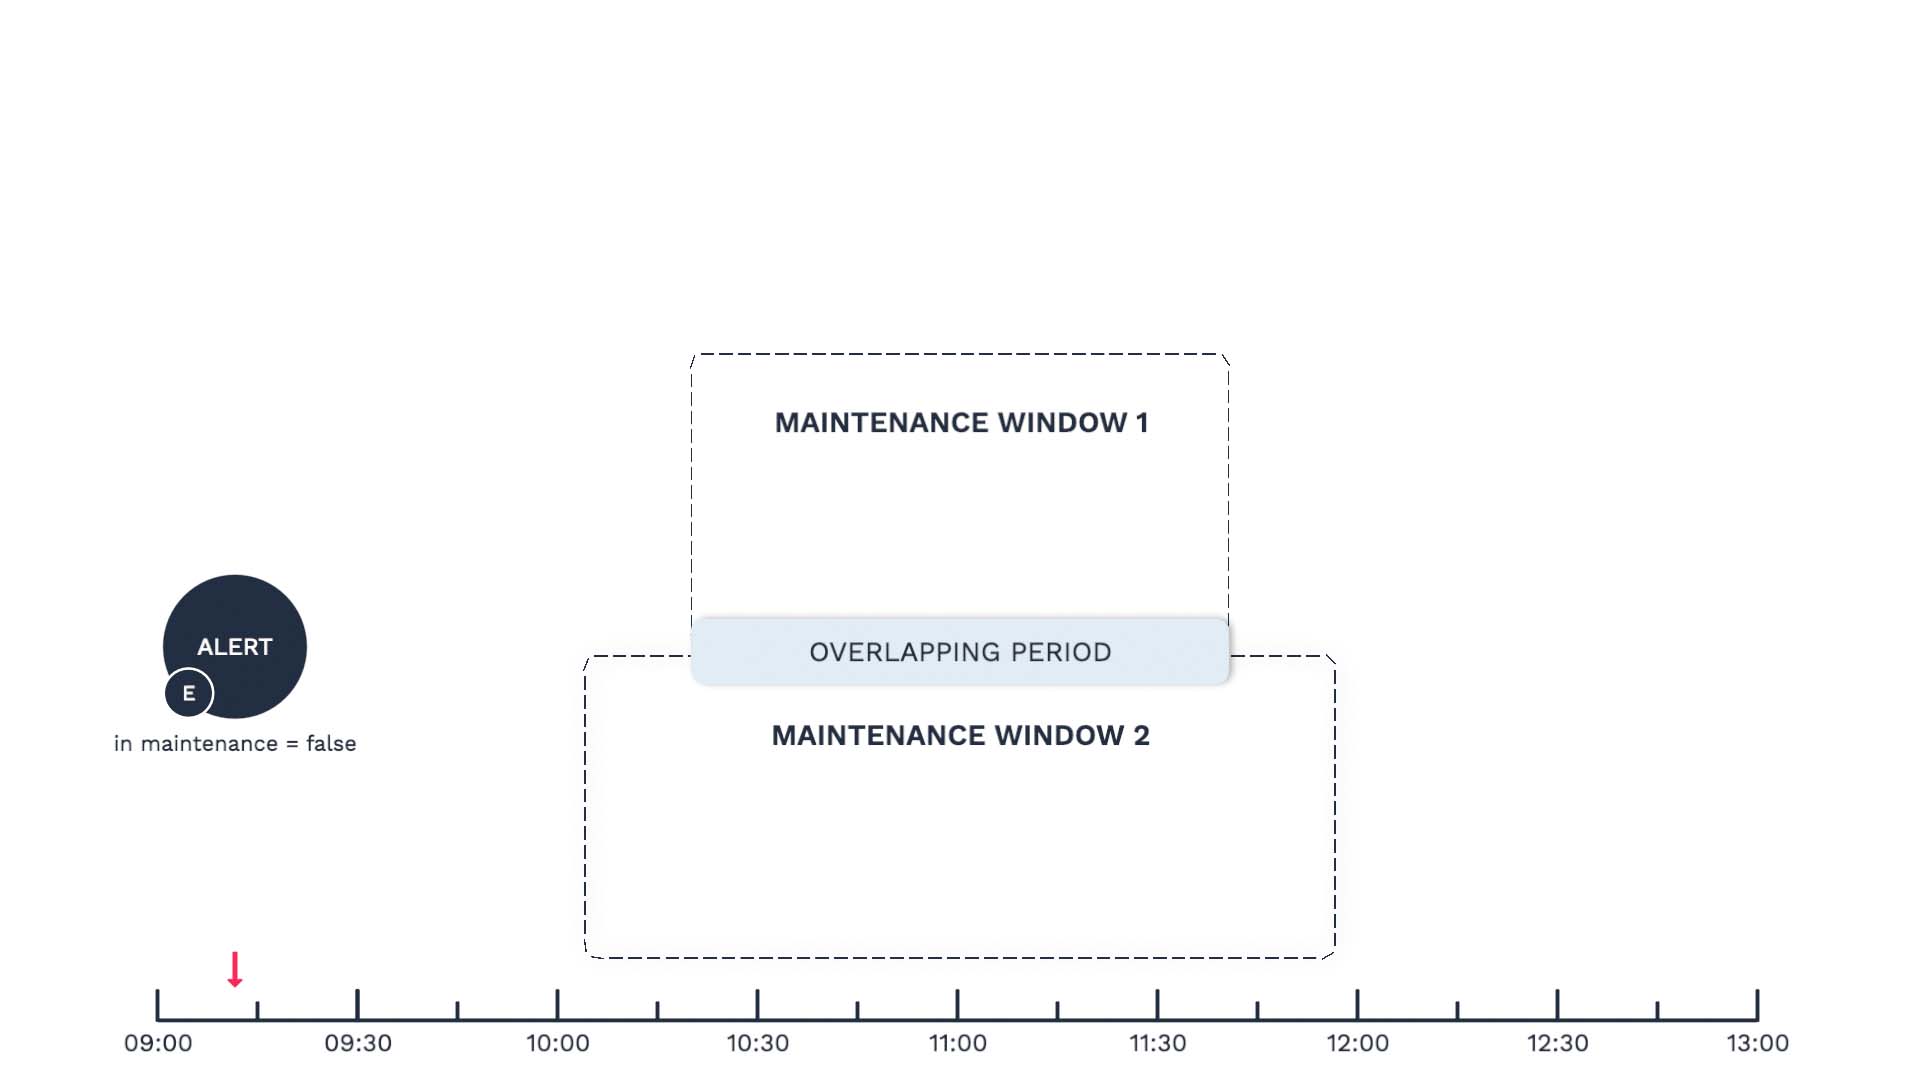
In this case, there’s no way to predict which window this alert would be part of. It could go into window 1 or window 2, but it will never be part of both windows.
Once it’s placed in one window, it works the same way as the first example.
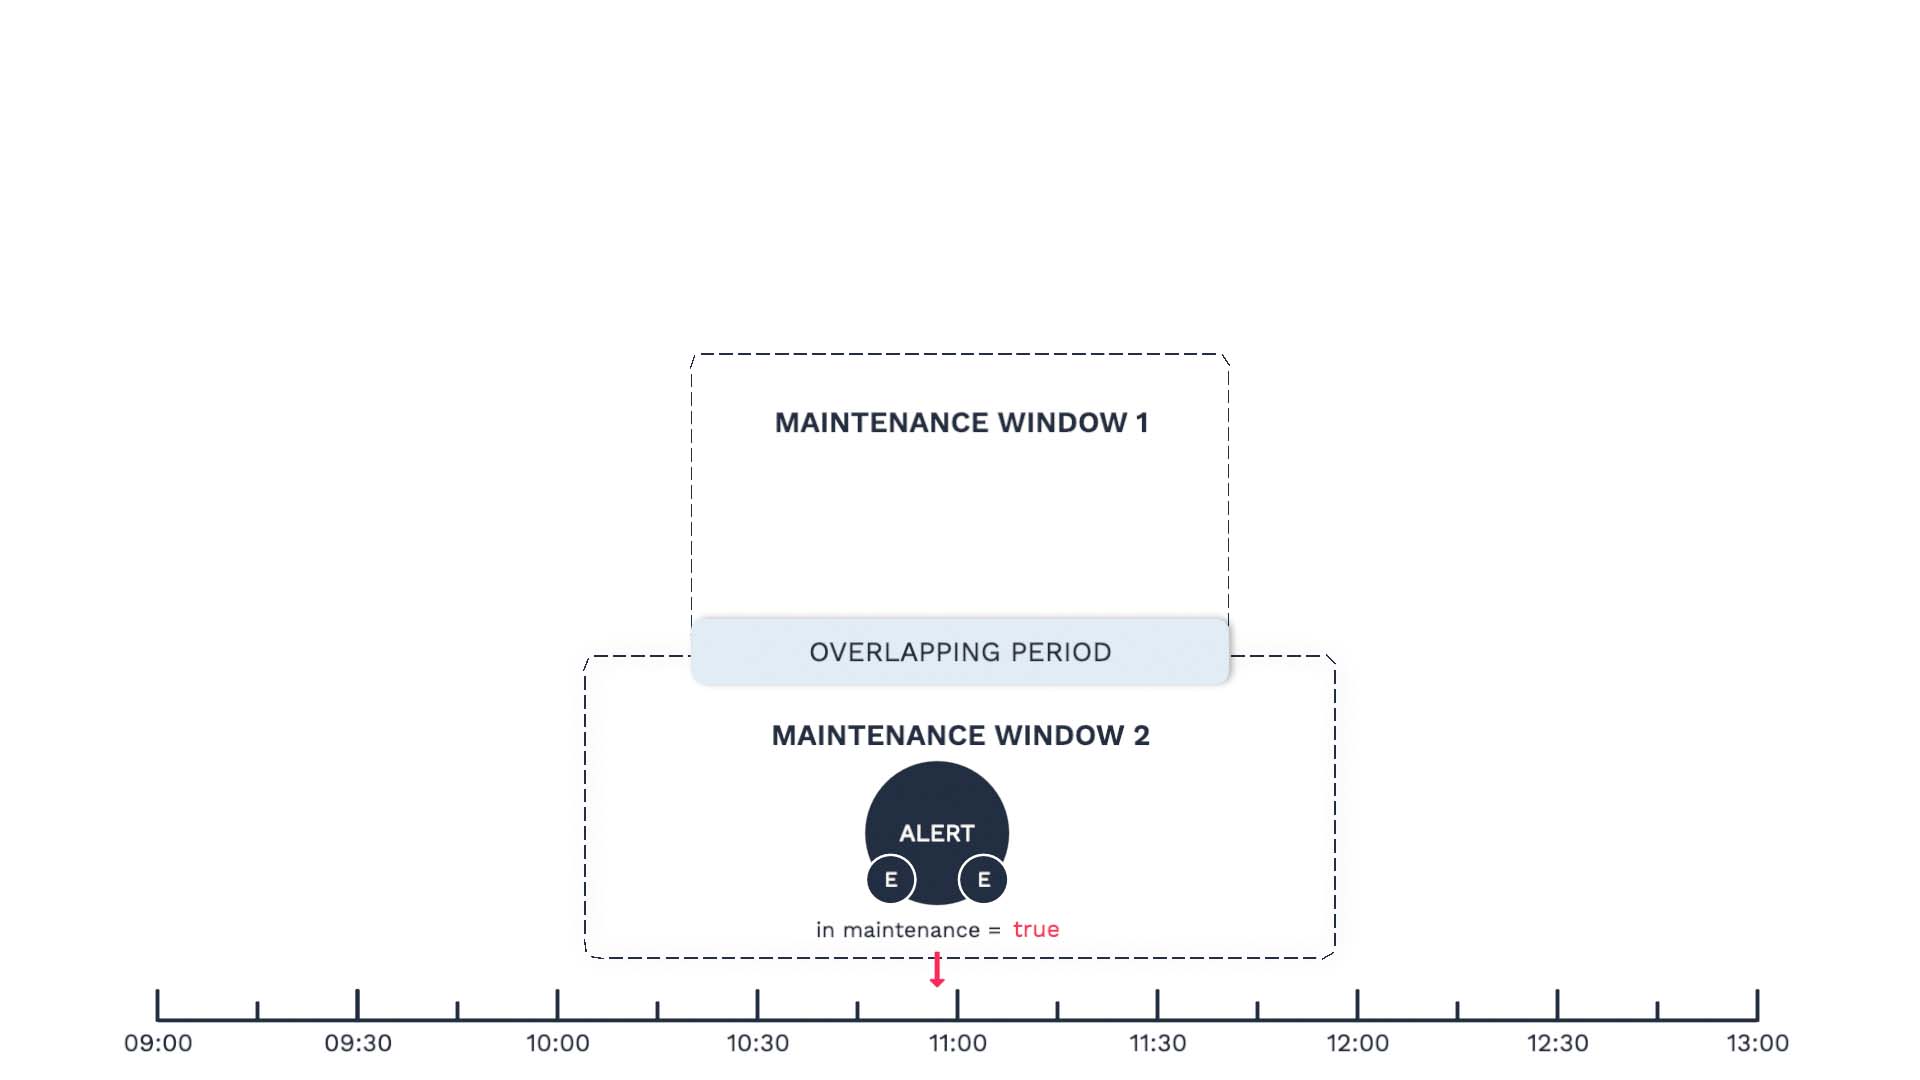
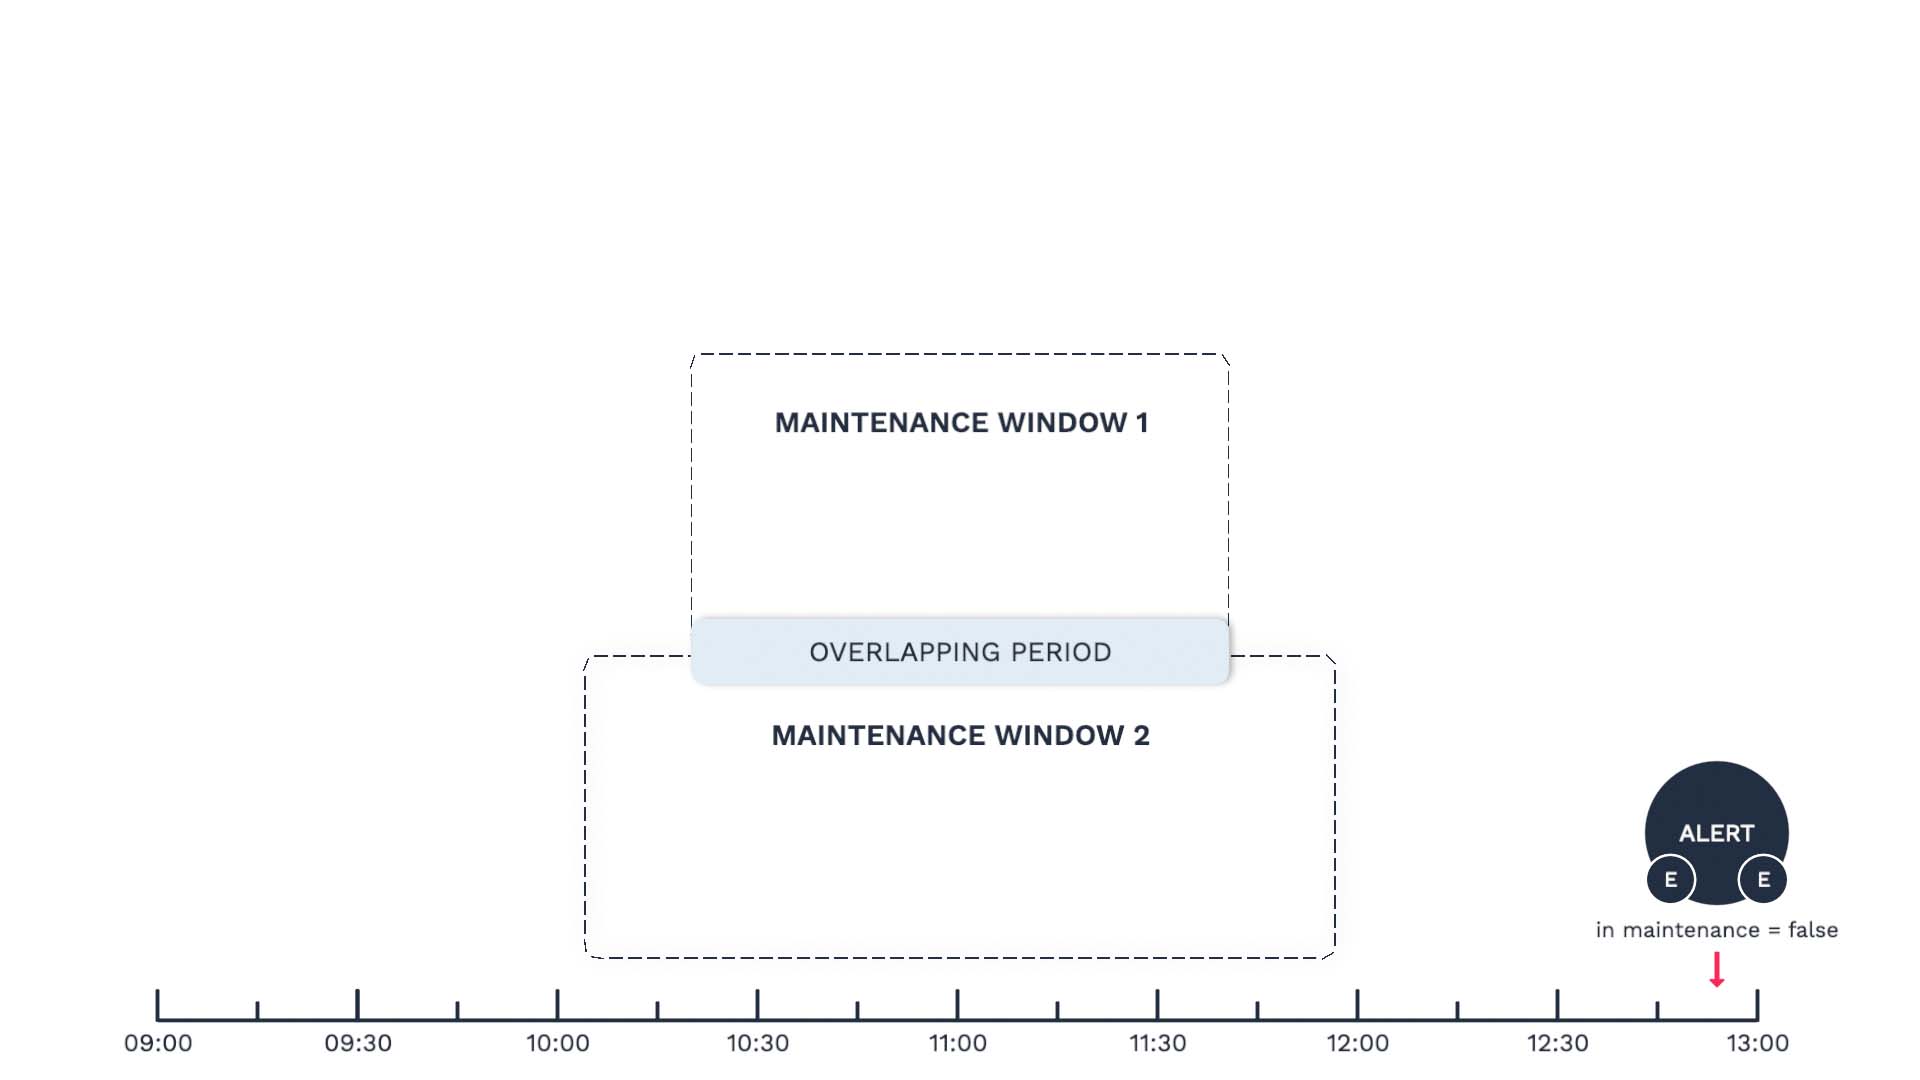
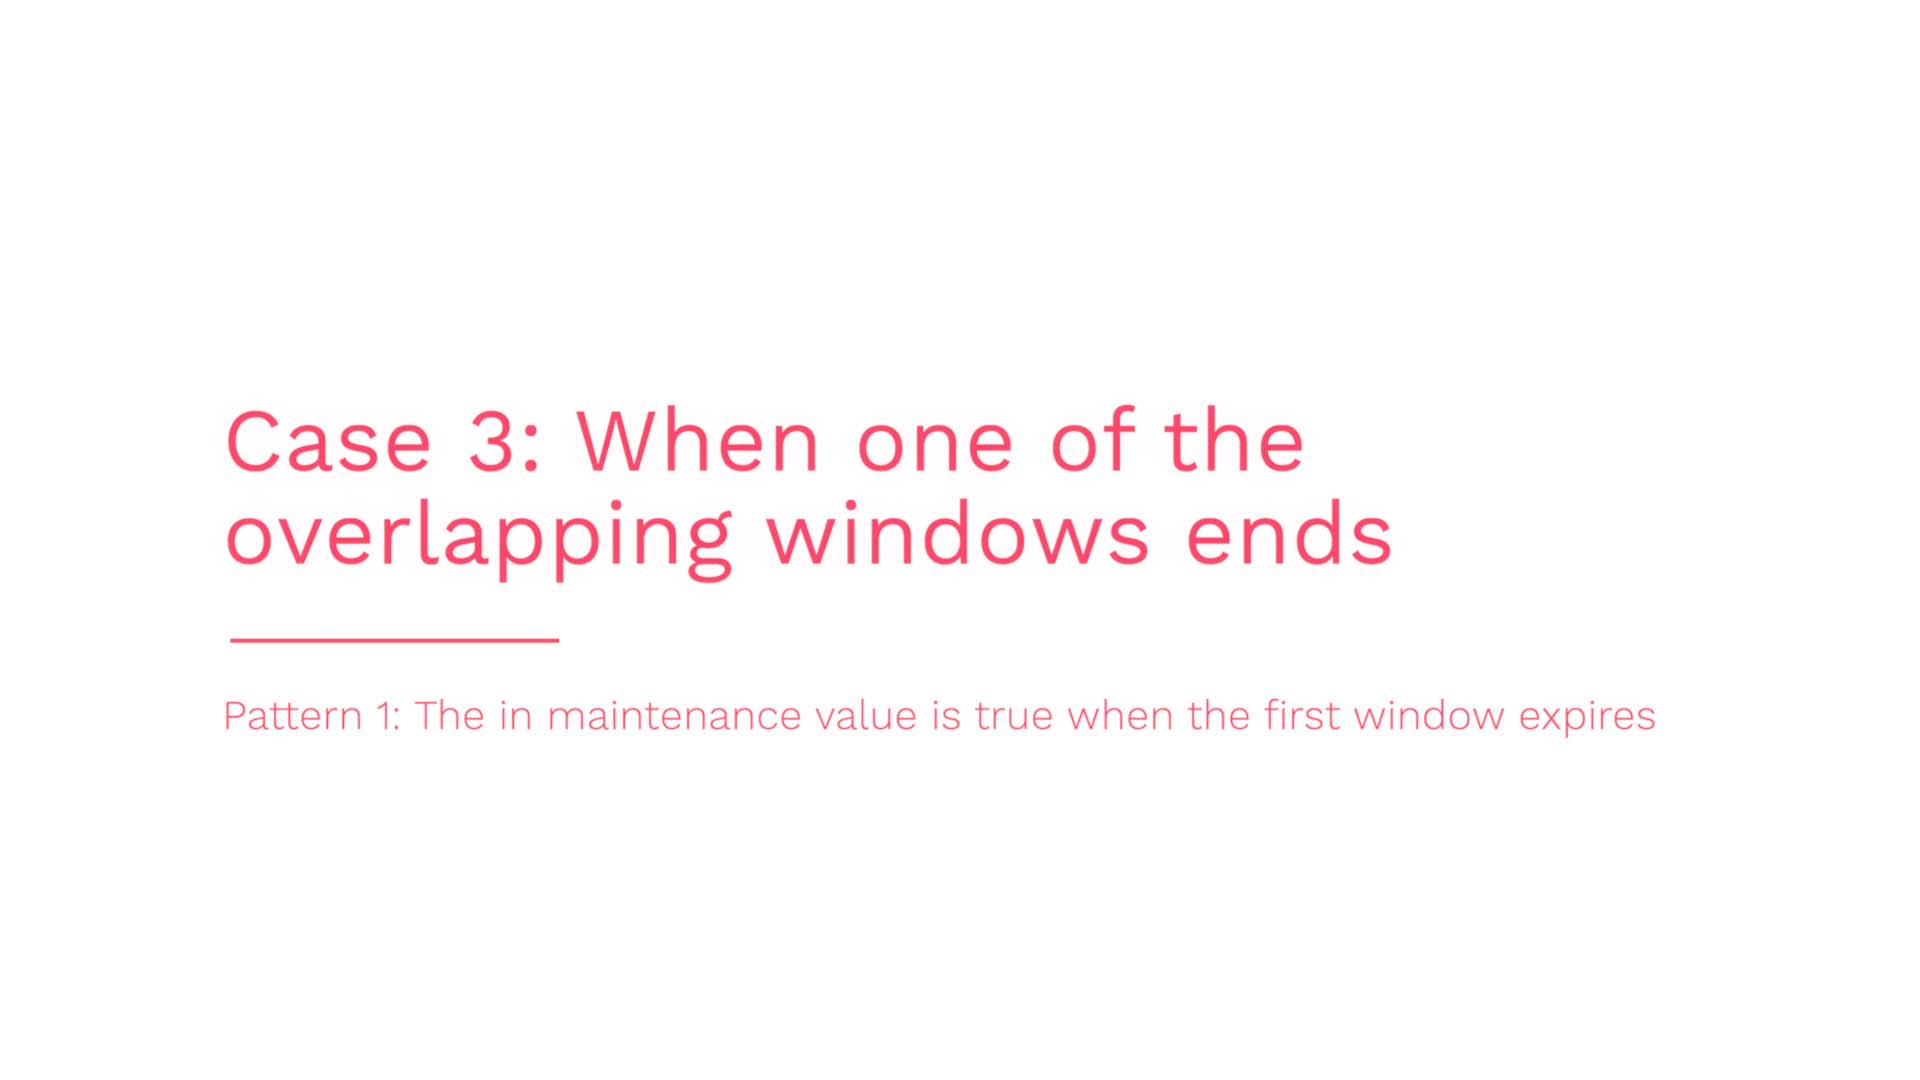
Let’s say you got an alert that qualifies for both windows, and Incident Management placed it in window 1.
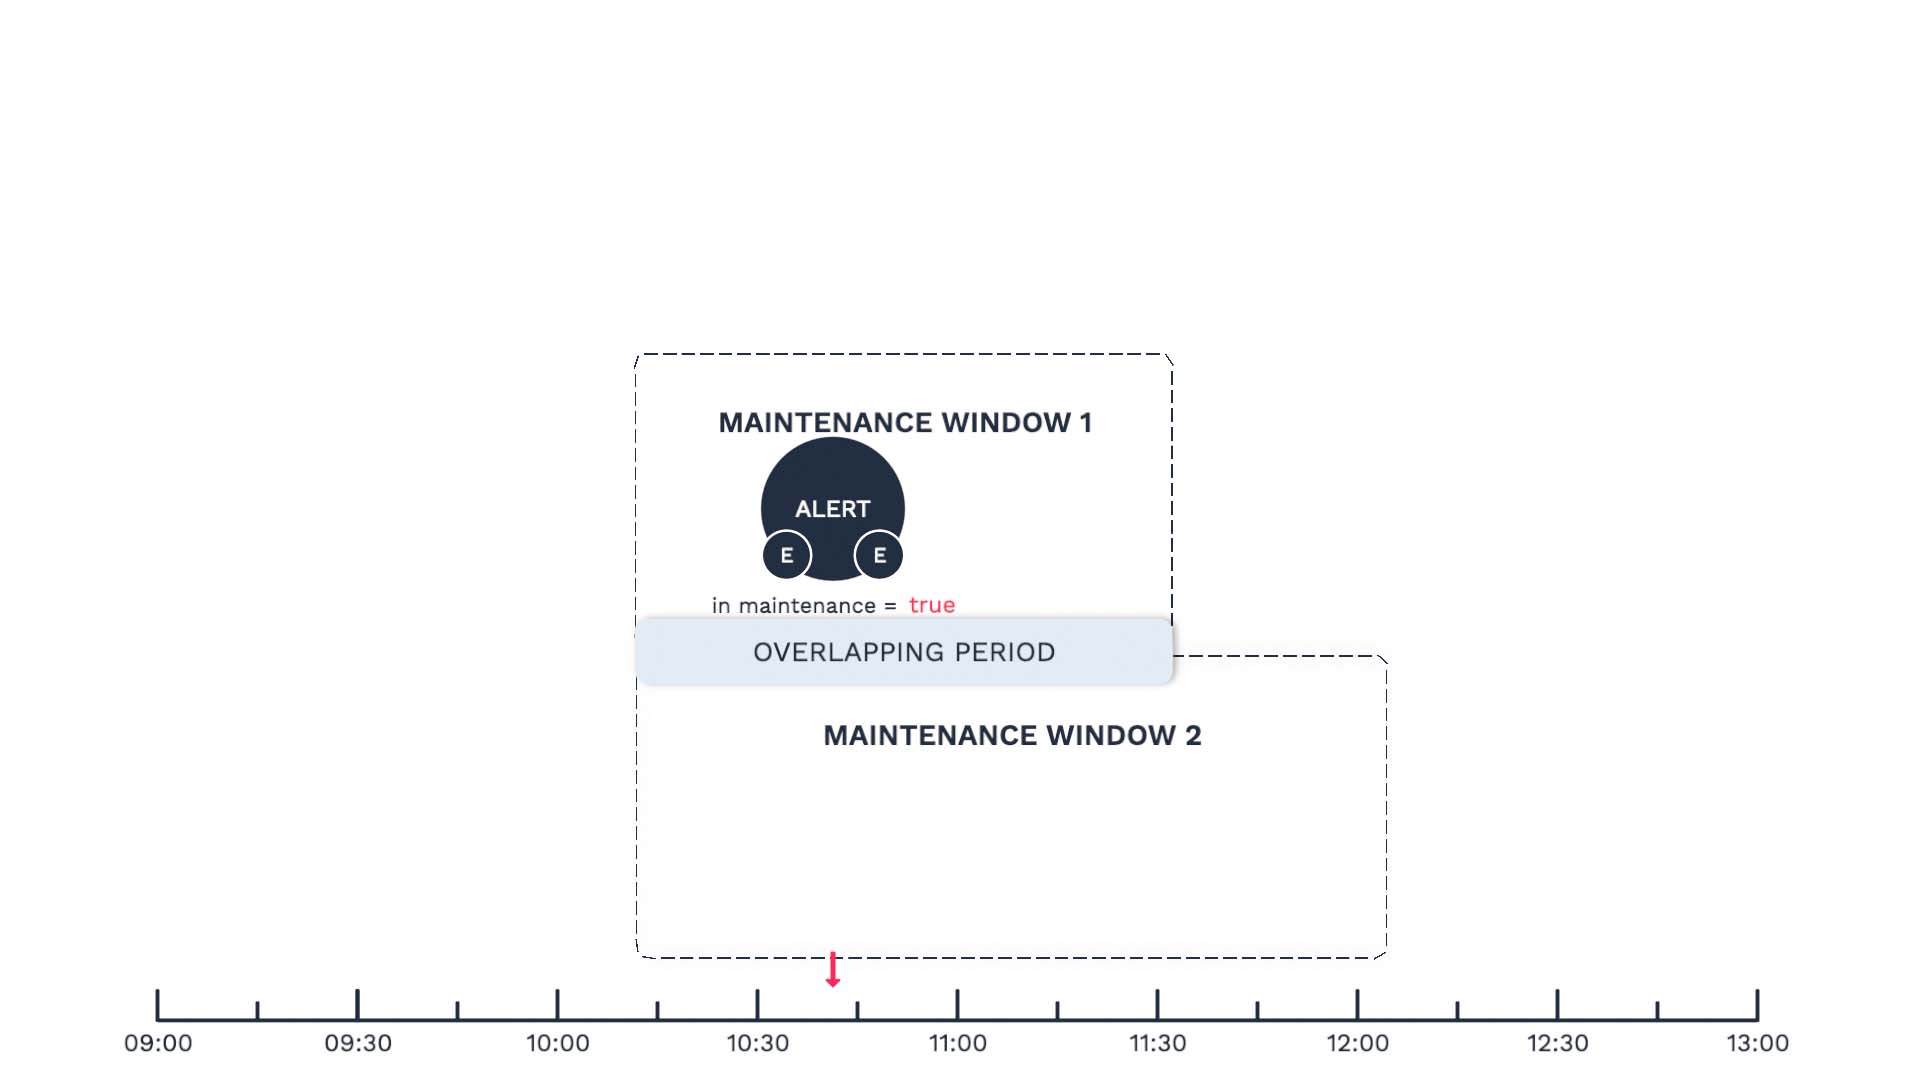
After the maintenance window expires, Incident Management puts this alert into the other maintenance window that’s still active. And unlike other cases, the in maintenance value stays true.
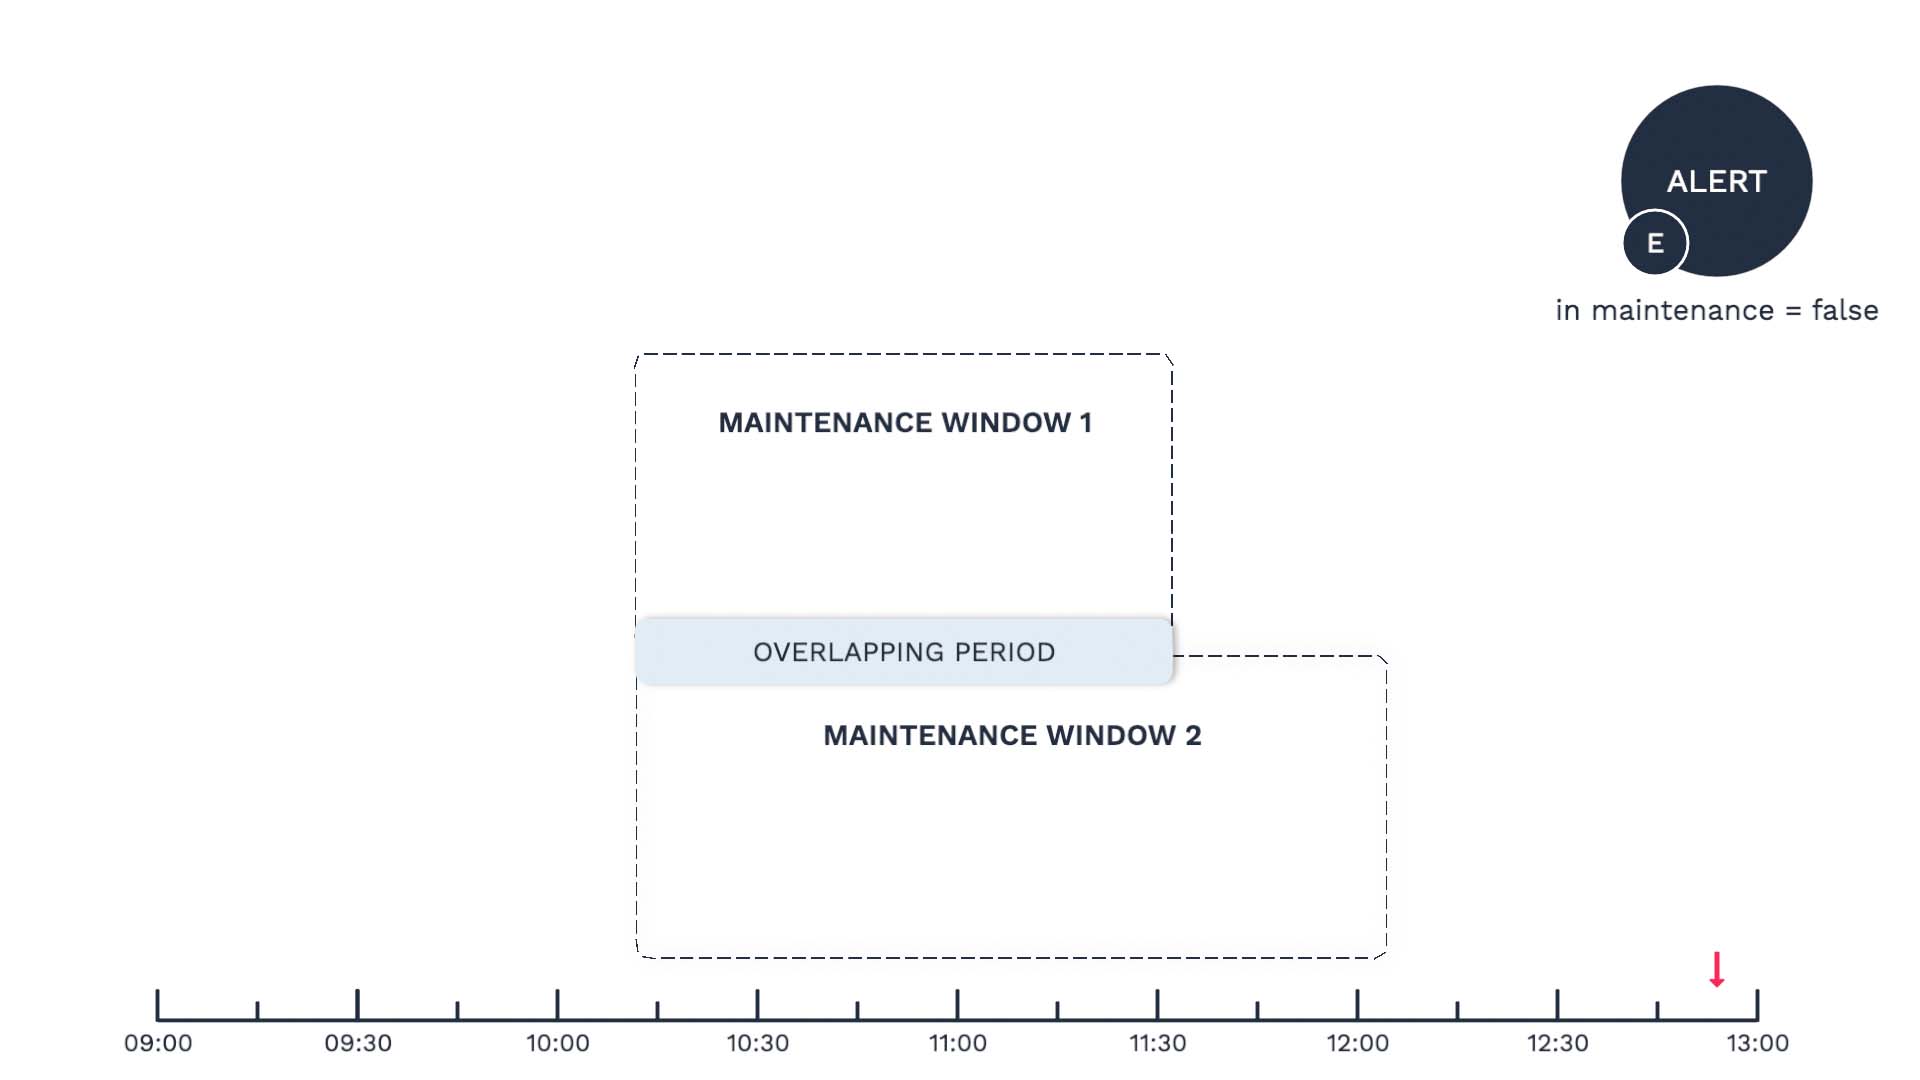
Finally, what if an alert is within the first window's time range, but no new event arrived during that window to flip the in maintenance field value to true?
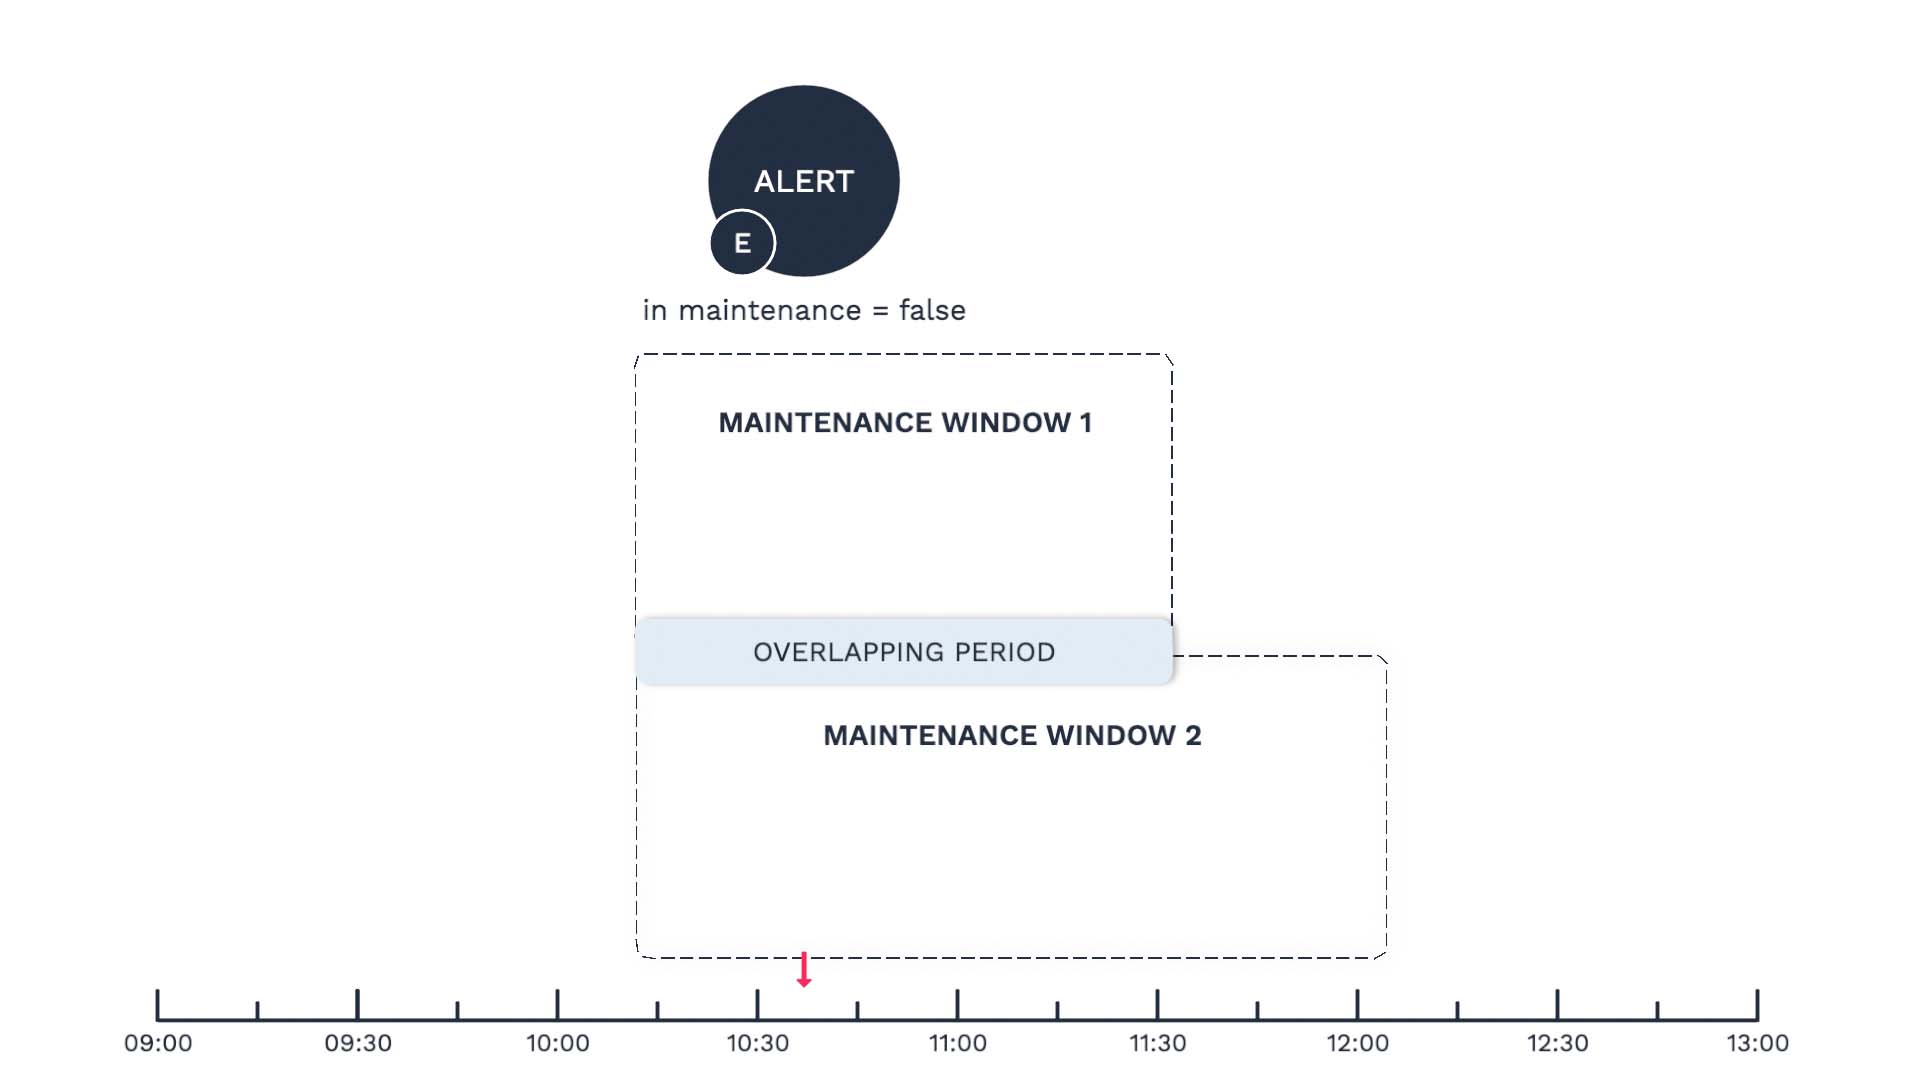
It stays outside through the time periods of the maintenance windows.
Now you know how the alerts behave with multiple maintenance windows. Thanks for watching!